HOME | DD
 IHMPCYPAWB — The Process

Published: 2008-01-18 23:10:46 +0000 UTC; Views: 1300; Favourites: 18; Downloads: 0
Redirect to original
Description
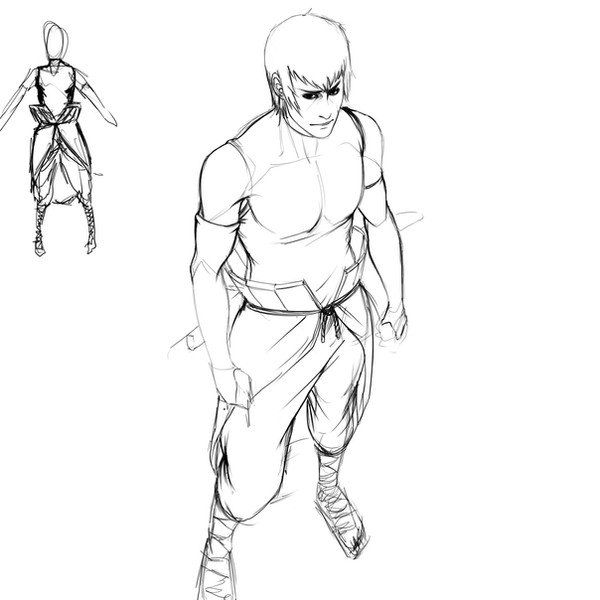
Ok, though I'm fairly positive no one cares, I figured I'd put up a pic of the steps I usually put into my lineart. It's improved a lot lately, and it's mainly due to the fact that I actually have a process now. The actual lineart for this is here . Anyway, here we go:1. The Rough: I generally know who I'm drawing before I start, though a lot of times it will be some random generic character. I try to envision what the person is like, what their profession is. In this case, a samurai swordsman. I generally take that idea and think of cool poses for that kind of person, and sketch out a rough of the body structure and anatomy, including major things like, for example, the sword in this pic. Clothes and any detail is generally ignored. For this step, I use a 100% hardness, size 10 brush (working at 300 DPI on an 8x10 in. image).
2. The Sketch:This step is optional, actually, and more often than not I don't include it. It's here because I had no idea wtf I was doing in terms of his legs and the cloth there, for the most part. This step gives a rough guideline for what the character looks like and what clothes they'll be wearing, and generally follows the original sketch in terms of positioning. For this step I use a size 7 100% hardness brush.
3. The Fix: Usually this is the step after step one. I obviously include clothes, usually fairly properly drawn, but the lines are generally semi-messy. I put some effort into keeping the lines clean enough so that I can tell exactly where the cleanest version's will belong. This includes heavy use of the eraser tool, and/or redrawing a few parts of the image. (For example, I fixed his face, and his left foot, heavily) The point of this step is that the final image, in terms of positioning, anatomy, and folds, will look exactly like it. Like step 2, I use a size 7 100% hardness brush.
4. The Clean For the final step, I trace all the lines YET AGAIN, with a size 5, 100% hardness brush. Though for the straight edges, I use the pen tool and a size 4, 100% hardness brush. (E.g. the sword, the sheathes) This is generally the most boring step. Only a few minor fixes in terms of lines are needed, so it's basically tracing the last image. The best part, though, is after this step you're done, and it generally looks awesome.
 (Smile)")
Related content


Comments: 4

"No one cares"? I do ^_^
I wanted to start drawing samurai, so thanks for this...
If you have anything else like this or know other tutorials I can also look at for more reference, please do let me know ^_^
👍: 0 ⏩: 0

Nice little tutorial! It should get you a ton of faves and comments over time (my reference sheet from back in 05 has 1,126 faves and 113 comments now; and I get 3-5 more faves every day for some reason 
~Justin
👍: 0 ⏩: 1

Assuming people read the description, lol.
👍: 0 ⏩: 1
It's probably best to type the steps right on the JPEG for those that don't pay attention  (Wink)")
~Justin
👍: 0 ⏩: 0