HOME | DD
 ladynlmda — Rachel - work in progress.

Published: 2012-09-16 15:25:46 +0000 UTC; Views: 3118; Favourites: 96; Downloads: 0
Redirect to original
Description
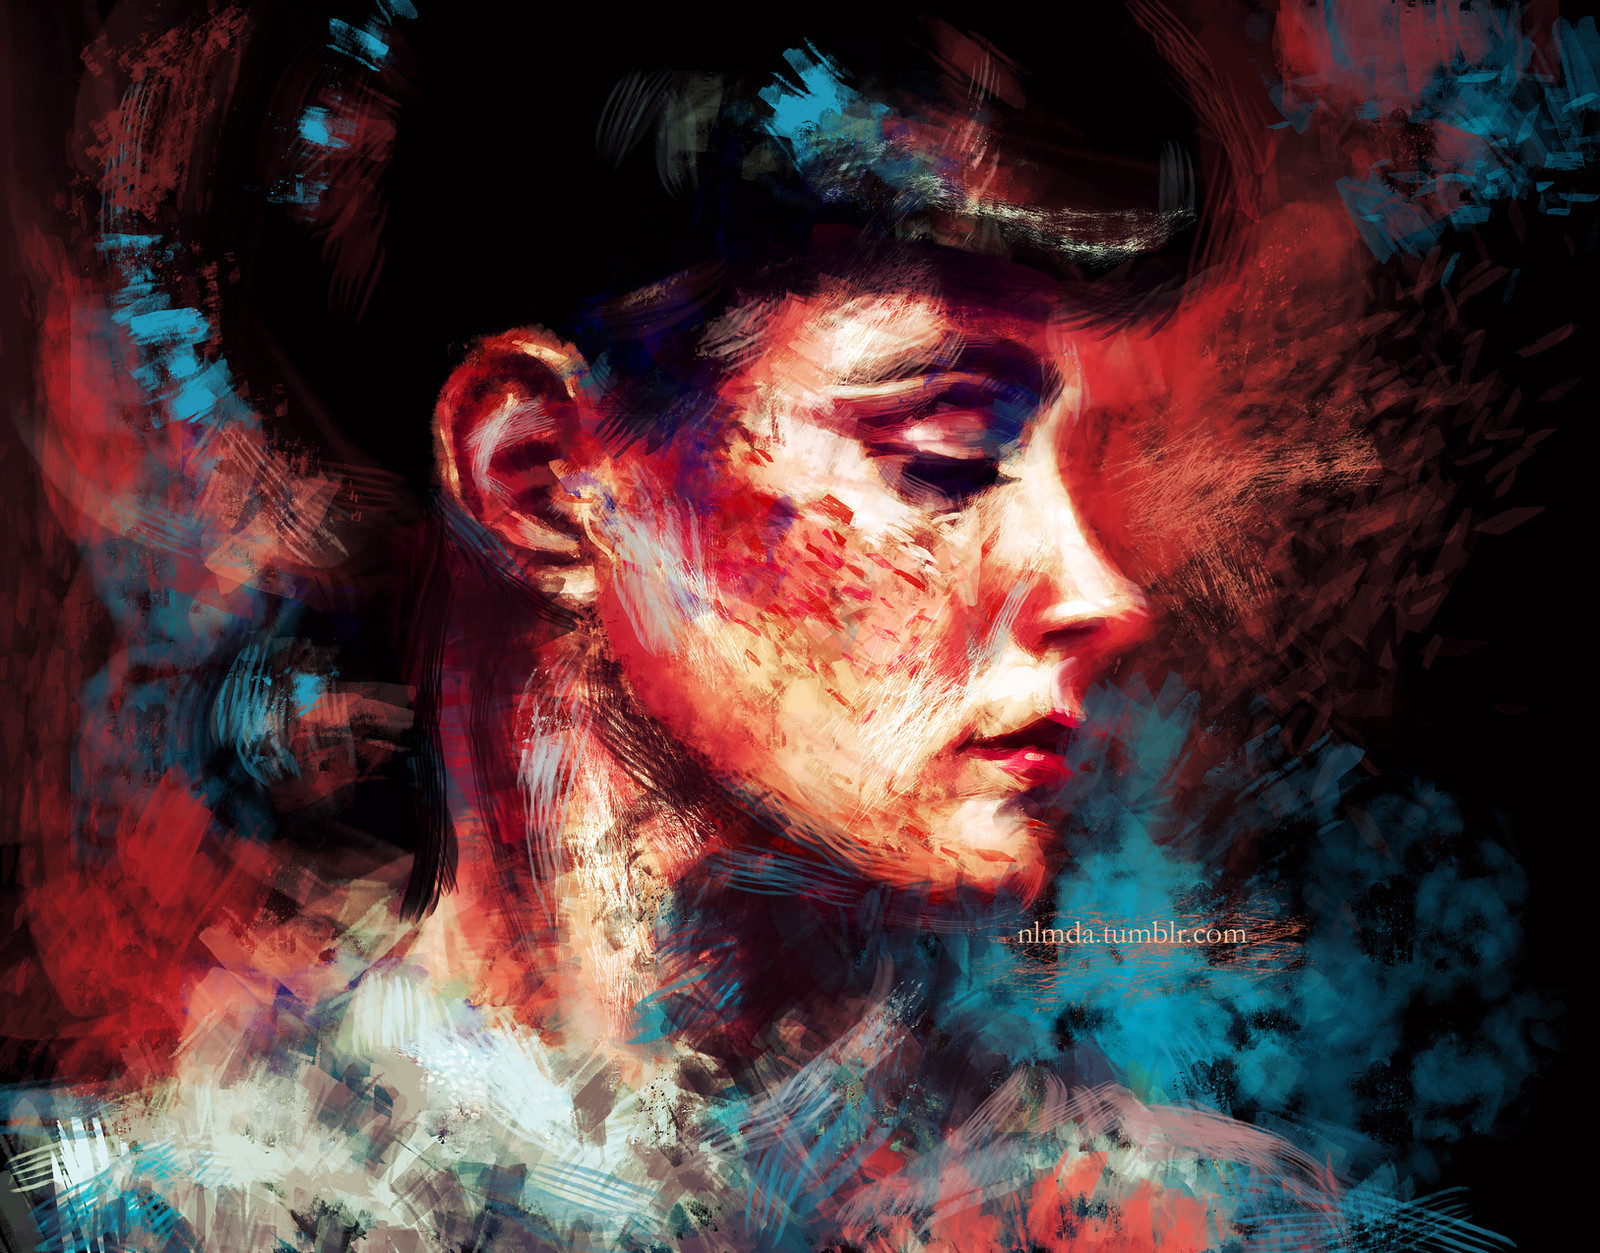
Yeah, I promised an animated GIF, but it turned out too big and wasn't working properly, so I chose to say "fuck it!" and present you a bunch of still images.So here it is, my painting process, once again. I don't want anybody to treat it as a tutorial or something, I'm just presenting you how I did this painting.
Yes, this is going to be a long post.
The painting in all it's glory can be found here .
I don’t always work the same way. To be honest, I should probably do this kind step by step thing for each of my paintings to present all of them. Sometimes I start from a linear sketch, sometimes from wide smudges of colour (like with this one). Sometimes I start right away with precisely planned background and foreground, sometimes not. It’s not a routine, I just quickly sketch to capture the idea at first and then try out what works best and see where it all goes. Now let’s focus on the images above (open them in new tab to make them slightly bigger).
1. As you can see, I started with the very dark background and put a colourful blur shaped (roughly) almost like a face. The colour is some sort of middle ground between the background and lightest tones of the skin colour I planned. I need this “dense” base, because later I want to use brushes that give sometimes very wide splatters and I don’t want the background to show through them.
2. Then I put some lighter tone and started giving my blur the shape of face.
3. Marking the deepest shadows - eyebrows, eyelashes, nose, lips, ear. The face still looks rather flat, but now after placing those elements I can already tell if I captured the resemblance of the person I’m portraying, at least a little bit. How to capture a resemblance, you may ask? Well, in a nutshell: stare, analyze, stare, analyze, draw, do some more staring and more analyzing. And draw lots and lots of heads and faces (have you seen my gallery? so now you understand).
4. Now it’s time to do some shading to make the face look more 3 dimensional. Light above the eyebrow to form the shape of the forehead, light below the eye to form the cheeks. And so on.
5. Here I did some more shading and now painted the lips (it’s rather rare to do them properly at the first time, but they seemed quite fine, so I just coloured them and didn’t bother to fix them until the very last stage of the painting).
6. Putting more blush on the cheeks and on the nose to make her look more life like (skin is usually more red on the nose, cheeks, ears and around the lips of course) and slightly fixing her chin.
7. Now some light on her hair and trying out some background colours. I knew that I wanted some blue background, but what kind of blue? Not this one apparently.
8. Not this one either. But at least I worked more on the hair, played around with her make up a bit and marked some hypothetic clothes.
9. Perfect shade of blue found!
10. And then I thought that it would be nice to use some warmer colour for the contrast, to put more depth into the image. Slightly blending the face into the warm colour of background seemed also like a good idea. I used to do this a lot and haven’t tried out how it would look like if I mixed it with my current fascination with splatters.
11. Still working on background and finally doing some more work on the hair.
12. Pumping up the saturation a bit, because I though everything looked too pale. Also I fixed her jaw line a bit, worked more on the hair, and added more brush strokes here and there.
And voilà, painting done.
Related content


Comments: 7

👍: 0 ⏩: 0


What brush settings do you use? I tried the technique but I don't think I used the right brush, everything just looks fuzzy
👍: 0 ⏩: 1

I used like 5-6 different brushes here, so it's not really about the brush, but how you use amd control it.
👍: 0 ⏩: 0


 (Smile)")

Great job! I still don't understand how you, and others, make it look so rough and yet be so controlled! I'm just not a sketchy person and get hung up on details too much
")
👍: 0 ⏩: 0