HOME | DD
 Logan-Pearce — Tutorial 1. Step 6: Tapering

Published: 2011-10-05 07:30:04 +0000 UTC; Views: 4733; Favourites: 20; Downloads: 30
Redirect to original
Description
Previous Step:[link]Step 6: Tapering the tang.
One of the most fun parts of this. Really?
No.
Just like the step before this, skeletoning the handle, it depends on the knife and what you are aiming for. Some people and/or collectors don't think a full tang knife is properly/masterfully crafted without having a tapered tang. Again this isn't all people and maybe everyone that you will sell to will want a thick tang. To me it is a matter of opinion.
Why, you ask?
Well from what I've been told and heard from different sources is that tapering the tang of a knife was an accident. Now we have all kinds of reasons why it is good.
Obviously it is good for the sole purpose of removing metal to help balance the knife and make it weigh less. On another note, it's also aesthetically pleasing to the eye in most cases. A well tapered tang on a knife is a pretty sight and just adds to the knife in most cases.
For those reasons I taper most of my tangs. However, you will see a lot of my knives that haven't been tapered. There are usually three cases in which I will not taper my tangs:
1) I do not taper 1/8" thick steel knives, because after skeletoning the handle, I don't feel comfortable with tapering it, in fear that it will make the knife weaker.
2) If the blade is exceptionally long compared to the handle. If the blade of the knife is 8-10"+ long and my handle is 5-6" long, then chances are I need the weight in the handle to balance out my knife. Usually I will drop tapering before skeletoning, but it really just depends on the knife and how much weight I have to keep in the handle to keep the knife balanced.
3) Filework. Now many people don't like filework. I personally like it. I think it's good in moderation, but I will go filework an entire handle from time to time. In those times, I do not taper my tang, because it would take away from my design.
The ABS prefers tapered tangs and while I'm not apart of the association yet, I still use their guidelines in a majority of my work.
So for all those reasons, I continue to do tapered tangs. Plus I really like the way it looks, even if I hate how much trouble it is.
Now! On with the actual tutorial.
Our piece of metal is 3/16" thick. I use a ruler or whatever I have handy to help find a center line in the handle. The best thing I've seen to find center lines is sold at various knife suppliers.
My favorite is sold by Uncle Al @ riversidemachine.net. For $20 you can get the little tool that will find the center line of whatever size metal you are working. Do I have one? Negative. ;_; Michael aka deadpoole on my friendlist ended up buying one and I loooove it. I've been living bicuriously through his. Alas, I've moved too far from him to be able to use his, so we will be using a ruler. I still feel like it's worth noting, if you are going to do knifemaking, that the center line tool is well worth $20, annnd one day I'll get one too.
")
Now that we have our...rough...jacked up....center line draw...with a brown freakin' marker. We section up the end of the handle. I usually do it in 1" sections, but you can make them bigger depending on how big your handle is going to be.
The idea is to have the thickest part of the blade in the middle. That way it will automatically have more weight there than the rest of the knife, even before putting on a bolster.
Once we section the knife into 3-4 sections, then we draw more lines on the handle. I've done 3 sections here. You'll notice at the very end I just left the thick center line. The reason is because I'm going to file down to the line or close to it.
The two sections next two it have a line drawn on each side of the center line. These brown....lines will be what I take off with the file.
I always start with the last section first. I stop a little bit outside of the center line before going to the next section and filing away the outer brown layer. Doing it this way allows me for more room to mess up.
Take your time and make sure not to go too deep with the sections until you have all 3 filed. Once you have all the markings off, then you can clean up the lines and connect the three together to make a smooth, seamless transition.
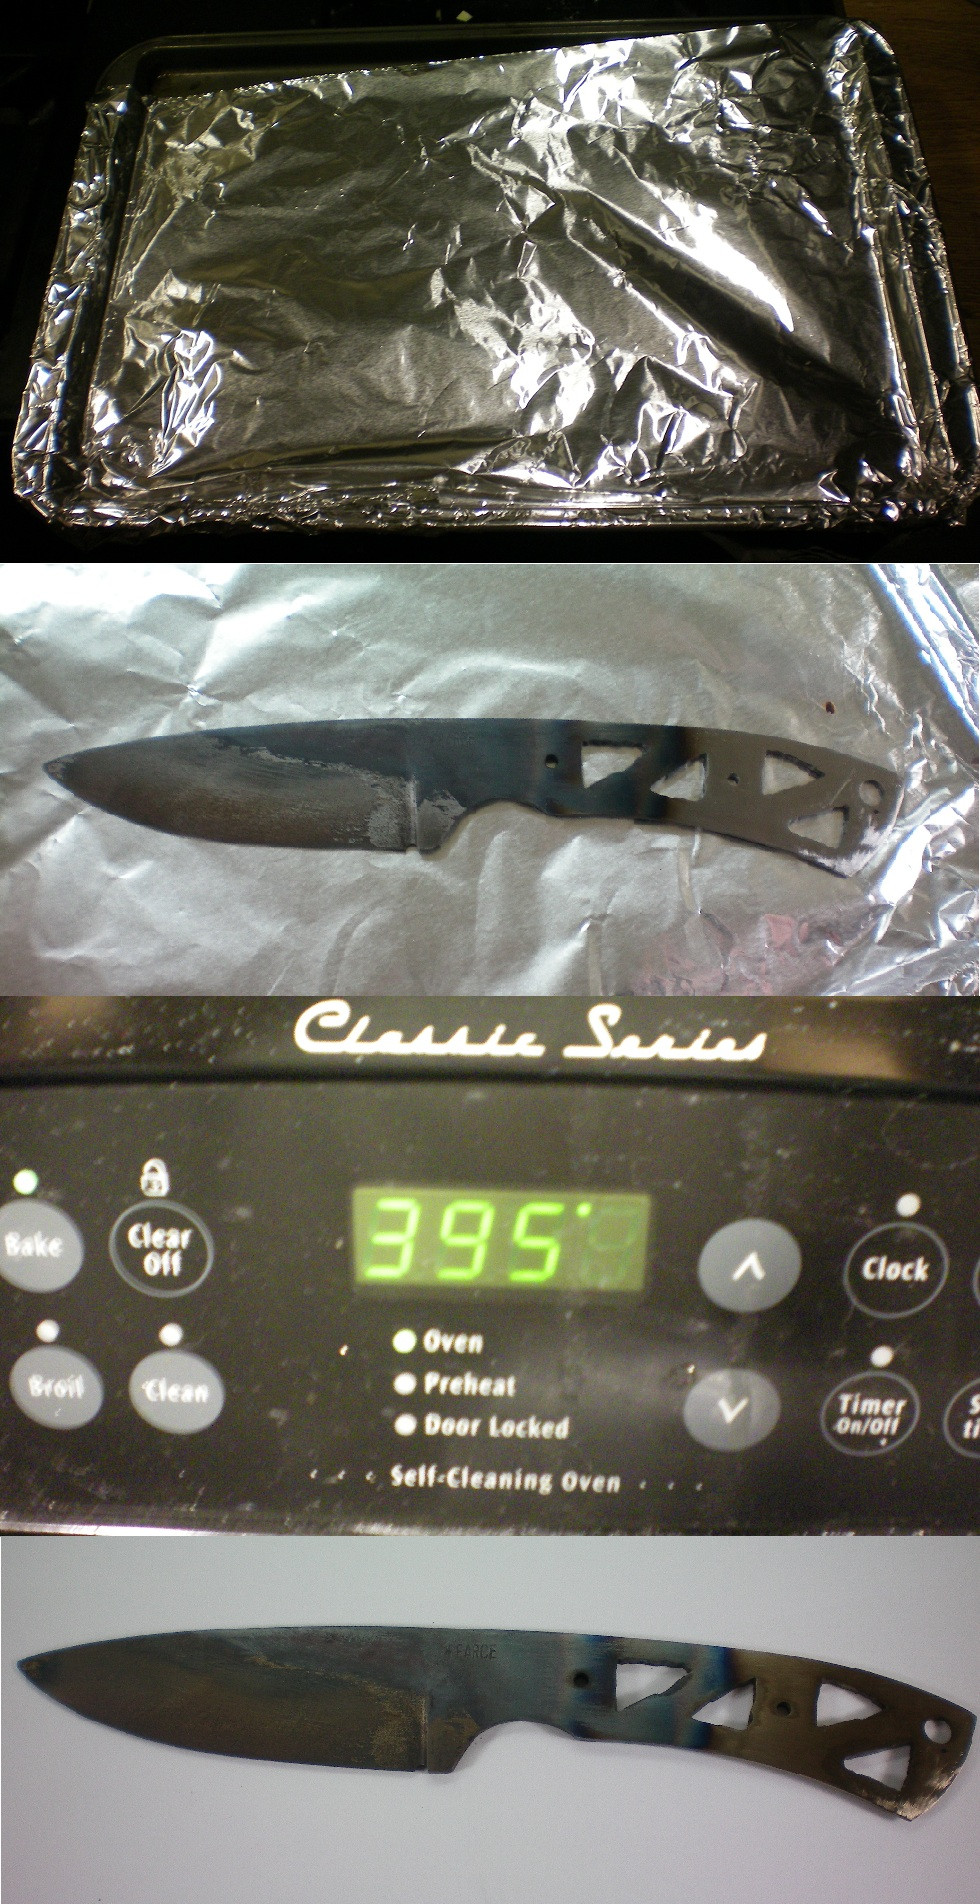
Once your lines are cleaned up you can take off more of the last section to make it even thinner. Once you are finished filing away most of the metal, go back over it with rough sanding paper. 36, 60, or 80 grit sanding paper is what you will want to use to finish smoothing the metal.
Hand sanding isn't needed at this point, but I found that it makes my clean up look a lot better and I eventually get my handle looking like the bottom picture. If I didn't use sanding paper, my life would be a lot easier, but it wouldn't look nearly as clean.
And after doing all of that work, its nice to clean it off and see a nice, smooth looking taper. Rather than a file scarred handle.
Next Step: [link]
Cocaine? Pffffft. Real men snort metal dust. Notice that the metal shaving in the top picture keeps disappearing...
I'm soooo high now.

Logan Pearce
www.pearceknives.com
Related content


Comments: 4

You r kind of a funny fellow. I like you and I can buy you a dinner If I ever came to your state...
👍: 0 ⏩: 1

lol. Well I like food! I think...
👍: 0 ⏩: 0

Gosh, at least buy me dinner first!
And thank you.
 (Wink)")
👍: 0 ⏩: 0