HOME | DD
 Nova-rek — [SFM tutorial] Space Engine Skybox [EDIT 2]
#sfmsourcefilmmaker
Published: 2016-05-23 00:34:54 +0000 UTC; Views: 3623; Favourites: 17; Downloads: 0
Redirect to original
Description
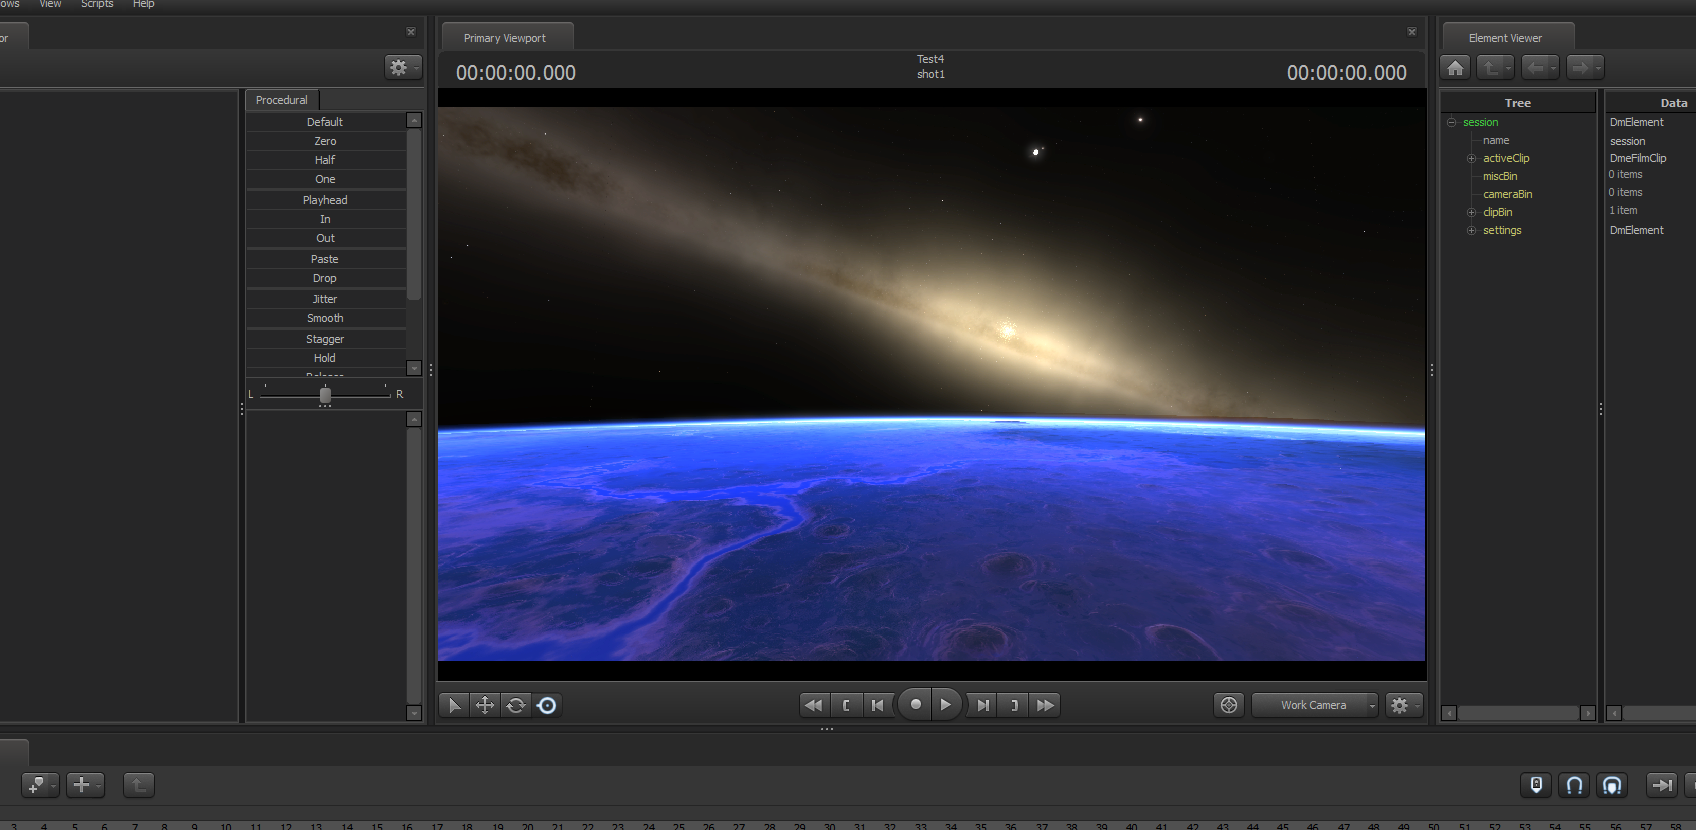
First, what is Space Engine?Space Engine is basicaly a 3D "galactopedia" in which you can explore planet, star systeme and galaxies in real time, now you can watch this...
youtu.be/f4WrUpc1D3U
Glorious background isn't it? Now if I told you that Space Engine is a free software en.spaceengine.org/ and it is handle a feature which allow this software to export a cubemap of your glorious scenic view?
This step is really easy, once you've found a background in Space Engine that you want to export in SFM, hit the "esc" on your keybord, this will open the menu, set your screen to "cubemap" in the option of Space Engine (so you can see exactly what will be exported).
Once you are happy with what you see, go back to the main menu in the "export" option and hit "export cubemap" a small window will pop-up asking in which resolution your want to export the cubemap, you can let the default resolution or even choose a 4K resolution (yes you can!).
Your exported skybox will be in the "export" folder of Space Engine directory.
Space Engine is compatible with various graphical mods like SweetFX or ReShade, but sadly the modification made by those mods are not applied on your exported skybox, some others graphical feature of Space Engine are also disabled by default during the skybox export, like the lens flare.
_______________________________________________
[EDIT 09/11/2016 NEW EXPORT TECHNIQUE]
Instead of exporting your Space Engine skybox directly as a cubemap, you can also choose to export it as a cylindrical map, in fact if you want to keep the max quality for your skybox, you should use the cylindrical map export, why?
Because sadly when exporting as a cubemap, Space Engine automaticaly turn off some graphical setting and reducing some other, which is not the case for the cylindrical map export (except for the lens flare).
First, open the consol command (look in the keymap option to find it since it's not the same depending of your keyboard) then copy/past the code "Set LandLOD 2" then hit enter, this is an "hidden" option that will force Space Engine to load the maximum detail on terrain texture, but be warned that this will hit pretty hard on your PC ressource.
By default, the cylindrical map will be in 2K but there is a way to force the 4K, once you found the skybox that you want to export, go to the display option (CTRL+F8) then enable the cylindrical view, after that, still in the display option, enable the windowed mode and choose as resulution "4096x2160" (be sure to choose your skybox before).
Move the window of Space Engine so you can see the top right corner of the screen, wait for the loading circle to stop (meainig that the game still load the terrain if the cricle still runing), once the circle is gone, hit F11 for exporting your cylindrical map.
The map will be in the "screeshot" folder of Space Engine, once you have your screeshot, go to this website gonchar.me/blog/goncharposts/2… this is an online cylindrical → cubemap converter, open the panorama converter, wait for the tool to convert your map, then download the 6 face of your cubemap in 4K!
Finaly the last step, port your map into VMT and VTF, the chart for the VTF & VMT name (where go each texture and how you should name them will be noted at the end of this page...
______________________________________________
Now go into the directory folder of SFM, the most easiest way is to simply go into the skybox folder of the TF material (located in : Steam\steamapps\common\SourceFilmmaker\game\tf\materials\skybox), then copy a random set of Skybox (you should get 6 VMT and 6 VTF file in total), now go to the "skybox" folder located in "usermod" (path: Steam\steamapps\common\SourceFilmmaker\game\usermod\materials\skybox If you do not have a skybox folder in usermod, you can creat it).
Paste your copied file inside, now this is where the thing become a bit tricky, you should see that the name of the VMT and VTF that you have copy/pasted are named according to each face of the cubemap (usualy the 2 last letter), so with VTF edit, you have to open your VTF and replace the texture by the corresponding face of the exported texture from Space Engine, once done you can rename the VTF if you want but keep the last letter for order sake.
Still with VTF edit, now you have to edit the code of the VMT file, most of the code from the skybox are like this (in bold the important things)...
"sky"
{
"$hdrbaseTexture" "skybox/name of your texture"
"$nofog" "1"
"$ignorez" "1"
"$basetexture" "skybox/name of your texture"
}
You should change the code like this...
"UnlitGeneric"
{
"$baseTexture" "skybox/name of your texture"
"$nofog" "1"
"$ignorez" "1"
}
Rename the VMT file as well, but just like the VTF, keep the last letter which locate each face of the cubemap, SFM will need them to know on which face go the textures, so let's say's that you want to rename a VMT "Mars", it will look like this...
MarsBK.vmt
MarsDN.vmt
MarsFT.vmt
...
Side note...
BK = back side map of the skybox
FT = front side
RT = right side
LF = left
UP = top side
DN = down side
Once you have done, to load your new skybox in SFM, open the consol command and use the code sv_skyname "the name of your map" and without the last letter at the end, so let's take again the case of Mars skybox...
sv_skyname MarsCongratz, work done
")
______________________________________
Chart name between Space Engine, panorama tool and SFM skybox file name...
Skybox exported directly as an cubemap (left = Space Engine file name / right = their correspondence in SFM) :
sky_neg_z = BK
sky_neg_x = RT
sky_neg_y = DN (you will need to flip the texture at 90° on the right side)
sky_pos_z = FT
sky_pos_x = LF
sky_pos_y = UP (you will need to flip the texture at 90° on the left side)
Cylindrical map converted as an cubemap from the panorama tool converter, note that the cubemap patern you will get is not the usual SFM skybox patern, you will see what I mean in the list (left = panorama tool name / right = their correspondence in SFM):
Front = BK (yes front side and back side are inverted)
Back = FT (inverted)
Left = LF
Right = RT
Top = UP (you will need to flip the texture at 90° on the right side)
Bottom = DN (you will need to flip the texture at 90° on the left side)