HOME | DD
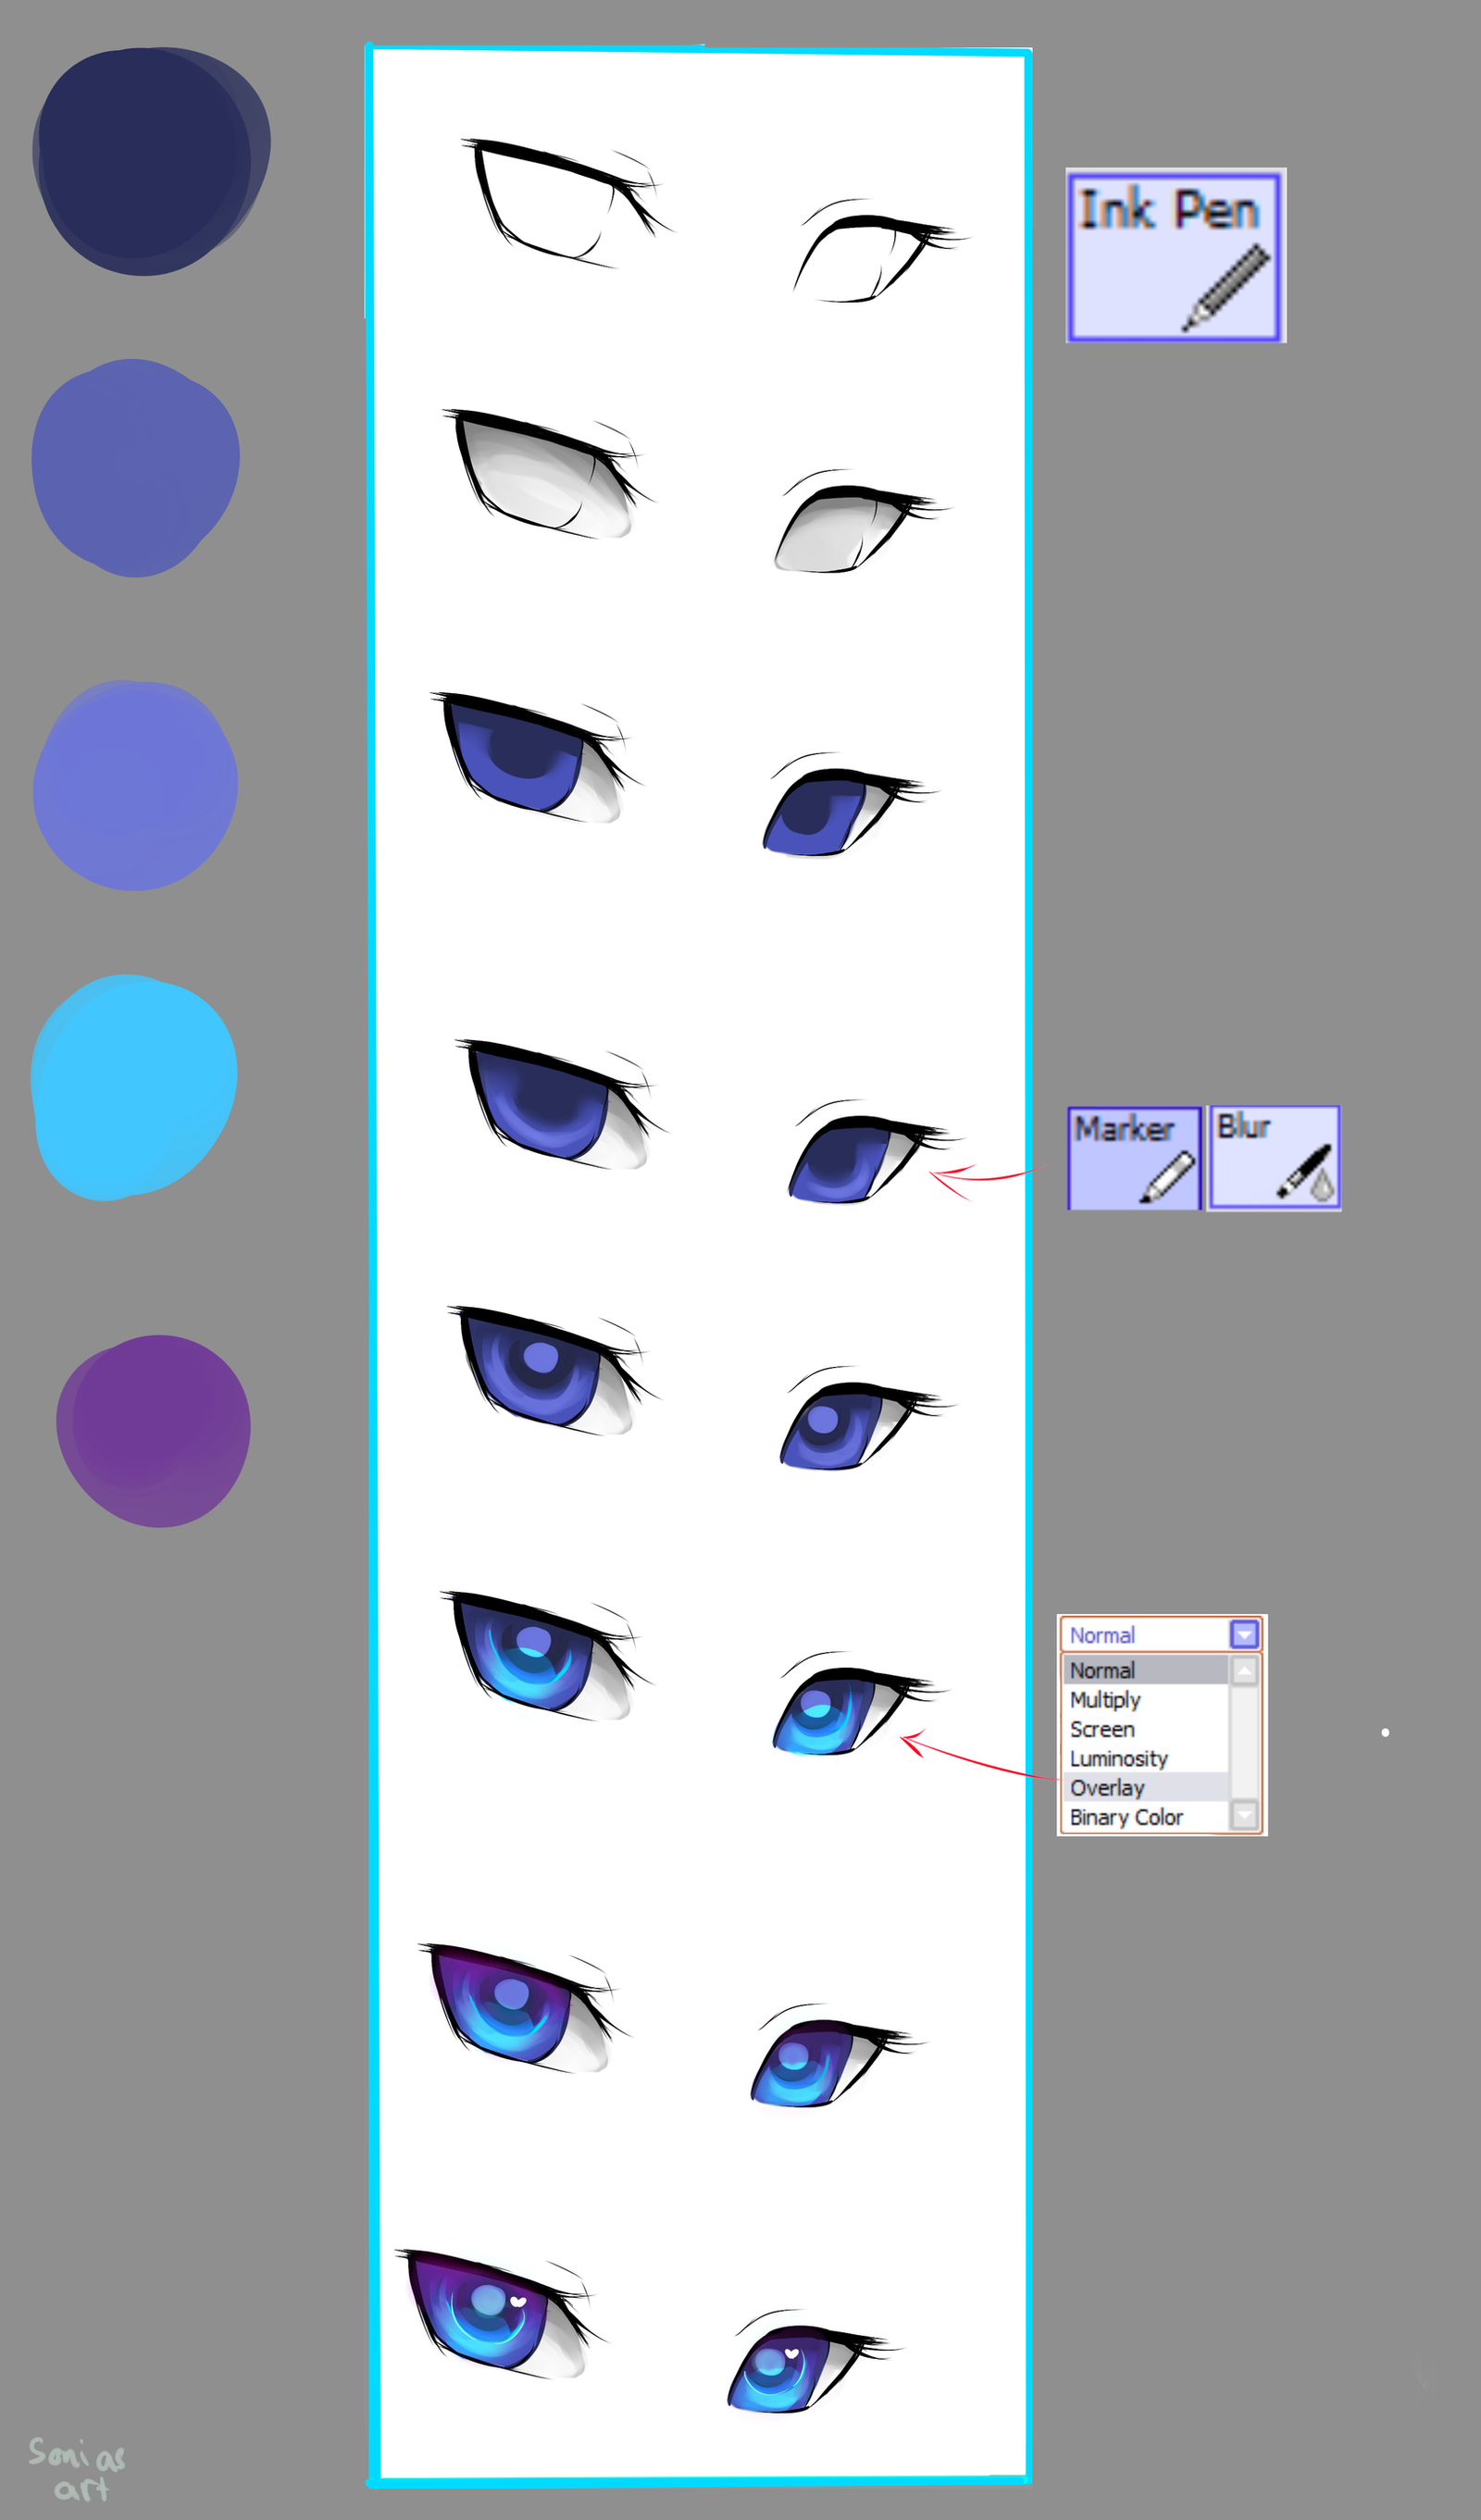
 Nyaseiru — DShou's Method : Eye Style Coloring
by-nc-nd
Nyaseiru — DShou's Method : Eye Style Coloring
by-nc-nd

Published: 2013-01-15 01:01:43 +0000 UTC; Views: 23204; Favourites: 567; Downloads: 343
Redirect to original
Description
Note : This is for coloring, not for how to do eye-shapes, iris placement, or anything like that.
As well it's a general guide, not a 'hold your hand from start to finish' kind of tutorial.
Remember that it's best not to out-right copy this. Instead, take the basics of the steps and try out your own variation/interpretation. A unique eye-style helps an artist stand out from one another.
. . . seriously, you don't learn how to draw by copying. An artist learns by 'understanding'. So please read thoroughly as well make sure to check out how other artist's do their eye styles to help you get a better idea of how to color eyes.
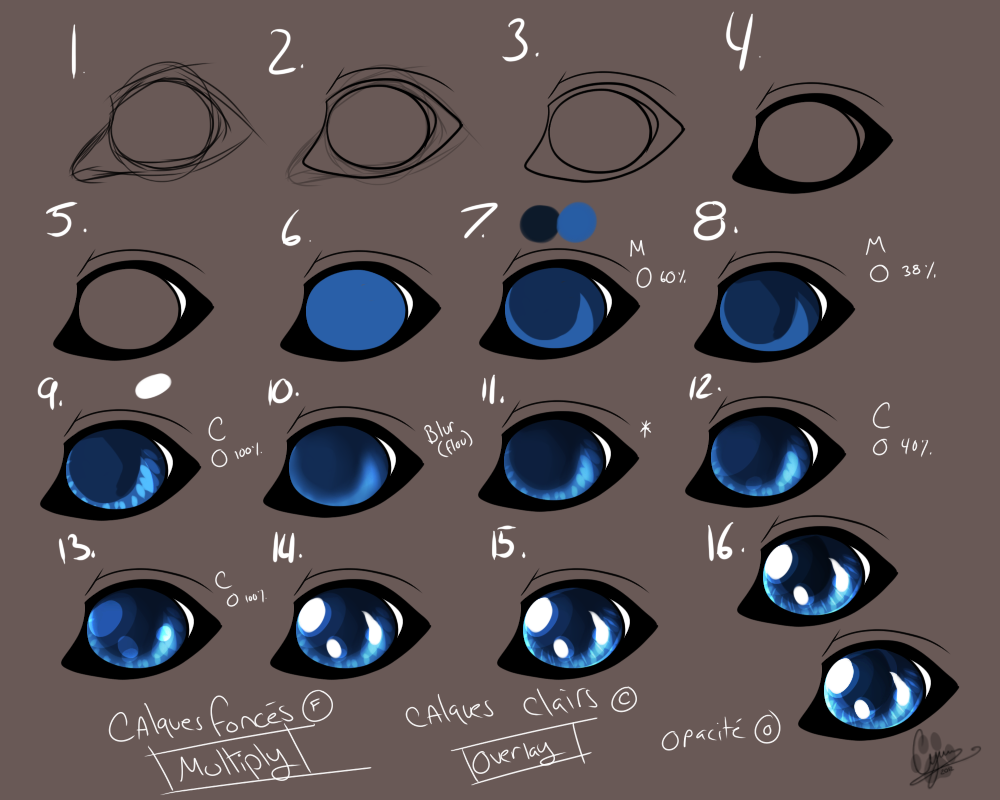
The way these eyes are designed is a mixture of providing a smooth yet shiny look that stands out from the rest of the drawing (well okay, it's colored eyes on a sketch here but check out what I mean in my other drawings), but I also made it so that it's pretty simple to do, note that there's only 8 steps, and even then some of the steps (3, 4-6 and 8) are very quick to do.
Program : Paint Tool SAI
Note : All of these functions/adjustments/brushes should be available in many digital art program such as Photoshop. However, the method to implementing them depends on the program.
(Paint Tool SAI) Tools -
Lineart for Outlines :
Default Bucket for Fills
Default Airbrush for Step 4, 5, 7 and 8
What is Clipping?
How do I make a layer Multiply or Luminosity?
Select a layer, and above it between the layer window and preview window should be a drop-down called Mode.
What does multiply do?
"Multiply blend mode multiplies the numbers for each pixel of the top layer with the corresponding pixel for the bottom layer. The result is a darker picture."
Basically, it will darken the colors towards black. It's great for adding shadows.
What does luminosity do?
"The Luminosity blend mode preserves the hue and chroma of the bottom layer, while adopting the luma of the top layer."
Basically, it will brighten the colors towards white. It makes the layer glow.
Can you explain what you did specifically at step 4~6?
I created a clipping layer on top of the iris base, one for each step and set the layers to multiply/luminosity (what is mentioned at the step). Next, I would brush the effects on top of the iris base.
The blobs next to step 4 and 5 are what the effects look if it's not clipped onto another layer. As you can see, I just made quick circles, but because it was clipped on the iris base, it would only effect the iris base.
How'd you do Step 8?
There's two methods to doing this.
One, when doing a colored drawing, do a step 0 and create the eye whites which would go below the outlines. This way, you can clip a layer on the eye whites so that you can brush on the shading without having it go on top of the iris or outside of the eyes.
Two, shown here, I made a layer below the outlines and made a rough brushing. At that moment, the shading would go outside the eyes, but since it's the bottom layer it won't be on top of the iris. All I had to do there was just erase the excess that was outside the eyes and done.
Explaining the Purpose of Each Step
Step 2 -I separated the iris outline from the fill. The reason for this is because it helps keep a consistent outline around the eyes. This is important for keeping consistency when doing a lined drawing as otherwise the eyes will be the only area without outlines. This may be skipped however for a line-less drawing.
Step 4 & 5 - The reason for the addition of the shading and lighting is to apply a relative gradient to the eyes.
The shadows are meant to match with the shadows of step 8. The lighting is to help add 'life' to the eyes. Light colors signifies life when drawing eyes, but at the same like the shadows, match with the whites of the eyes.
Step 6 - You can make lots of variations here. I create this line to give the illusion of the inner circle because eyes tend to be built of multiple circles, one inside another.
Step 8 - The shadow is to add depth to the drawing, and is needed for when you shade your drawings, otherwise ignore this step. The 'shadow' is created by the eyelashes in a sense, even if they wouldn't be able to create such a shadow.
Again, depth.
Sometimes you need to delve away from 'realism' in order to make the drawing look better after all.
Make sure to keep things on separate layer, at least until later when you're confident that the section is completed. I did each of these 8 steps on different layers and the reason for this is because it'll let you work below/above/in-between other layers (which makes subsequent steps easier) and makes for putting effects on much easier as well. It will also make it easier to fix a section in case a mistake is made.
For the actual order of the layers, it's (from top-to-bottom) 1 - 7 - 2 - 6,5,4 - 3 - 8
7 is done later, as since highlights are white, you wouldn't be able to position them well, plus you'd want the iris completed first before determining highlight position.
Usually when working with clipping layers (6,5,4), you work back up from bottom to top.
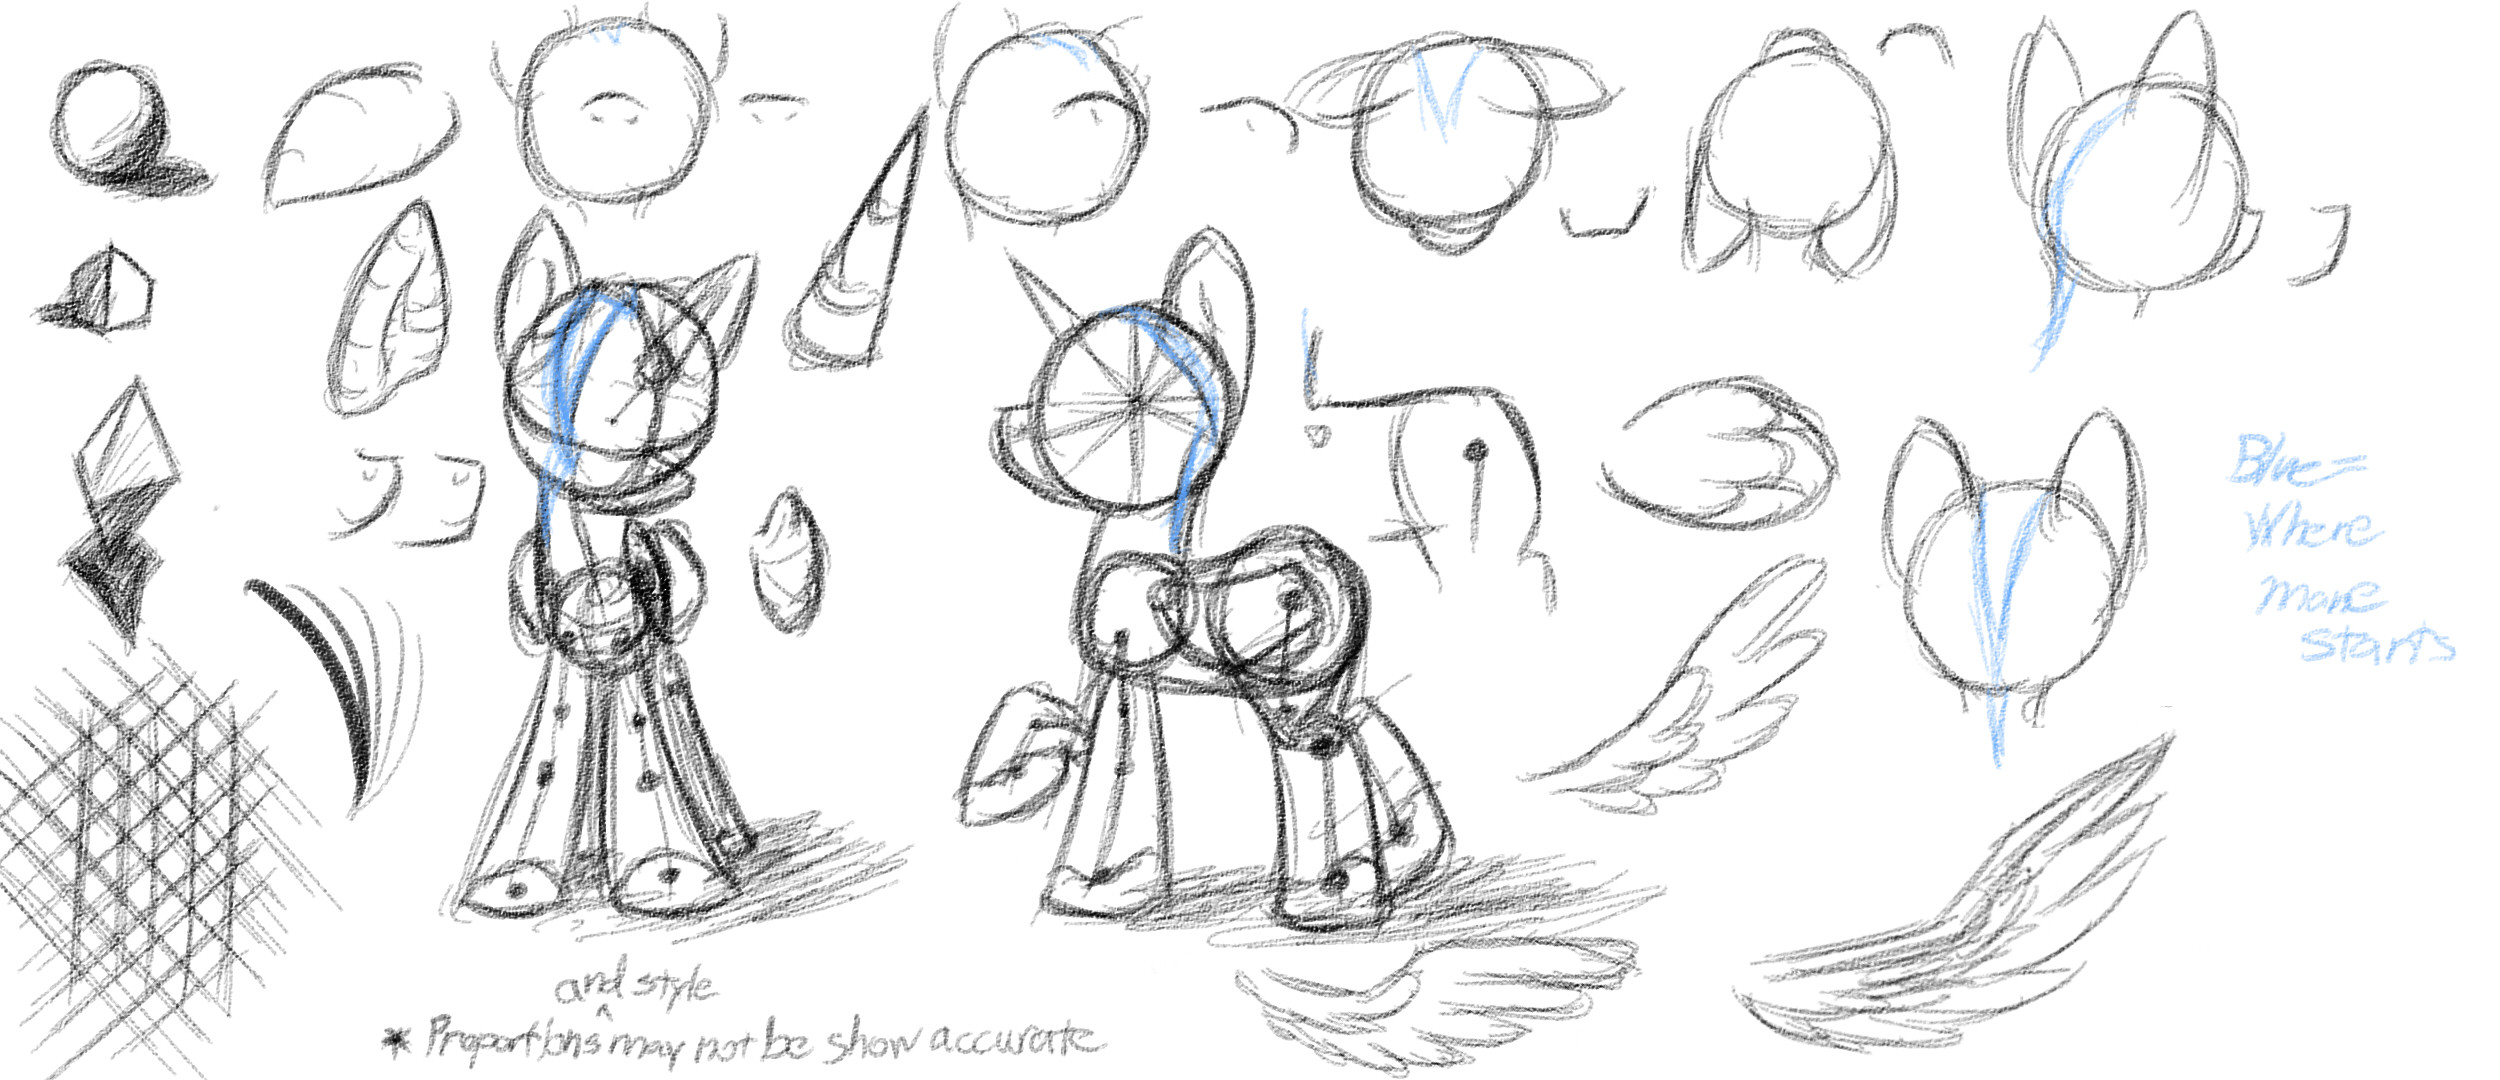
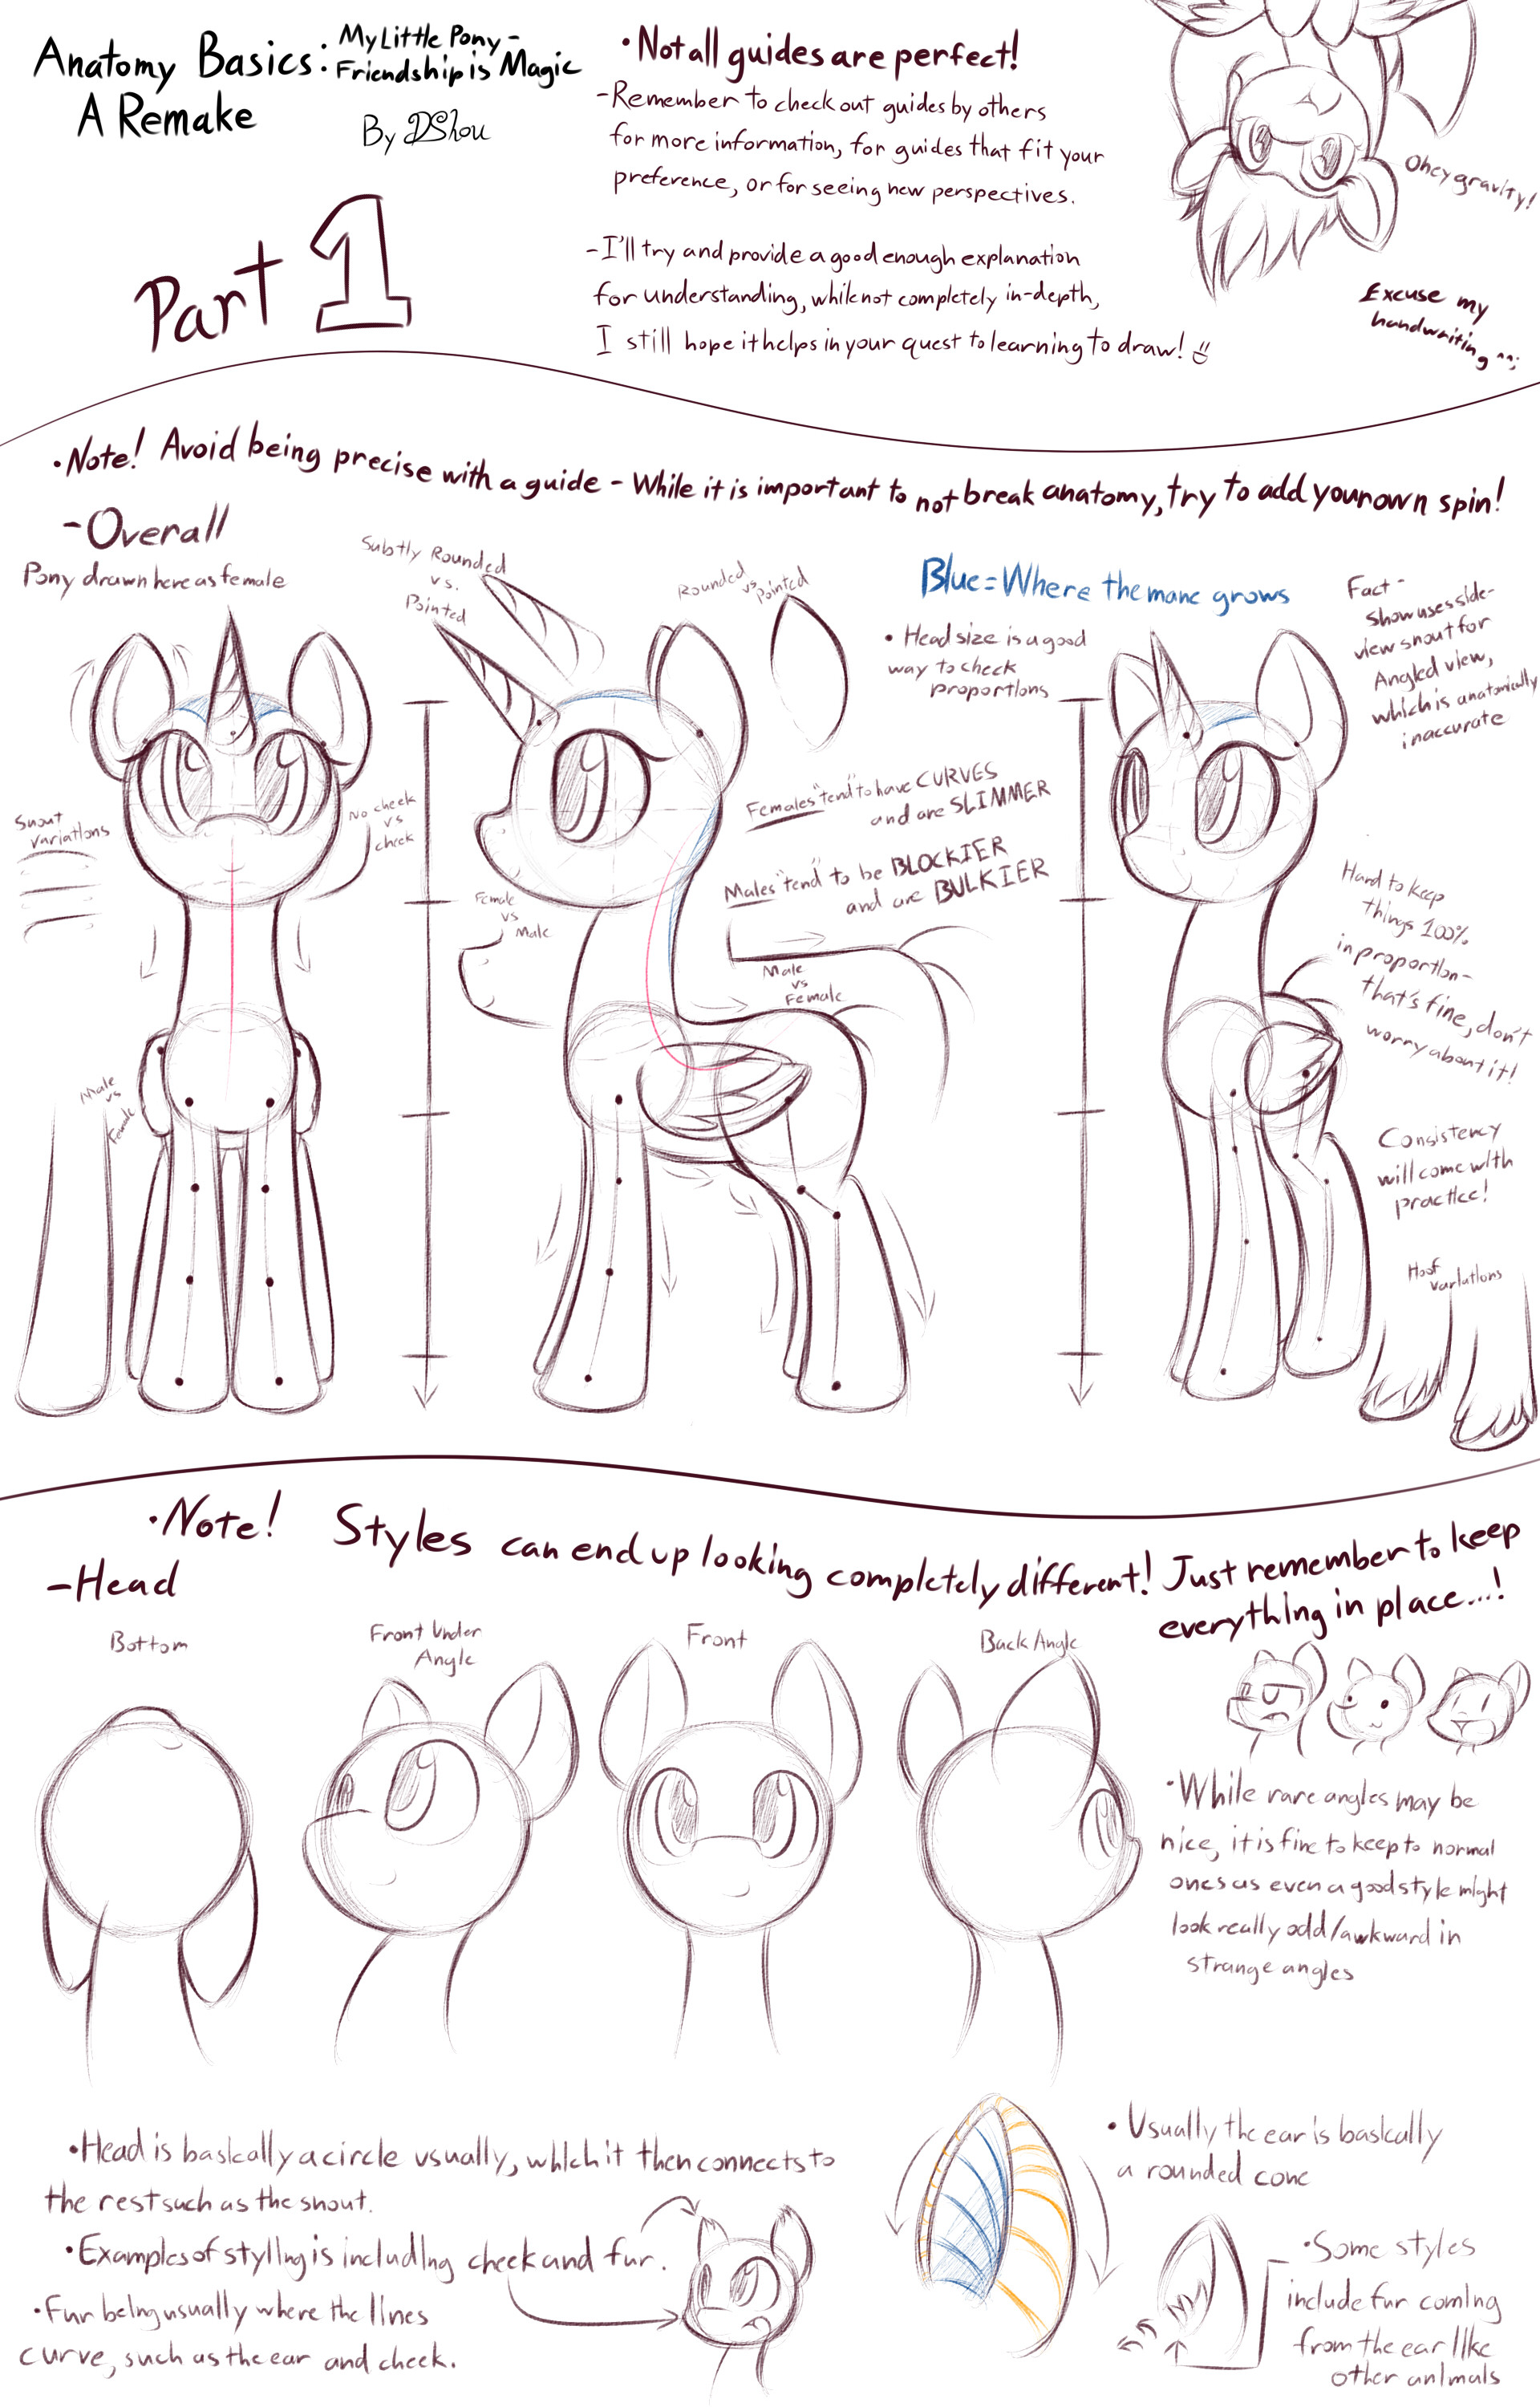
If you wish to check out tutorials on drawing the ponies of My Little Pony : Friendship is Magic or perhaps gather some general drawing tips, then Check out the MLP-ATG-Alumni's Drawing Tutorial Folder here - [link] (and perhaps join the group's weekly themed drawings as well if you haven't, more info on the group page)
Check here [link] for the guides I made myself.
My Little Pony : Friendship is Magic series and characters belongs to the Hub & Hasbro
Related content


Comments: 18


They are amazing! I am going to have to try this.
👍: 0 ⏩: 0


I was wondering a thousand times on how you do it, now this gives me a lot of helpful tips, Thanks a lot.
👍: 0 ⏩: 0

I have been waiting for this guide! I could not figure out how you made the eyes so well ^_^
👍: 0 ⏩: 0


I find it so admirable that you do these how to guides
")
👍: 0 ⏩: 1

To think I didn't even plan on doing this, I just somehow made it without realizing it xD
👍: 0 ⏩: 1
")
People do crazy things when they're not thinking~
👍: 0 ⏩: 1
