HOME | DD
 PoeticJustice314 — How to Make Scan Lines

Published: 2010-02-06 19:09:44 +0000 UTC; Views: 5841; Favourites: 113; Downloads: 87
Redirect to original
Description
WARNING: Massive file alert - I am not to be held responsible if your computer dies, stops responding, or spontaneously combusts/explodes in any way!
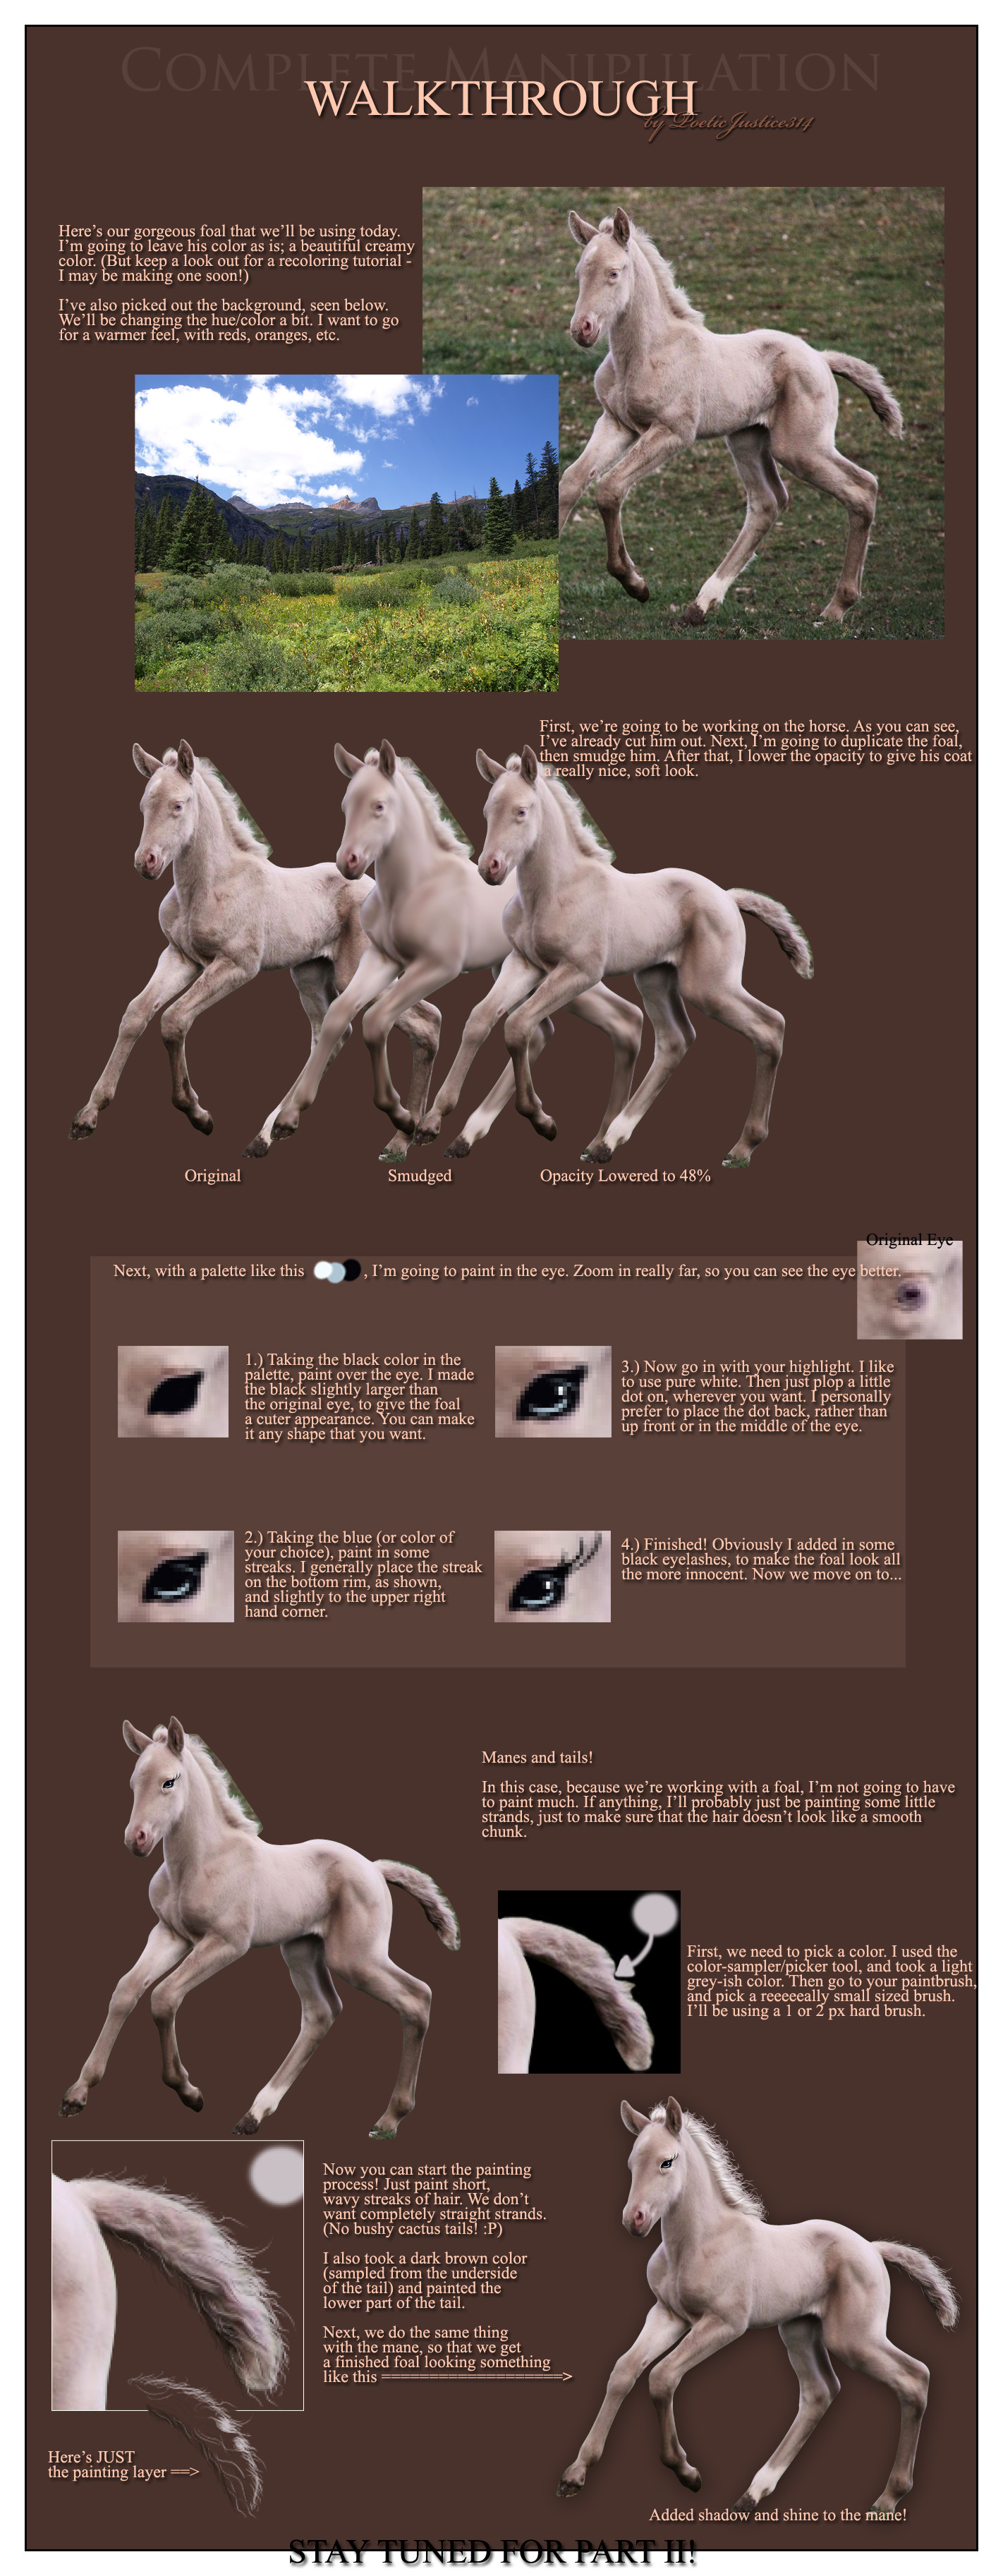
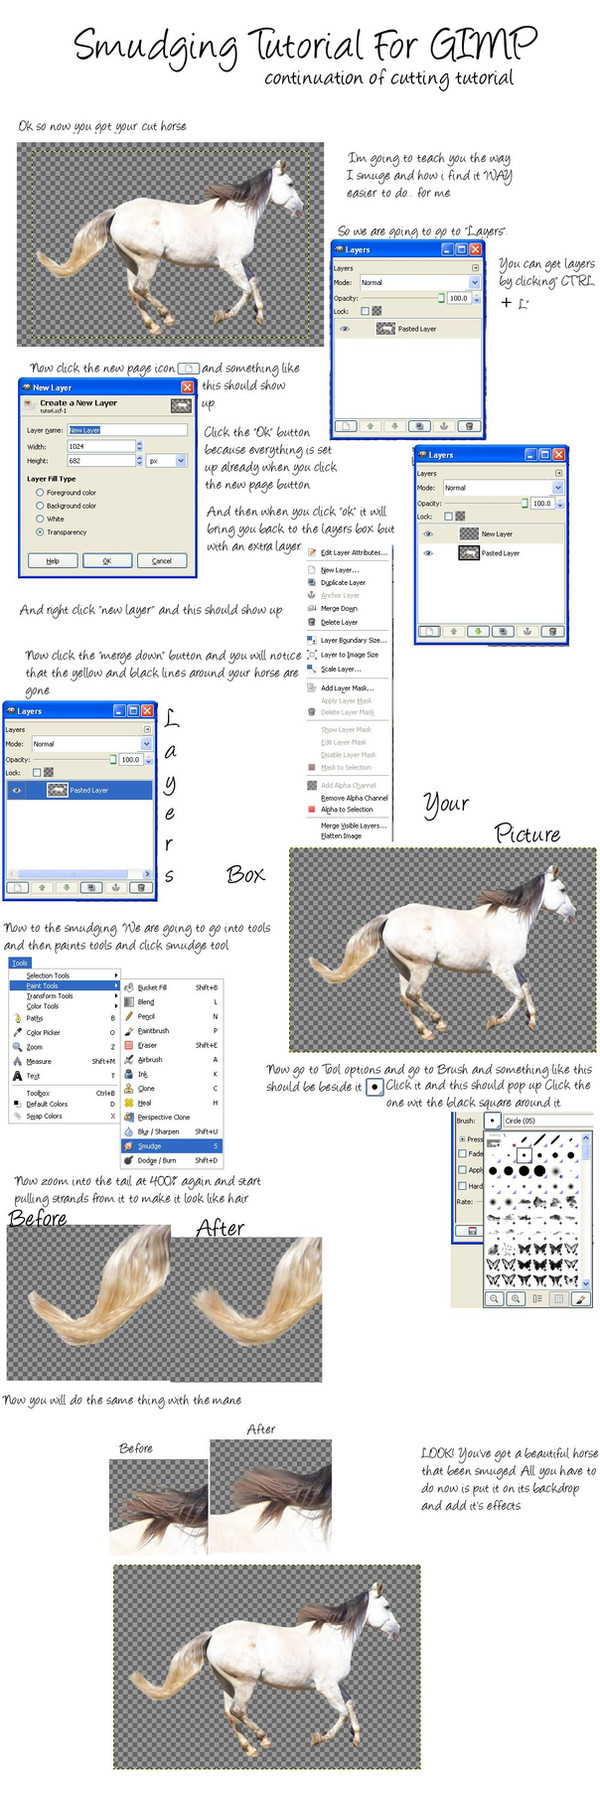
First tutorial in a series of tutorials on photo effects & textures.
------------
Summary of Steps:
1.) Open a new image, plugging in the shown settings (according to the type of scan line you are making.)
2.) Zoom in, grab your 1 pixel pencil brush, and paint the layer as shown.
3.) Click EDIT > Define Pattern, and name it.
4.) Open up your stock image, make a new layer, click EDIT > FILL, and select your pattern that you defined.
5.) Zoom in 100%, and you will see your scan lines.
6.) Optional: play with the blending mode (I prefer overlay or soft light) and opacity settings.
------------
If you still need help, comment or note me, and I'll explain it to you the best that I can.
You may not post this tutorial anywhere without my written permission. Understand...?
Related content


Comments: 21


Thanks so much for this!
Used it here:
[link]
Although it's hardly visible.... XD
👍: 0 ⏩: 1

Looks great! Thanks so much for using my tutorial!

👍: 0 ⏩: 1
Ahaha, actually I can't even see the scan lines at all unless you look at the full view in the .psd. XD
Know of any way to turn up the effect without making the entire image too dark?
👍: 0 ⏩: 0

Thank you SO MUCH. I've been wanting to learn this forever.
👍: 0 ⏩: 1
No problem! I'm glad it was helpful

👍: 0 ⏩: 0


Thanks for the tutorial! And, might I ask, what's the name of the font you're using? I just love it.
👍: 0 ⏩: 1
The font is called "Catholic School Girls"  (Wink)")
Thank you so much!
👍: 0 ⏩: 1
Thanks!
And you're welcome.
")
👍: 0 ⏩: 0

Sometimes Adobe Photoshop 5.5, other times, Photoshop CS3. Just depends on which computer I'm on :]
👍: 0 ⏩: 1

Thank you! I've been trying to figure this out for a while now... =]
👍: 0 ⏩: 1
You're welcome!

👍: 0 ⏩: 0

No problem! I'm glad it was useful!
👍: 0 ⏩: 0

Ooooooh, I like it, I like it.
Going to try this out now!
Thanks for using my stock as an example, hun =3
And sorry for the uuuuuuuber late reply!

👍: 0 ⏩: 1
Thank you for allowing me to use it! It's beautiful!

👍: 0 ⏩: 0