HOME | DD
 PracticeImagination — Crystal Tutorial / Drawing Process

#crystal #crystals #drawingprocess #gemstone #process #tutorial
Published: 2023-03-26 14:01:42 +0000 UTC; Views: 11114; Favourites: 124; Downloads: 11
Redirect to original
Description
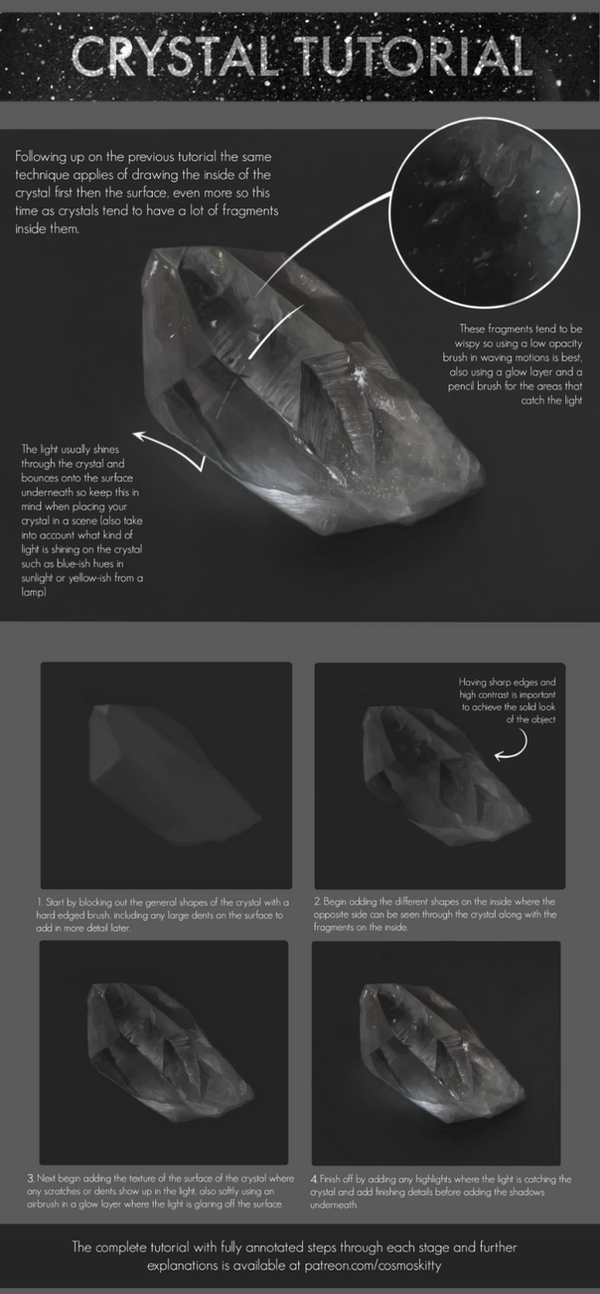
I only just figured out how to paint crystals and figured I would share what I learned with you.
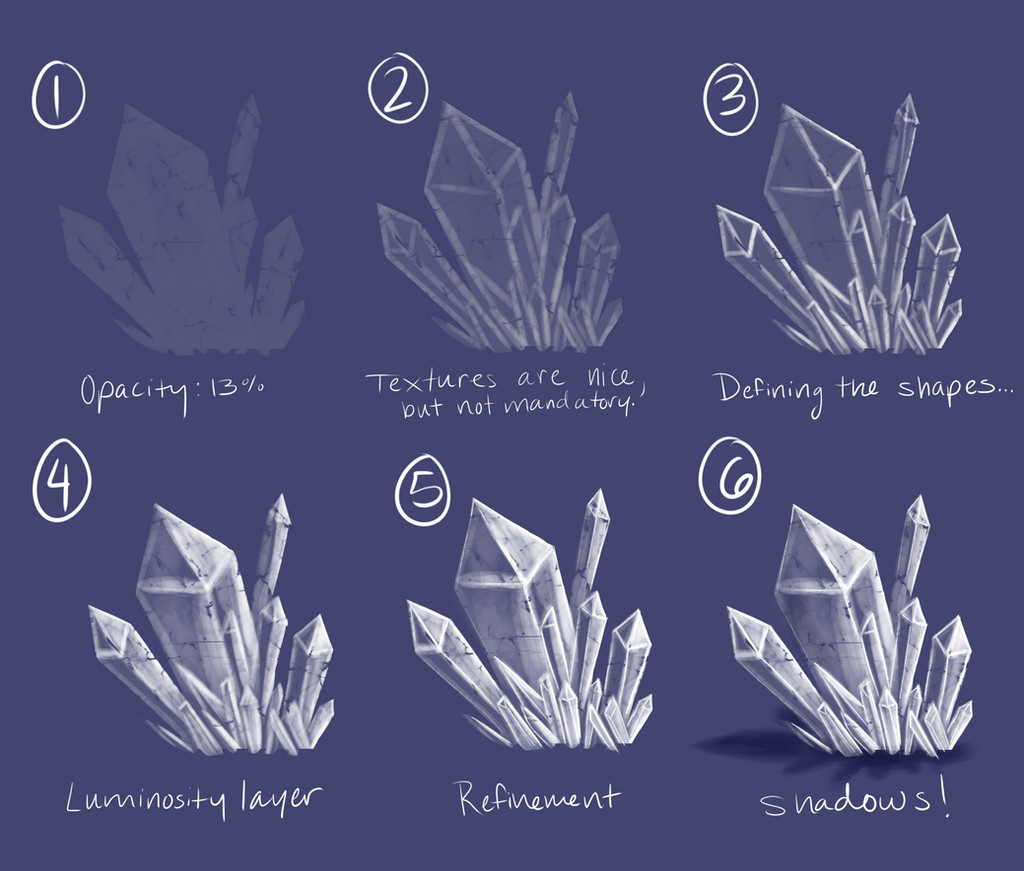
1. sketch + block in the colours
Use the line tool to get straight lines for the sketch. Use the selection tool to block in the colour. It should be a darker desaturated version of the colour you want the crystal to be later. Go wild, there are a ton of different shapes and sizes crystals comes in. It doesn’t have to be the standard one I am showing here.
2. Add the highlights
Crystals are pretty reflective. Use a bright (almost white) colour and paint the areas of your crystal, that would be hit by light. Add imperfections if you want the crystal to look a bit more natural. These imperfections usually take the form of thin lines or cracks. I set this layer’s opacity to 67%, this way the structures underneath can still shine through.
3. Add internal highlights
(I’m not sure if this is the right name, but I will just go with it since its descriptive.)
Some light passes through the crystal and hits the back wall before being reflected back to the viewer. It will be very saturated since it passes through the colourful crystal.
4. Add internal colour zones
Normal coloured crystals will sometimes have zones of slightly darker colour in them. Adding them is somewhat optional, but I found it helps make it look a bit more interesting and real.
5. Add internal structure
This is optional. Crystals are often slightly broken inside or have little imperfections. Add them in. I tend to go for a sort of stripy look, but you can play around with it. Note that if they are close to one of the edges, they will seem to appear twice on the two neighbouring sides. Have you ever looked at an aquarium and wondered why you can see some fish doubled? It’s because of refraction. The same thing happens in crystals. I set this layer’s opacity to 50%. They would make the picture too noisy otherwise.
6 + 7. Put them all together and add some final touches
Layer structure (from bottom to top): block-in layer, internal highlights, internal colour zones, internal structure, highlights
For the final touches I rendered the stone a bit and added an Erase Layer to blend the crystal a bit more into the stone. I also added some little colour swatches because why not.
Note: You do not need to do these in order (though I would recommend to start with the highlight and the internal highlight since they are the most important).
If you want to see some more crystals I painted:
Hope this helped someone!
______________________________________________________________________
If you have tips, questions or suggestions for me I would love to hear from you