HOME | DD
 psykopath — displacementMapFilter Tutorial
by-nc-sa
psykopath — displacementMapFilter Tutorial
by-nc-sa

Published: 2007-02-03 05:53:09 +0000 UTC; Views: 3282; Favourites: 8; Downloads: 87
Redirect to original
Description
Heres a cheap tutorial on using displacementMap filter. This tutorial is for applying to to a MovieClip and not to BitmapData, although it does involve bitmapData. For the bacgkround image I used click here [link]Instructions are included in comments, I hope it makes sense. Need help with anything, leave a comment.
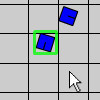
Move you mouse to make the effect. Press any key to see what the effect is using.
NOTE: When you copy and paste, be sure to fix the stuopid smiley in the middle. it should be a : and a D without any space between them.
//START COPYING HERE
/*
----BitmapData Tutorial
----Using the displacementMap filter
First off create your background image. Either draw one,
or import a graphic, but make sure it covers the whole stage.
Convert it to a movieclip. Make sure its registration point
is at 0,0. Name it bg_mc.
Now for the script.
>>MAKE SURE THIS SCRIPT IS ON THE FRAME, AND NOT THE MOVIECLIP<<
The basic format of the script will do this:
--Import the classes so we can use them
--Create a bitmap and holder to hold the displacement map
--Create an empty movieclip to hold the temporary effect shape
--Create the displacementMap filter
--Create the convolutionFilter
--Make it so that on every frame the effect shape is updated
and applied
--Add the option to show the effect shape (this is kind of
like debugging)
*/
//Import the classes so we can use them
import flash.display.*
import flash.filters.*
import flash.geom.*
//Create a bitmap and holder to hold the displacement map
var disholder:MovieClip = createEmptyMovieClip("disholder", getNextHighestDepth())
var disbmp:BitmapData = new BitmapData(550, 400, true, 0xFF000000)
disholder.attachBitmap(disbmp, 1)
disholder._visible = false
//That creates the bitmap to be used in the displacement filter
//It doesn't usually need a holder to be visible because
//you usually don't want to see it, but since I am including
//the option to see it it needs to be able to be seen.
//Create an empty movieclip to hold the temporary effect shape
var effshape:MovieClip = createEmptyMovieClip("effshape", getNextHighestDepth())
effshape._visible = false
//Now we need to put the movieclips in the order they should
//be, so only whats meant to be visible is visible.
effshape.swapDepths(getNextHighestDepth())
bg_mc.swapDepths(getNextHighestDepth())
disholder.swapDepths(getNextHighestDepth())
//Create the displacementMap filter
var disfilter
") isplacementMapFilter = new DisplacementMapFilter(disbmp, new Point(0,0), 1, 1, -5, -5, "clamp")
isplacementMapFilter = new DisplacementMapFilter(disbmp, new Point(0,0), 1, 1, -5, -5, "clamp")//disbmp is the bitmap containing the shape of the effect
//new Point(0,0) just means the the two bitmaps line up correctly
//1 means that red is the color affecting the displacement.
//--2 is green, 4 is blue, 8 is alpha
//--the first one means the color affecting the x, second for y
//the first -5 is the amount to move in the x direction, the second is for y
//Create the convolutionFilter
var convo:ConvolutionFilter = new ConvolutionFilter(3, 3, [1,1,1,1,1,1,1,1,1], 10)
//For the convolution filter see [link]
//Make it so that on every frame the effect shape is updated and applied
effshape.onEnterFrame = function() {
this.clear() //Remove the last shape
drawCircle(this, _xmouse, _ymouse, 50, 0xFF0000, 0x000000) //Draw a red circle into the shape holder
disbmp.applyFilter(disbmp, disbmp.rectangle, new Point(0,0), convo) //Fade the old effect
disbmp.draw(this) //Draw the shape onto the effect bitmap
bg_mc.filters = [disfilter] //Update the bacgkround
}
//This function draws the circle. It is copied from the
//Flash help files, and edited slightly
function drawCircle(target_mc, x, y, radius, fillColor, endColor) {
with (target_mc) {
//If you use beginFill the shape is continuous
//If you comment out beginFill and use the next 3
//lines, you will use a gradient, which makes the
//edges smoother.
//So beginFill = greater effect, gradientFill = smooth edges
beginFill(fillColor, 100)
//var gmat:Matrix = new Matrix()
//gmat.createGradientBox(radius*2, radius*2, 0, _xmouse-radius, _ymouse-radius)
//beginGradientFill("radial", [fillColor, 0xFFFFFF, endColor], [100, 100, 100], [0, 127, 255], gmat)
moveTo(x + radius, y);
curveTo(radius + x, Math.tan(Math.PI / 8) * radius + y, Math.sin(Math.PI / 4) * radius + x, Math.sin(Math.PI / 4) * radius + y);
curveTo(Math.tan(Math.PI / 8) * radius + x, radius + y, x, radius + y);
curveTo(-Math.tan(Math.PI / 8) * radius + x, radius+ y, -Math.sin(Math.PI / 4) * radius + x, Math.sin(Math.PI / 4) * radius + y);
curveTo(-radius + x, Math.tan(Math.PI / 8) * radius + y, -radius + x, y);
curveTo(-radius + x, -Math.tan(Math.PI / 8) * radius + y, -Math.sin(Math.PI / 4) * radius + x, -Math.sin(Math.PI / 4) * radius + y);
curveTo(-Math.tan(Math.PI / 8) * radius + x, -radius + y, x, -radius + y);
curveTo(Math.tan(Math.PI / 8) * radius + x, -radius + y, Math.sin(Math.PI / 4) * radius + x, -Math.sin(Math.PI / 4) * radius + y);
curveTo(radius + x, -Math.tan(Math.PI / 8) * radius + y, radius + x, y);
endFill();
}
}
//Allow the effect shape to be seen
//This is using a listener for any key that is pressed
var k = {}
k.onKeyDown = function() {
disholder._visible = !disholder._visible
}
Key.addListener(k)
//STOP COPYING NOW
Related content


Comments: 10

Awesome thank you sooo much this realy helped (even though i couldnt understand most of it 0.o)
👍: 0 ⏩: 0


 (Wink)")


I have, but Im too lazy to make it into a tutorial. All you need is rings getting bigger and fading away.
👍: 0 ⏩: 0