HOME | DD
 SgtMilenko —
Sculpting Tutorial
SgtMilenko —
Sculpting Tutorial

Published: 2010-09-03 16:58:58 +0000 UTC; Views: 74030; Favourites: 2552; Downloads: 1689
Redirect to original
Description
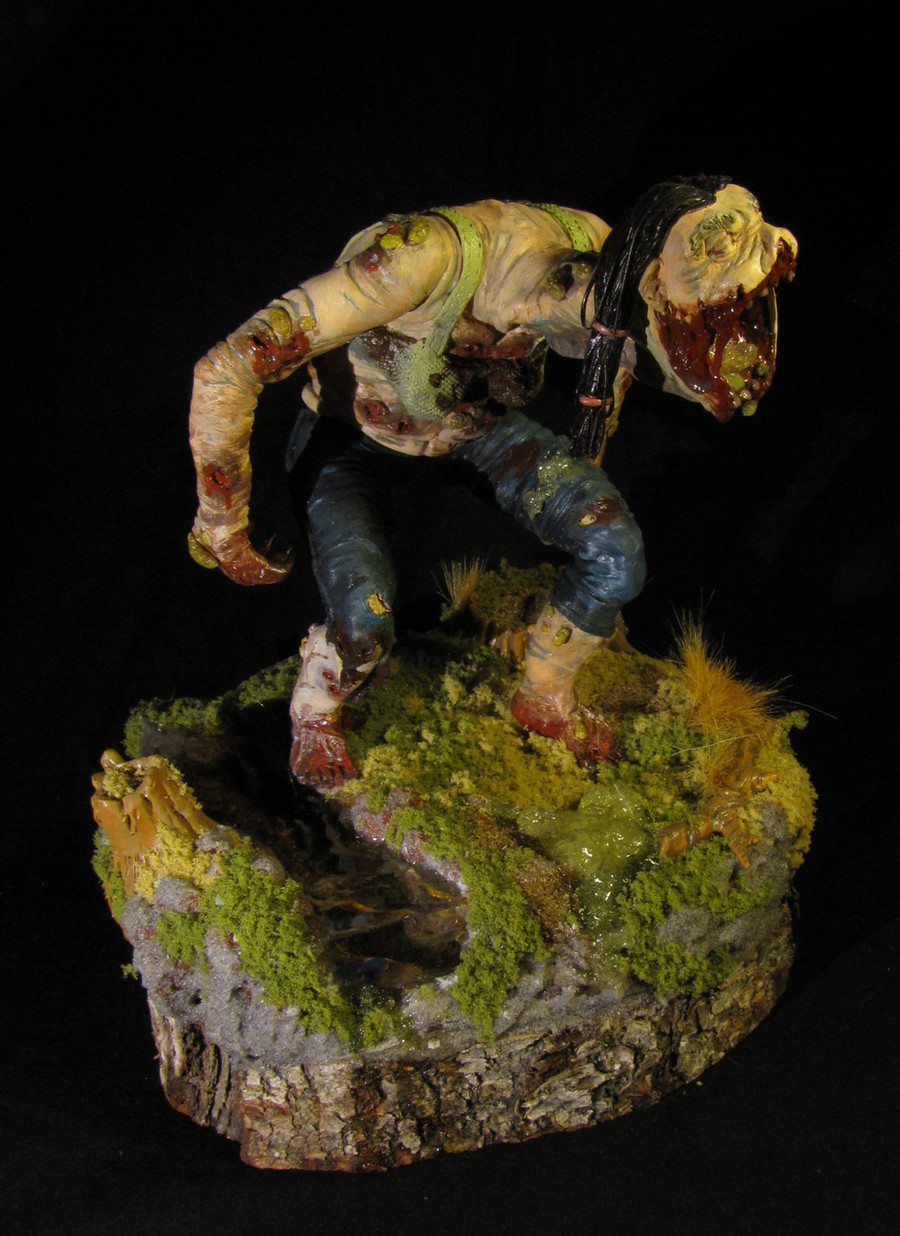
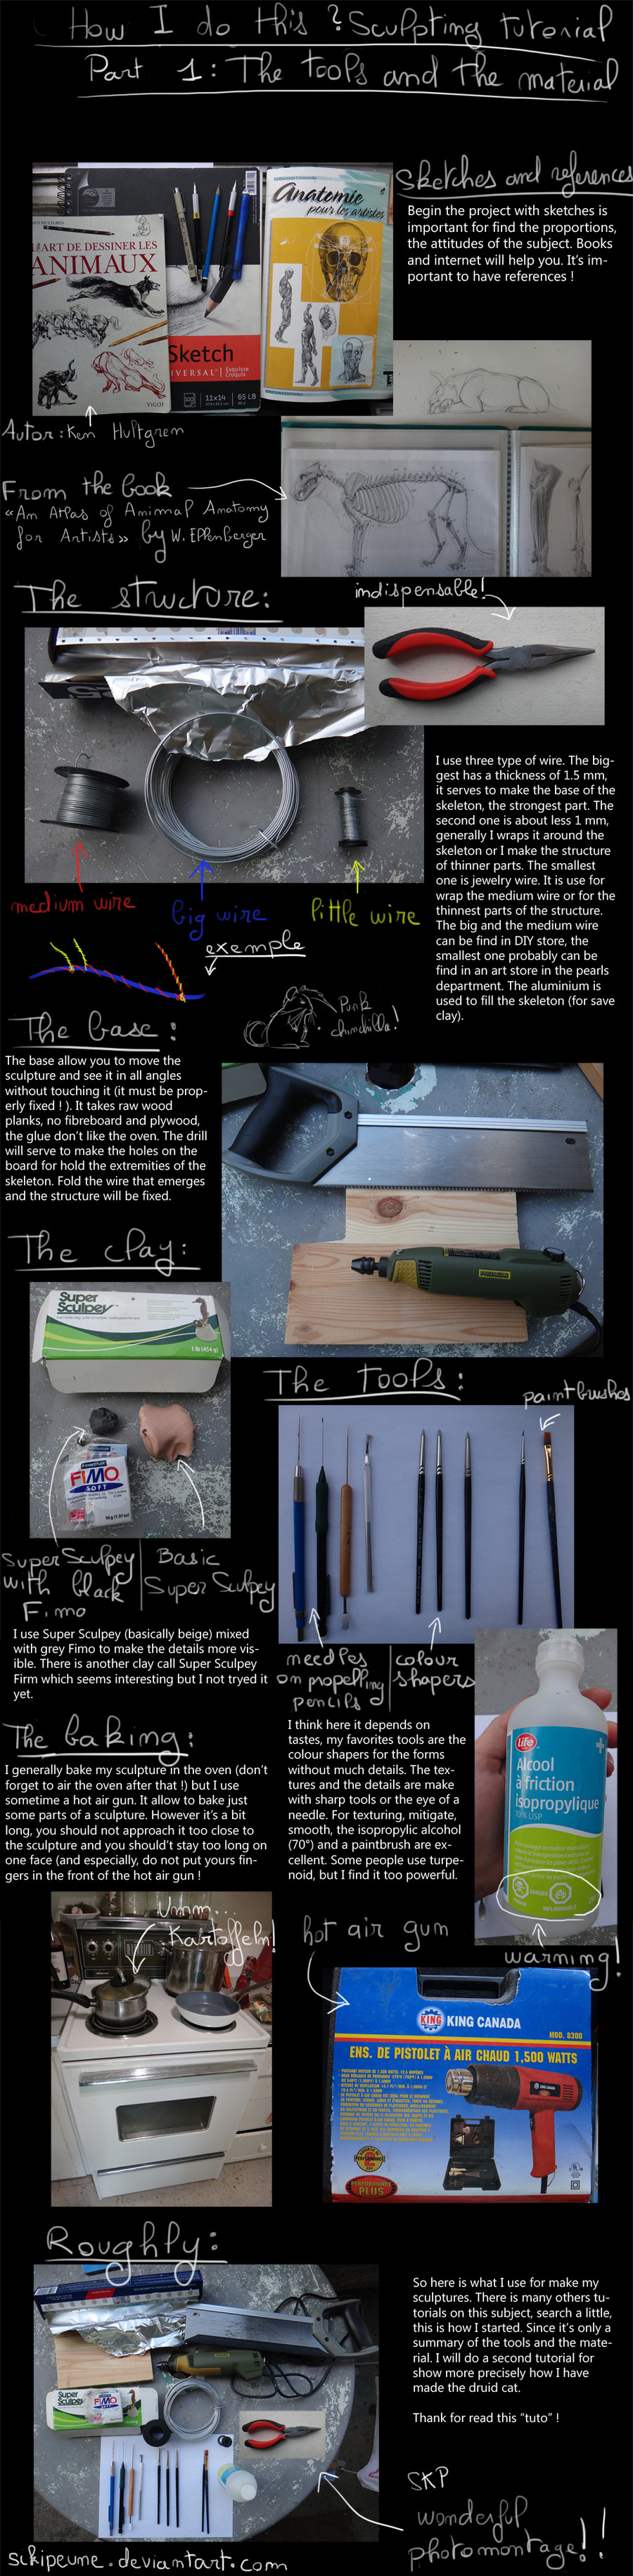
In this tutorial Ill be going over some basics of sculpting.Its huge, so its best if you download it.
Comments appreciated, painting tutorial on its way.
Pour vouz who asked for the head tutorial, please go here:
[link]
Click here [link] for the finished product!
Id LOVE to see what you created using this tutorial, so if youd like please take the time to post your creation in the comments below.
EDIT: I woke up this morning and noticed I had 300 new messages since 8 hours ago ("wtf did I not take my pills last night...?"), and first thing I see on my reply sack is "Congratz on the DD..."
I swear guys, Christmas isnt for another 4 months!
Im not quite sure how to begin to thank you all...
Related content


Comments: 397

Great work! Really helpful! 
👍: 0 ⏩: 1

Better be safe than sorry,- so just dont, even if you let it dry for ages. Using turpentine is always a bit of a shady thing to do, so thats a big no if the bottle clearly says its flammable.
Try looking in art stores, they usually sell odorless turpentine to clean your paint brushes with. Also,- dont use your best brush to do the job!
👍: 0 ⏩: 1
Thank you very much for the reply!
👍: 0 ⏩: 0

thanks this is really helpful <3
👍: 0 ⏩: 0


This just the kind of tutorial i needed, thanks  (Smile)")
👍: 0 ⏩: 1
Thats great! Looking forward to seeing more WIP pics of your sculpture!
👍: 0 ⏩: 0

This be scary. It's a good tutorial though!
👍: 0 ⏩: 1
Her eyes glow in the dark...
👍: 0 ⏩: 2

Well, then it's really scary ^^
👍: 0 ⏩: 0

Have this tutorial bookmarked and saved for when I work on my first figure!
I have to ask though, is it safe to put the wooden baseboard in the oven? Wouldn't that go poof?
👍: 0 ⏩: 1
It is safe, but the only problem is that if its in for too long, the wood might crack. (My favorite base is almost completely busted) Remember that youll be baking your sculpture around 100 C with breaks.
However, I would not advice to paint your sculpture on the same base (if you plan to bake on it later) since some paints dont go well with heat.
👍: 0 ⏩: 0

Thank you all, more to follow very soon
👍: 0 ⏩: 0

This tutorial is going to really help me!
I always wondered how sculptures could get the clay to be so smooth and now I've found a way using turenoid~! :>
I love L4D, and your Spitter looks amazingly cool.
")
👍: 0 ⏩: 0


probably one of the best tutorials out there! I'm not the greatest at sculpting yet, but this sure will help! Your other artwork is pretty amazing too!
👍: 0 ⏩: 0

Fantastic tutorial! This provided such good information for me, being a beginner with larger-scale Sculpey projects and Sculpey in general.
👍: 0 ⏩: 1
Ill be here to help if you need it
👍: 0 ⏩: 1


Very helpful, I'm sure I'll be coming back to this for help time and again. Thanks again
👍: 0 ⏩: 0

Thanks for sharing your methods, after years of threatening to sculpt I've finally ordered all the gear but have yet to start but this will certainly help
 (Wink)")
👍: 0 ⏩: 1
Be sure to give me a heads-up when you start,- Id be interested to see what you come up with! ^^
👍: 0 ⏩: 1
I certainly will, armature wire arrived today but still no sculpey, hopefully tomorrow for a weekends playing
Thanks again
👍: 0 ⏩: 0

This is a great tutorial! Definitely going into my faves. :3
👍: 0 ⏩: 0

If you want to minimize risk of overbaking or having the thinner areas go brown/crispy, try putting the sculpt in boiling hot water instead of the oven. I've had success with smaller pieces this way, just turned off the heat once the water was boiling, and suspend the piece from above (just a wire so that it can hang in the water) and in 10 minutes or so, it's hard as a rock. No overcooking. Note you'll have to take the piece off the base to do this.
👍: 0 ⏩: 1
Hey, thanks for the great tip!
Ill definitely try this in my current project (a dark elf sculpture), and Id encourage everyone else to try this too.
Also, I know its been a while, but Im almost done with the head tutorial, sorry for taking so long!
👍: 0 ⏩: 0

When you say 100-120 degrees in the oven, do you mean Fahrenheit or Celsius?
Great tutorial
👍: 0 ⏩: 1
Celsius!
After an hour or so (depending on how thick your sculpture is) you can raise the temperature up to 150-160 degrees.
Be careful though (if you're not intending to paint your sculpture) at this temperature clay burns very easily and will ruin the natural skin color!
👍: 0 ⏩: 1
Ok, thanks
And thank you for the tip/warning as well, much appreciated!
👍: 0 ⏩: 0


this is amazing! I am going to use this and I have been inspired to sculpt again....!
thank you!
👍: 0 ⏩: 0

Very cool. Can't wait to see the environment you put on the wooden base.
👍: 0 ⏩: 0

Lovely tutorial. I have one question though. You mention turpentine, but later in that paragraph it turns to turpenoid? So I was wondering (though I'm pretty sure you meant turpentine) is turpenoid ok to use? Thanks
👍: 0 ⏩: 1
Hey,
Turpenoid pretty much = turpentine.
Both are okay, just remember to let it sit for a while before baking in the oven. Happy crafting!
👍: 0 ⏩: 1
Thanks so much! I will definitely try that
👍: 0 ⏩: 0

ohhh that's very nice!
is there any chance you'll do a head tutorial too? o uo
👍: 0 ⏩: 1
A head tutorial?
Maybe, what kinda tutorial/advice are you looking for?
👍: 0 ⏩: 1
i look for everyhtig one can tell me.
if you need to make a ball and then add stuff...how to use tools to not make it seem like a 1st grader did it...how to not make it fall when you attach it to the rest....
like i said-everything.
👍: 0 ⏩: 1
Sure
Next up is the painting/base of Spitter, but after that, I will make a head tutorial.
All I can say for now, is that you should use as much wire as possible, - if there's wire sticking out of the neck of the figurine, shove it there. This will provide you with some endurance as you work on the collar technique explained in the tutorial.
As for the head itself, start big. The first head I sculpted was actually 1.5 times bigger than a real one.
👍: 0 ⏩: 1
yay i can't wait! o uo
bigger? why?
👍: 0 ⏩: 1
So that you get the anatomy down right.
Even if you can paint it or draw it, doesn't mean you'll be able to sculpt it right away. Its harder to work on details on a smaller head, so you have to know exactly what you're doing.
👍: 0 ⏩: 1
oh that makes sense o uo
thank you!
👍: 0 ⏩: 0
<= Prev |