HOME | DD
 SimonJM — Glow test 3
Published: 2013-01-03 03:10:08 +0000 UTC; Views: 918; Favourites: 9; Downloads: 20
Redirect to original
Description
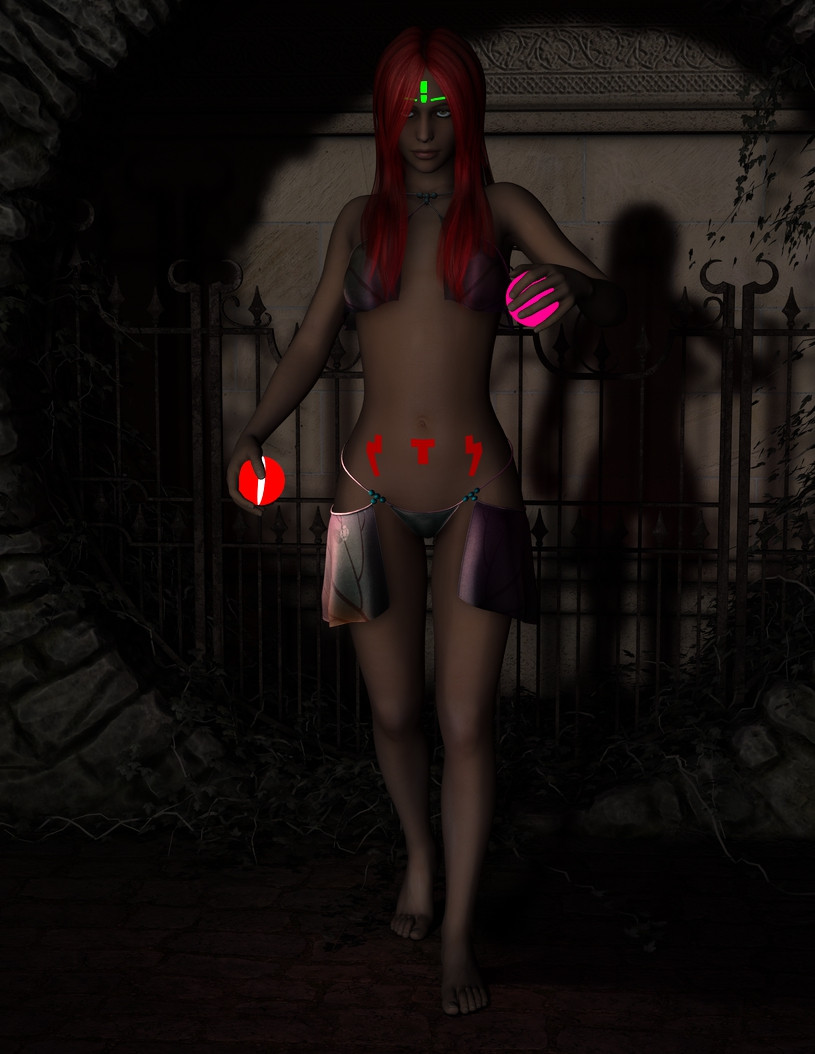
DS4P, no postwork.A bit more testing with the Polygon Group Editor - this time giving the Genesis figure two new MAT zones which I have used to assign UberArea light to, giving each a seperate colour.
Again, not the greatest of demos as the light produced doesn't really do a lot.
======== The tutorial part ==========
With thanks to ItiseyeMeeSzark [link] for the basic information on this process and the inspiration to try it out and then write this!
You can take an existing item (figure, prop, primitive) and using the polygons that make up the mesh of the item divide them up into new surfaces/MAT zones. With primitives you will get better 'resolution' the bigger you make the 'sides', 'segments', 'divisions'.
You will be using the Polygon Group Editor tool, which you can select in a variety of ways: Tools> Polygon Group Editor, shortcut keys of Alt-Shift-G, or you may have it in the toolbar (the icon looks like grey square with a white square in top left and a white band-aid(?) in center/top right).
Unlike some of the tools you will not see a change in the cursor from the standard pointer.
When you click on an item, the polygon so selected will be highlighted (default is with a checkered yellow pattern - you might be able to change this, but I am not aware of how). Clicking and dragging the mouse pointer will select a 'chain' of polygons, whilst ctrl-clicking will add polygons in a 'multiple select' mode. There does not seem to be a toggle feature, so once selected a polygon remains selected, so be careful! Ctrl-Z (Undo) works so if you add a polygon at a time you can undo, or just 'drop' the last range selected.
You can, via the right-click menu select alternate methods of selection: Polygon Selection> Mode> The default is Drag, but Lasso and Rectangle are also available
It is easier to deal with an item that is in isolation - so you can rotate the camera around the item to get to all faces/angles to select all the polygons you want.
Once you have the polygons selected, right-click on the item and from the menu select: Polygon Assignment> Create Surface from Selected ... When prompted give this group a name to identify it with.
You now have an item with an extra MAT zone to which you can do things.
If you wish, you can add extra polygons to this group by selecting the additional ploygins and selecting Polygon Assignment> Assign To Surface> from the right-click menu and selecting the desired surface from the supplied list.
In addition, with your polygons selected (and yet to eb assigned to a surface) you can use Grow and Shrink Selection (right-click, Polygon Selection> ..., keyborad shortcuts Ctrl-+, Ctrl--
Now, in the usual Surfaces tab - REMEMBER TO CHANGE TOOL BACK TO SURFACE SELECTION!!!! you have one, or more, additional MAT zones to which you can do what you wish!
Have fun!
Related content


Comments: 13

That's really clever! So are the symbols on her stomach and forehead actually separate to the rest of her textures?
👍: 0 ⏩: 1

The symbols are part of the overall Genesis mesh, but have been given a shape and a name so that they can be accessed separately from the rest of the textures (much like you can do different things to 1_SkinFace and 1_Nostril of a normal figure)
👍: 0 ⏩: 1
That's pretty cool! Is there a tutorial on how to do that?
👍: 0 ⏩: 1
Um ...? Apart from what is in the description?
 (Smile)")
👍: 0 ⏩: 1
Hahah argh, maybe I need to read more about meshes etc then? lol
👍: 0 ⏩: 1
Just practise on a dAZ primitive - a plane or cylinder to start with (with at least 5 'divisions' when you creat it); just to see how the tool works and what you will see on screen. Once you do that you'll feel more confident dealing with more complex props and figures.
👍: 0 ⏩: 1
Hmmm sounds like a plan! Thanks
")
👍: 0 ⏩: 0

It is a pretty fun thing, and a lot of potential!
👍: 0 ⏩: 1

Wow, I wanna give this a try. THis opens up new possibilities... especially for old but wonderful weapon models I own. because they only hae a single mat zone, I cannot hader them the way I want: If I shader it looking like chrome, the leather parts loook like that as well and if I shader them looking like leather, I have a leatherlike blade. But with this tool, I might finally be able to work on that and use those fantastic weapons again!
Thank you!
👍: 0 ⏩: 1
Absolute pleasure - and it is pretty simple to do for such a potentially usefil thing.
I really should say that it cam to my attention via a post on the DAZ forums by ItiseyeMeeSzark [link]
👍: 0 ⏩: 1
I will for sure try it out! You have no idea how many times I was wishing for somthing like that...
👍: 0 ⏩: 0