HOME | DD
 Soriano-Chan — How to Draw: Quick Bust Shading Guide+commentary
#phicen #tutorial #tutoriales #tutorials #tutorialskin #tutorialmanga #tutorialphotoshop #tutorialsresources #tutorialanime #tutorialhow #tutorialdigitalart #tutorialpainting #tutorialhowto #tutorialarticle #tutorialstepbystep #kritadigitalpainting
Published: 2020-12-25 22:20:46 +0000 UTC; Views: 10254; Favourites: 108; Downloads: 0
Redirect to original
Description
Want more tutorials like this? Please join us at:aminoapps.com/c/HowToDraw150
Hello everyone, I hope y'all are having a nice holiday.
FUN FACT: I got banned from a group for posting this tutorial xD Here is the "uncensored" version, even though I did NOT drew the nipples or anything of that nature: Lightrendstudyv2
Anyways, here, I will be sharing a shading tutorial. This tutorial
could be good to help you shade your characters or portraits.
In this specific tutorial I used a basic lightning set up. Most
of the figure is illuminated. This kind of lightning is popular
for portrait paintings. I will make more lightning set ups in the
future. So, lets get started!
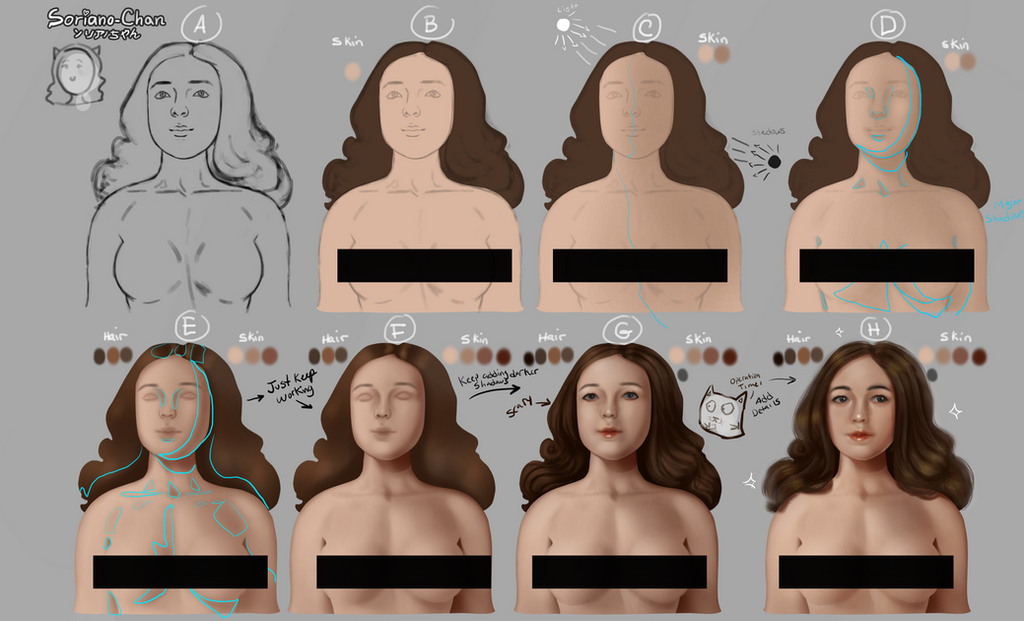
A. In figure A, we can see our lineart. You can be as rough or
clean as you want. It doesn't really matters. I tend to be rough
because I really don't use my lineart other than as a guide.
B. Here, we have our figured colored with basic flat colors. I suggest
you pick colors that are not too bright nor too dark for your base colors.
C. With a round standard airbrush, I quickly shaded were all the shadows
will going to be. The light is coming from the left (my left/ her right side), so the
shadows will be on the opposite side.
D. In this step, I started painting my big shadows, for instance, the drop
shadow from her head, her breasts and her arms. This is important because
this will add more volume to your painting. The reason for this is that
each element is casting a shadow over one another. The closer the objects
to each other, the stronger, darker and sharper the shadow will be.
E. Here, I kept adding some additional details such as the details from the neck,collar bones,
shoulders and chest. I also kept darkening the shadows from her armpits, neck and right side of her
face (my right). You don't have to be too detailed, so this is pretty much optional.
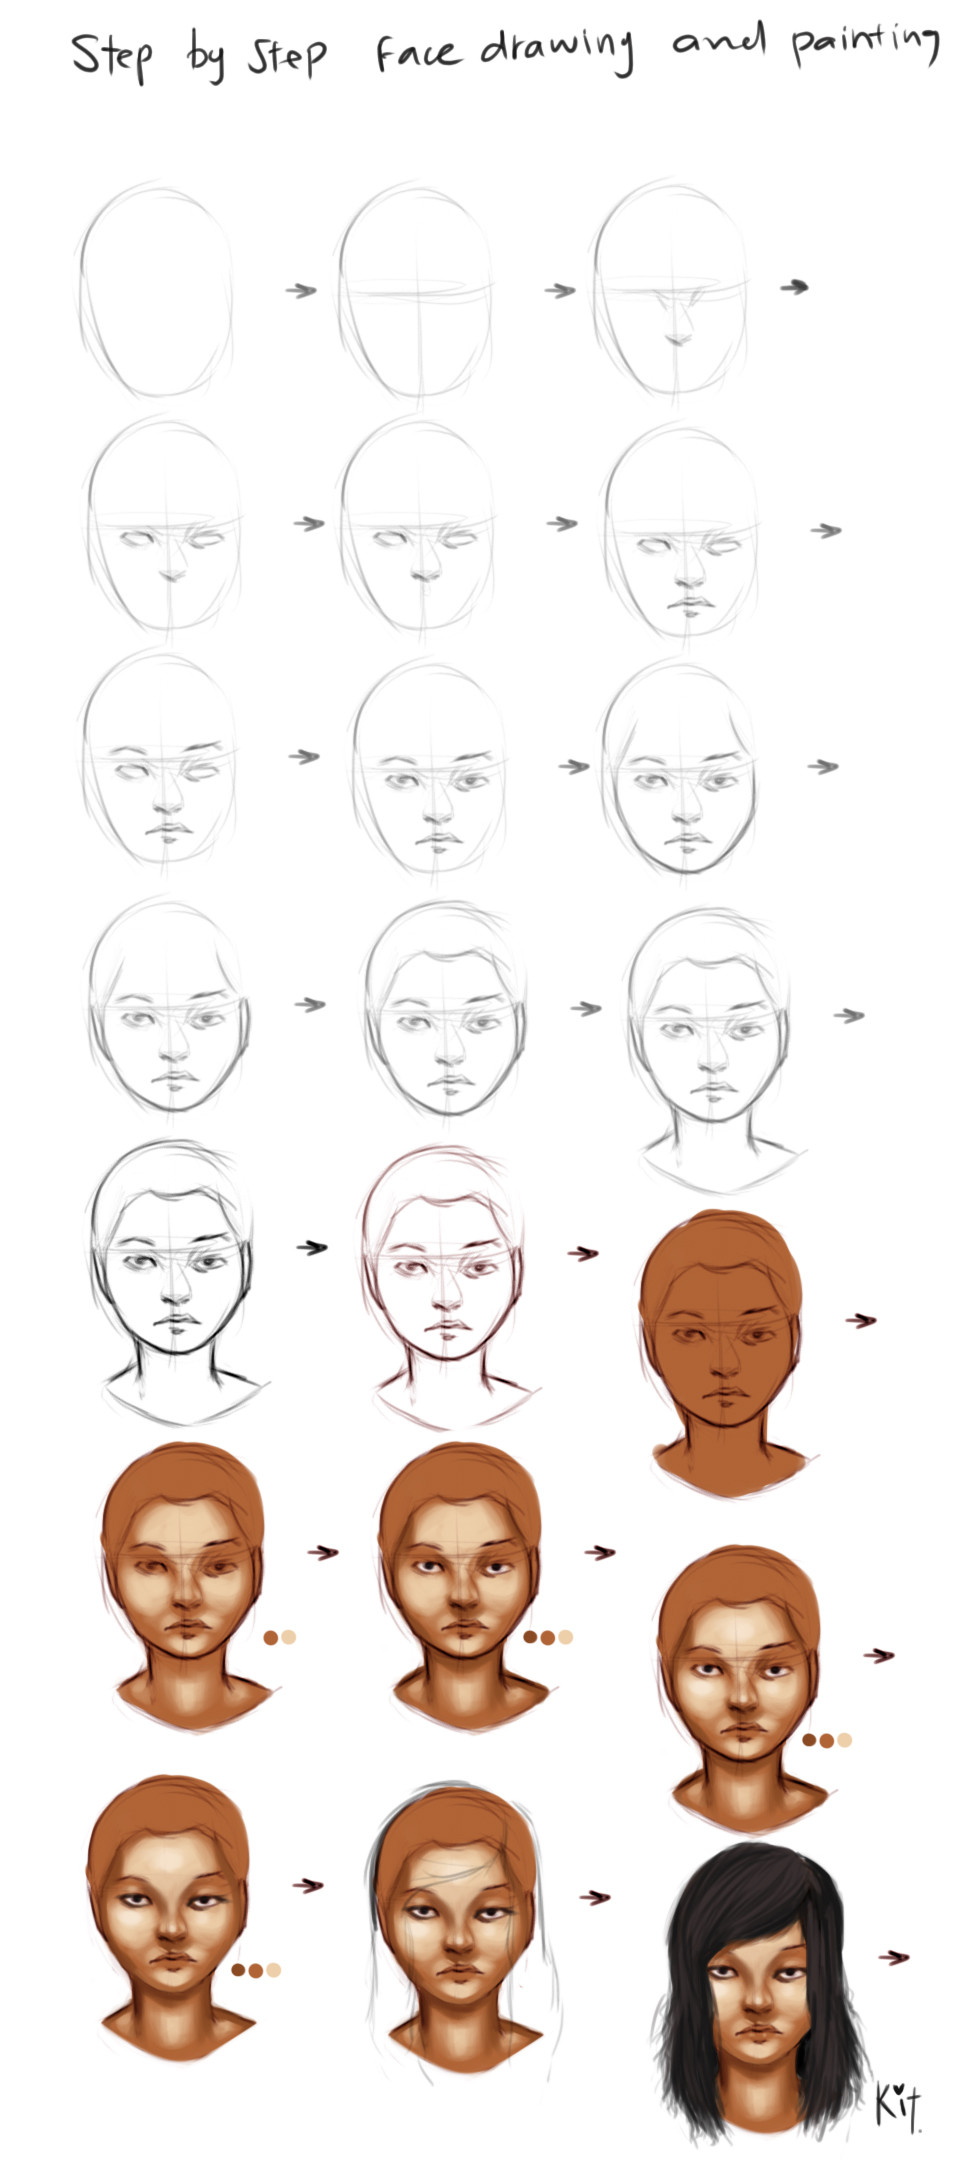
F. In this figure, I kept working with darkening the shadows above mentioned and started working on her hair and face. Faces are another complex subject that I can cover in another tutorial. But, if you are having trouble shading the face, I will suggest you to use references. As many as you need. Refereces are your best friends. Use them, please.
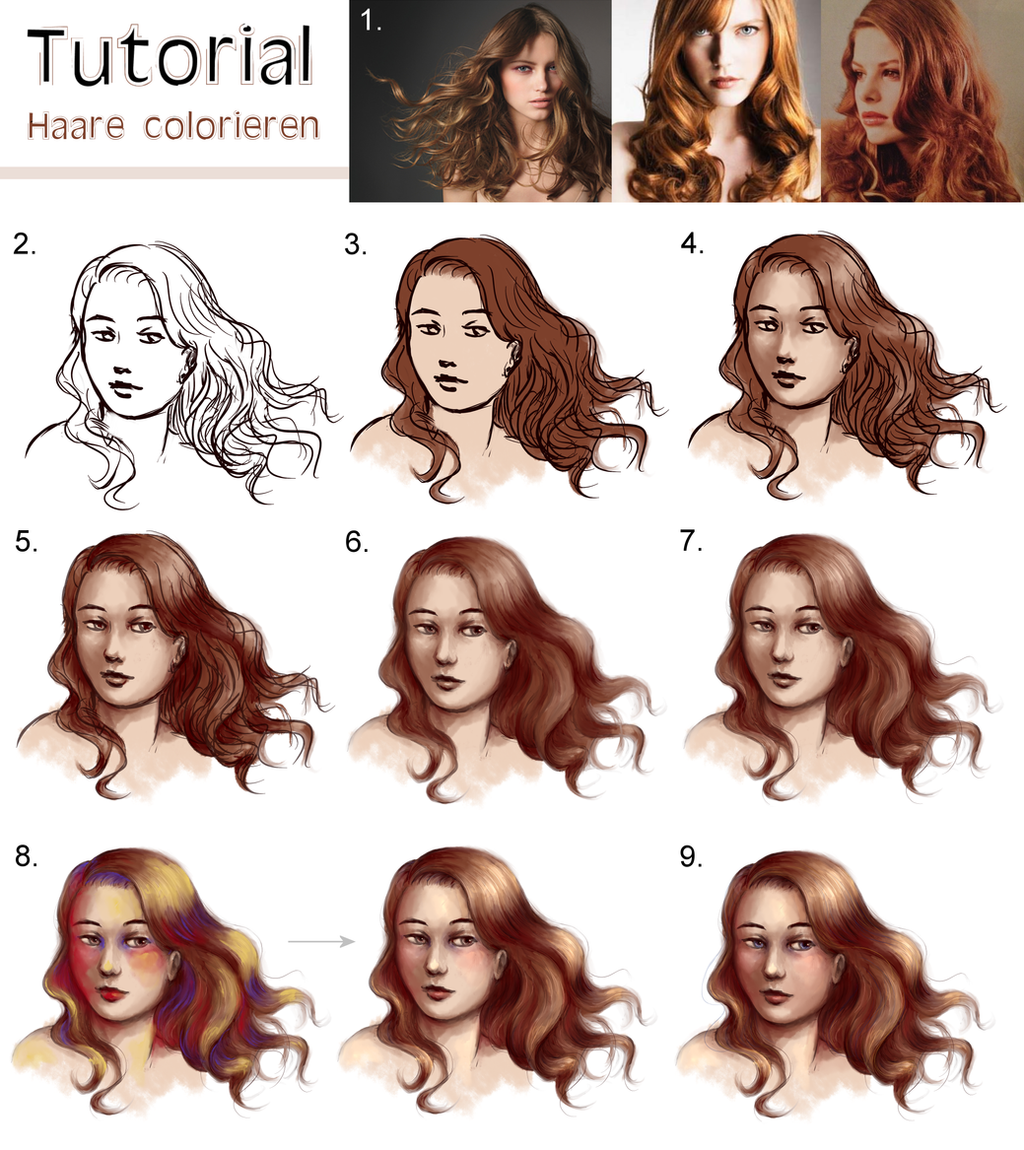
G. In this step, I added more details to the hair. Hair is another subject that is a bit complicated to explain in a few words. But a good rule of thumbs is to shade it using the same process you shaded the body. The light affects the hair kinda the same, but if you want to paint a bit more realistically, you'll have to learn how to paint the properties that makes hair look like hair.
H. In this step, I used a multiply layer and an addition/color dodge layer. With the multiply layer, I darken all the shadows that I painted. I chose the darkest color in my color palette (already provided in the picture) and I softly passed the airbrush all over her left side (my right). In the color dodge/addition layer, I picked the lightest color and did the same as I did with the darkest color. After that, I noticed that her face was wonky and...dead, so, with the select tool, I ajusted the anatomy and moved her features around. After that, I added highlights on her bottom and upper lip, tip of her nose and around the eye tearducts.
And here you have it! I hope this tutorial helps in anyway.
Related content


Comments: 6

👍: 0 ⏩: 1

👍: 1 ⏩: 1

👍: 0 ⏩: 0

👍: 1 ⏩: 1
👍: 0 ⏩: 0