HOME | DD
 Terreflare — The Easy Maille Inlay Pattern

Published: 2013-02-11 05:30:59 +0000 UTC; Views: 3394; Favourites: 4; Downloads: 0
Redirect to original
Description
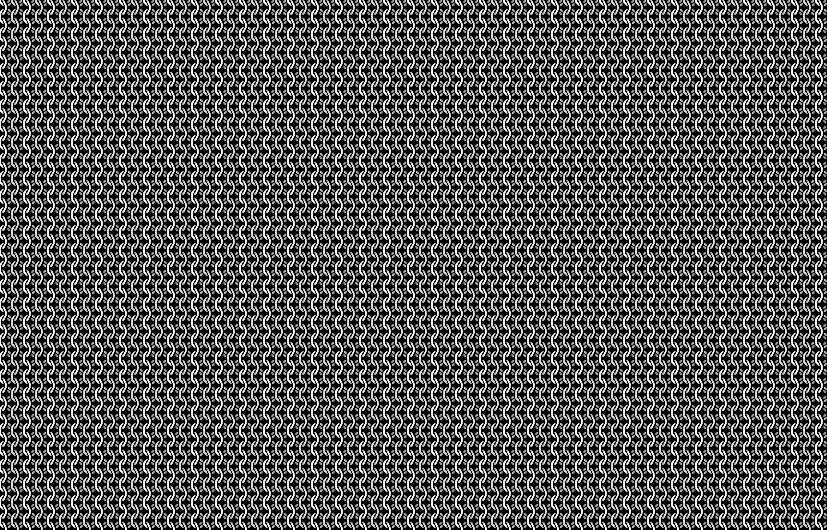
Ever wanted to try designing your own inlay? Ever been designing a 4-in-1 chainmaille inlay and wished there was an easier way to color each ring? Well, this inlay pattern should solve all your problems! It has been designed so that now it simply takes one click to color each ring and still displays a very realistic view of what your creations may look like! This has been accomplished using layers in a PSD file that can be used in your favorite graphic editors such as Photoshop or free alternatives such as Gimp.________________________________________________________
Download the PSD File here: sta.sh/download/63405103888409…
or here if that link fails: sta.sh/068r30xu77g
(Click the download button to the right)
The image you see above is NOT the pattern, just a JEPG preview of it.
________________________________________________________
Instructions for use:
1. Open the file in your preferred art program.
2. Select the layer named "Color This Layer!" You will not need to use the top layers.
3. Select the paint bucket/fill tool and a color you wish to use.
4. Click on any white space that is part of a ring, or in the black center of that ring to color it the selected color.
(NOTE: Default Photoshop users may notice the color bleeding from each ring onto ones around it. To prevent this turn off (uncheck) the anti-alias option from the bucket tool's properties and it should then only color the proper rings.)
5. You may wish to turn on the "Ring Shading" layer before starting or after completing the inlay pattern if you wish to add more realism to your pattern and get an even better idea what it should look like with real rings. This layer is off by default because it may make the inlay a little harder to work on or read visually if you are actively using the pattern to build the inlay. This is an optional layer I have just created while typing out this description.


Tips:
1.Save this base pattern somewhere, and make a copy before you start coloring so you do not accidentally save over it and need to download the file again later.
2. The aspect ratio of the rings you use may cause horizontal stretch or shrinkage in how the inlay will appear with real rings. For example the 16 gauge 1/4" rings I often use in inlays tends to shrink the pattern so that the final product appears less wide then the pattern. Knowing your ring aspect ratio or trial and error may be required to tell if your pattern will need adjustment and you can easily compensate for stretch and shrink effects by stretching or shrinking the base image you use to make the pattern.
3. If you color two rings next to each other the same shade and later try to change one it will then fill both of them. You can solve this issue a variety of ways. Perhaps the simplest way is to use the fill tool to color the three spots on the "Do Not Touch" layer and remember to color all three parts of each ring and that further changes must be made the same way on that layer. If you don't want to do that there are a few more alternatives. You could hand color the ring pixel by pixel, use the magic/fuzzy select tool to select the parts of that ring from the "Do Not Touch" layer and then re-select the color layer and fill the selected ring parts, or perhaps the fastest way is that you could have duplicated the "Color This Layer!" layer before coloring anything and use the magic/fuzzy select tool to select the ring you messed up and re-select the "Color This Layer!" and change the ring now that it is completely selected. (Photoshop users remember the magic select tool may also need to have anti-alias option turned off to work properly)
4. If more then one ring is colored when you click one be sure that you have turned off any anti-alias features and coloring on the right layer. If it continues then you may need to reduce the tolerance on your bucket/fill tool, it should still work even at 0 tolerance and if tolerance is too high it will fill the white and darker white rings that are touching filling entire columns or the entire image at once.
5. Consider using the select by color tool to select the two shades of white and change the background color after the entire inlay pattern is complete. It is great for easily changing the entire background color to the shade you want without coloring each ring.
__________________________________________________________
I hope you will find this resource useful in creating wonderful patterns! Feel free to spread links to this page, but please do not re-upload the pattern on other sites or claim ownership or authorship.
Commissions:
As a side note I am available for inlay commissions and can create patterns or turn patterns you have created into actual maille creations. All metalwork commissions must be made using real cash and may require an up front deposit on material costs (to insure I am not stuck with a bill if you later back out) with payment (negotiable based on complexity, time involved, and the number of outstanding orders) due upon completion. (Check www.theringlord.com for ring pricing and color availability as there are many sizes and colors to choose and ring colors and costs are solely dependent on the materials you want used) If you are interested feel free to send me a note here and ask questions.
I recommend www.theringlord.com for anyone interested in making their own inlays. There may be other great websites I have not seen, but I do know this site has a big selection of colored rings for inlays and the anodized aluminum is a good alloy that greatly surpasses the quality of some far more expensive rings I have tried from craft stores. If you know any other great ring selling sites I would be glad to list more that may be worth checking out.
Please notify me if the link to the PSD file does not work or if you have any questions about using this resource or your art program and I will try to help as much as possible!
Related content
Comments: 10

Looks like they altered the download addresses Stash uses and it messed up my first link. The second one still worked to direct people to the stash page with the file and download option, but I updated the description with a more recent direct link that should hopefully start the download until they mess it up again 
👍: 0 ⏩: 0

Oh noes! DA must have broken my link!! 

Ok, it should be fixed now with two updated links that are working for me at the moment so hopefully you and others can try it out now!
👍: 0 ⏩: 0

Nicely done. Probably a bit too advanced for the readers I was targeting.
👍: 0 ⏩: 0

PLEASE DO MORE PATTERNS!! i love patterns. you are awesome at them! 
👍: 0 ⏩: 1

Chainmaille patterns or those little color animation patterns?
This one is just a pattern for making patterns, I made it so new inlay pattern making would be faster and easier and it seemed a shame not to share it with others.
👍: 0 ⏩: 1

oh... :/ i just like patterns
👍: 0 ⏩: 1

I like chocolate.

👍: 0 ⏩: 1

omg so random.. but funny!
👍: 0 ⏩: 0


