HOME | DD
 TrapperMitch — Slimline Bass

Published: 2009-08-27 02:01:16 +0000 UTC; Views: 1760; Favourites: 17; Downloads: 1
Redirect to original
Description
I customized another bass.This time I went all out as I want this one to be more...legit. So I built it from the ground up.
Started out by setting some ground rules...
Goals:
~ Solid body (no cut down standard body then screw on shit made of different wood)
~ Proper finish (half-assed sanding and spray paint will play no part this time)
~ Reverse sunburst: Solid white center with increasingly transparent white edges
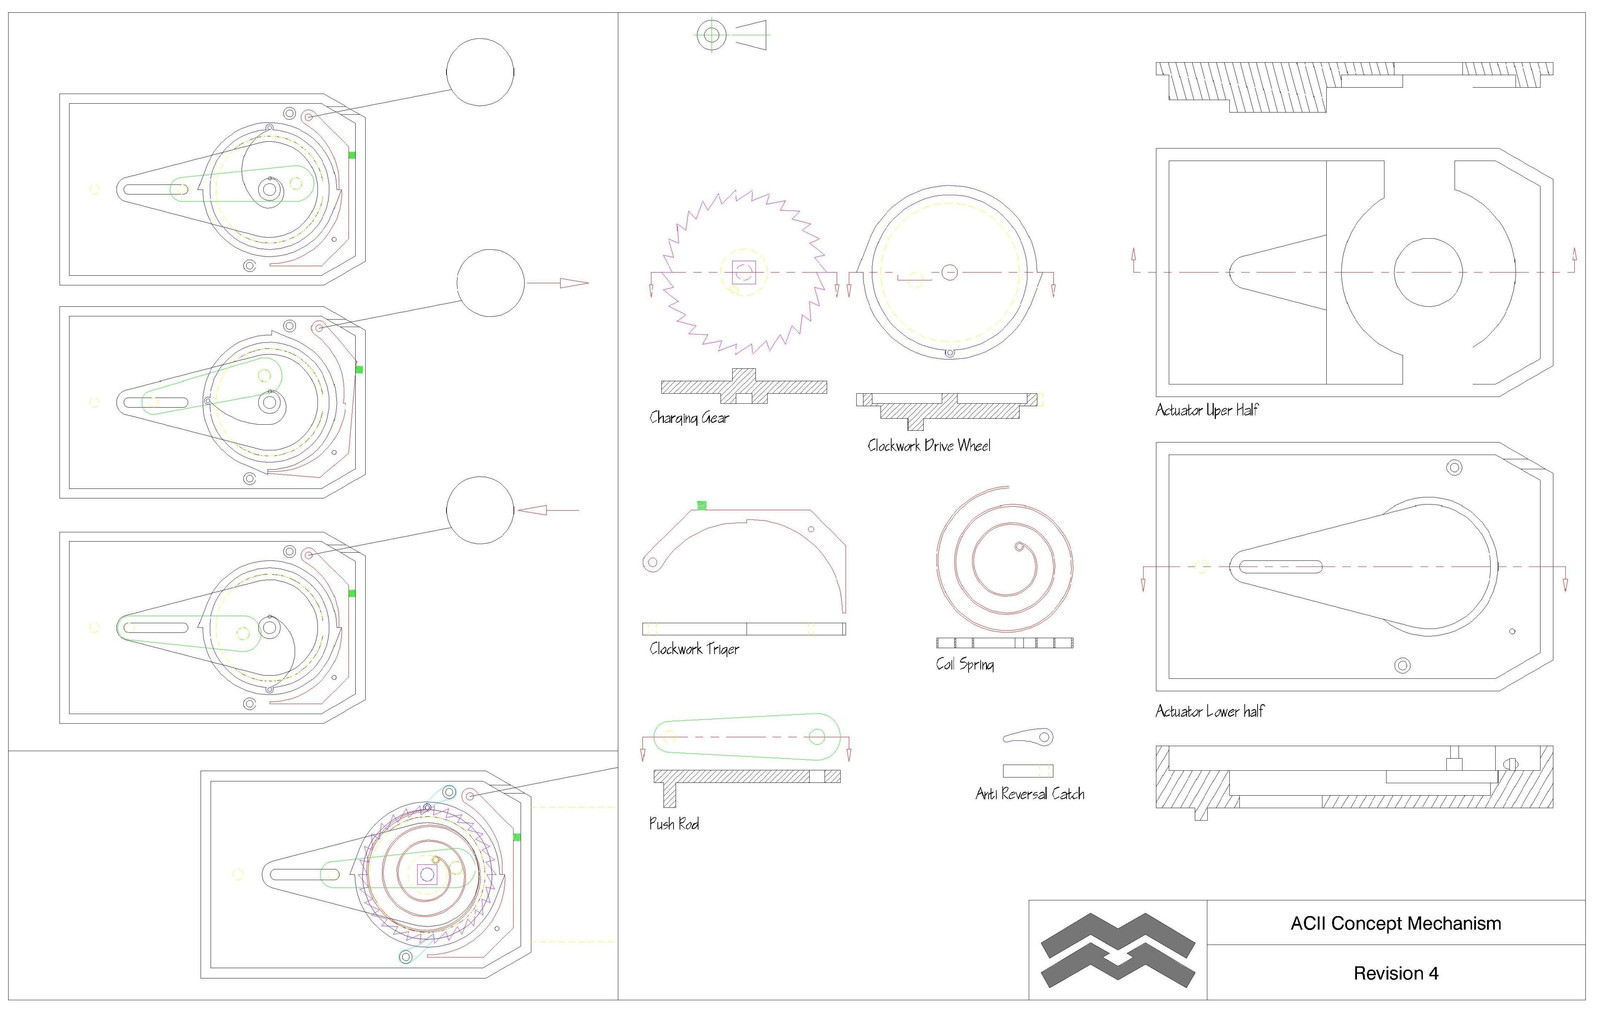
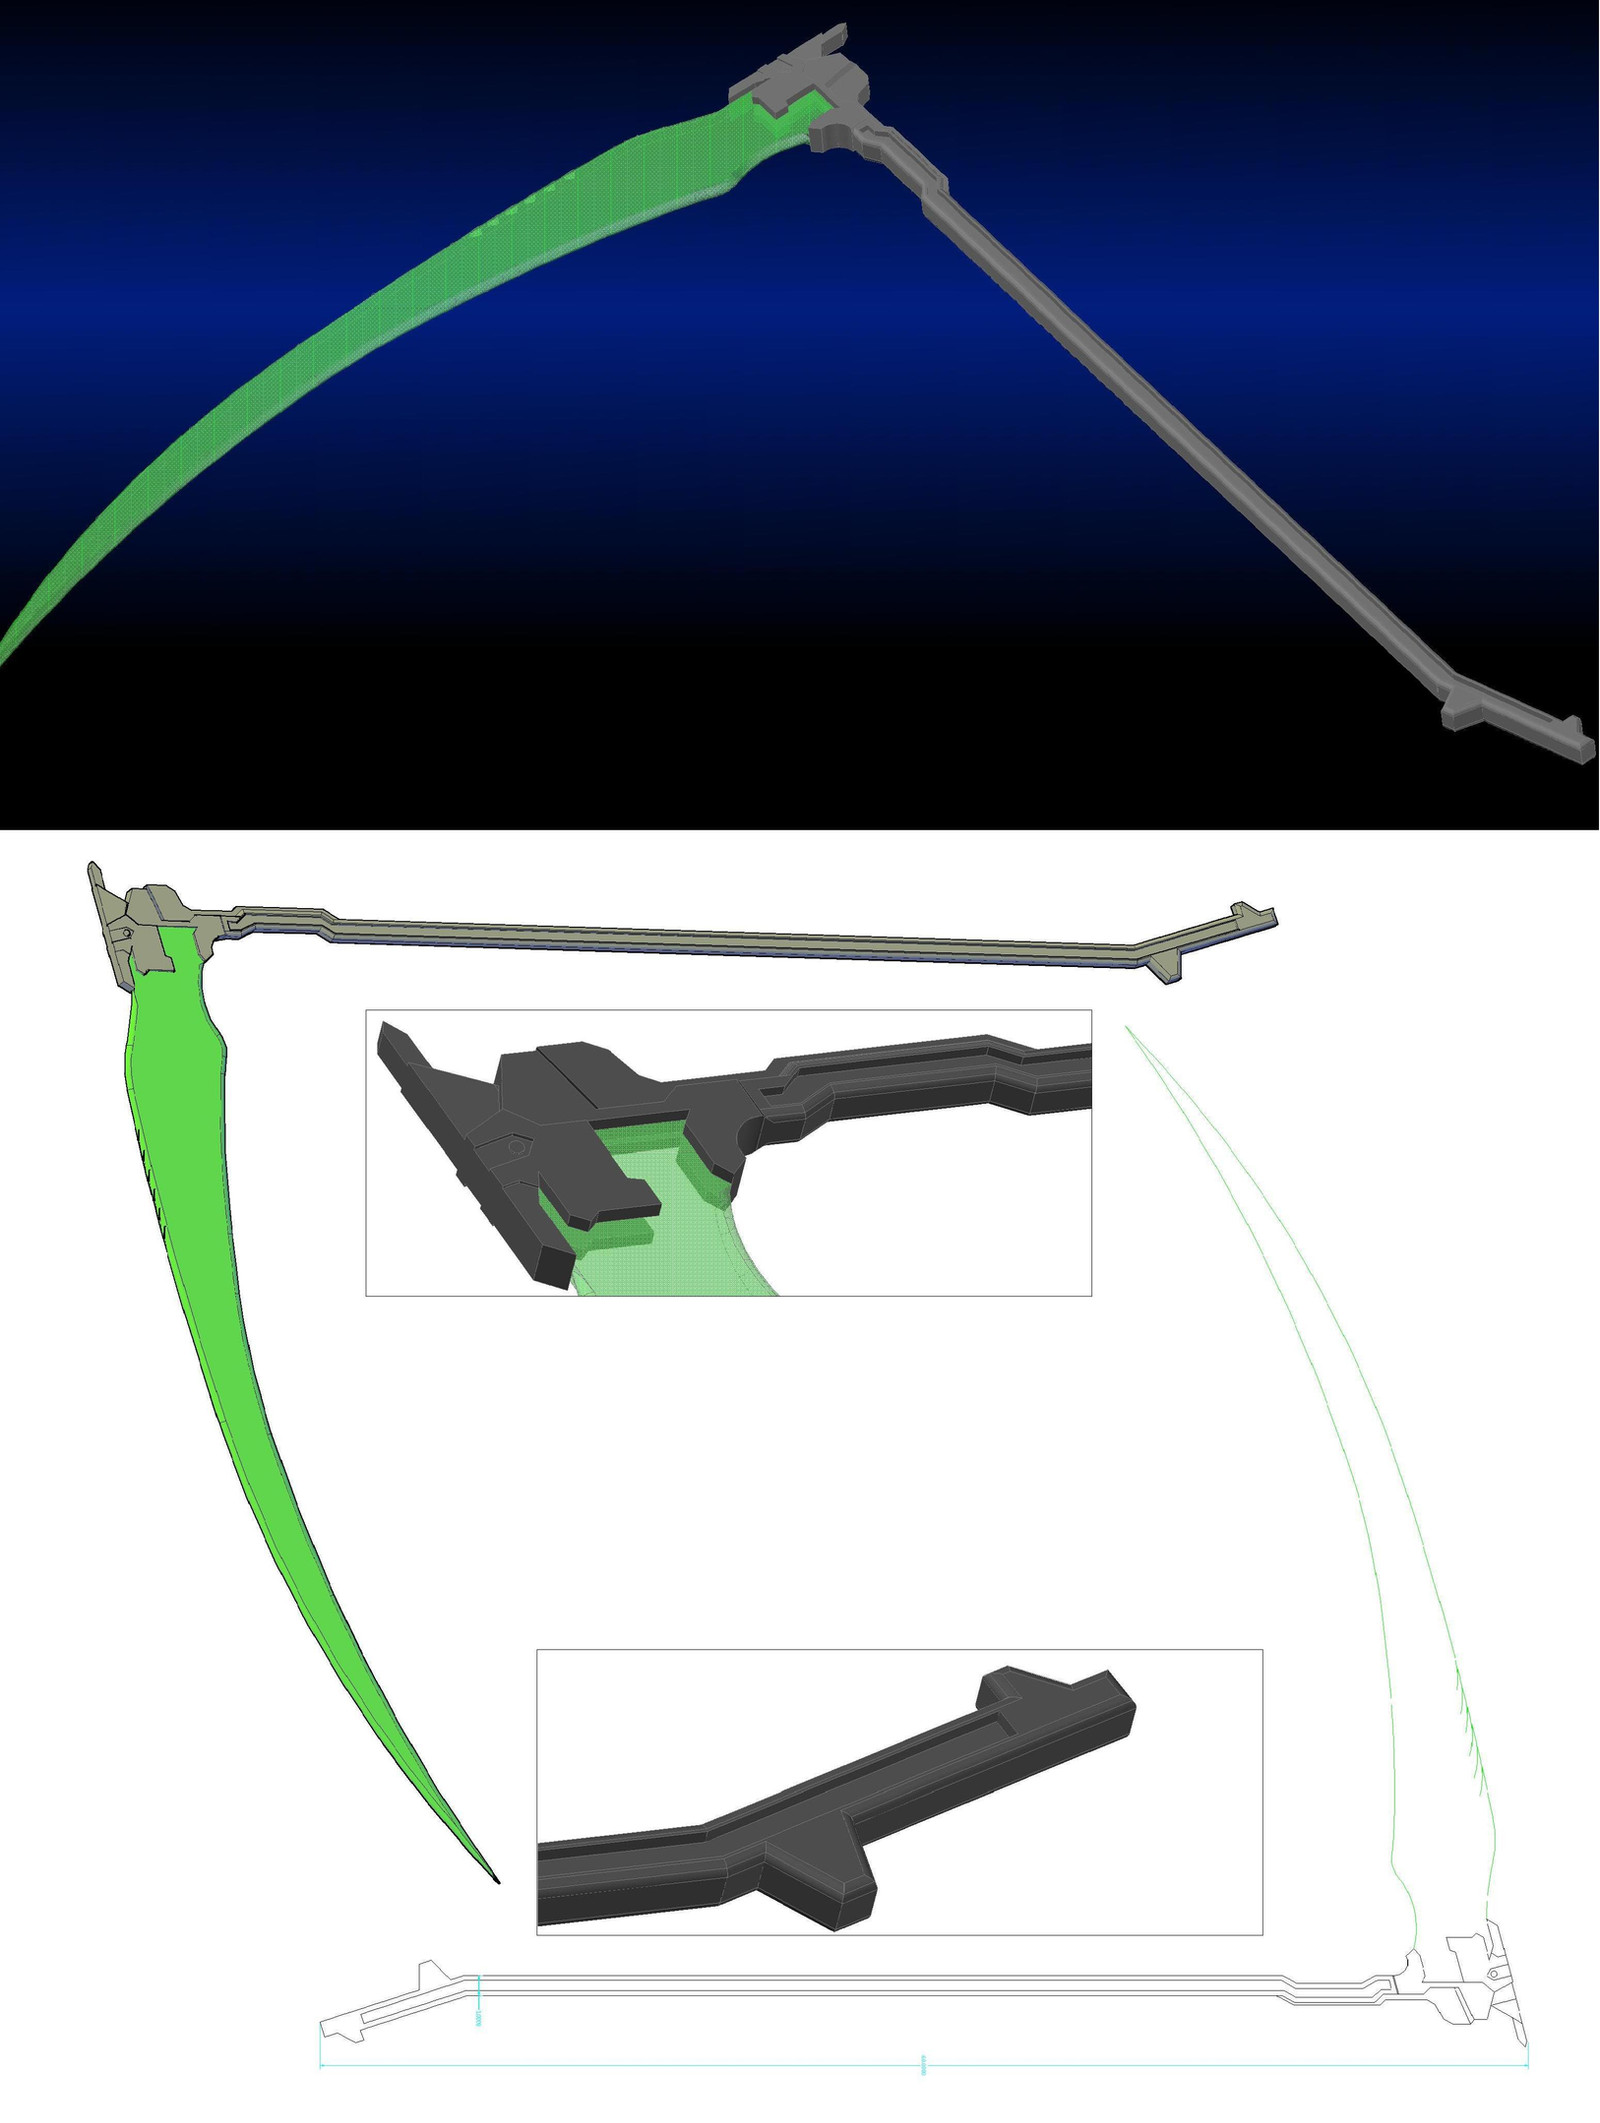
~ Sustain/Handle arm (given only Auerswald Guitars knows the science behind a functional sustain arm, mines for a different perpose)
~ Compact (compared to Scythe Bass...Easy)
~ Allows Conventional playing methods (Shouldn't have to teach people how to play seated)
With that in mind...
I shopped for my hardware. Pickups, a neck, tuners, bridge, controls...the works. Thank you eBay.
I found myself a nice piece of Alder, common wood Most electric guitars and basses are made of, at the nearest legit lumber yard (MacBeth Hardwood in SF...well worth the drive). Once I had all my dimensions set out from the parts that arived I started cutting my single-piece Solid body. My last custom was a two parter comprised of a cut down junk ply body and KNOTTY PINE from Ace...worst combo ever but it was cheep and took a lot of the router and alignment work out of the project.
Following that I set the Neck. Once I got it to lay flush I just had to drill holes to match up the ones in the neck and neckplate cover...didn't work out so well...misalligned. Drilled new ones 1/4" below thru the plate, body, and into the neck in one clamping. Perfect match, much better.
Getting that all anchored together, I threaded some fishing line from the neck tuner on the G side down thru the bridge, back thru the bridge one the E side and back up to the E tuner. Works nicely to position the bridge in the right position (that being a 34" scale length and strings centered on the neck).
With the fishing line in place seemed the right time to position the pickup slots. Simple outline of the PUps themselves spaced according to measurements taken from a standard PJ bass at the local music store made quick work of that.
Before any routing got started, wanted to work on the control knob slots and cavity first. Spade drill bits save the day! I figured I'd have the controls recessed into the body itself with a relief hole drilled perpendicular to the axis of the knob to allow manipulation (Kinda wish I drilled these before I cut out the body shape but a clamped in place piece of scrap solved the issue). With the receptacles drilled to a nice depth the Cavity was ready to be routed followed by the Pickup slots and lastly a nice 1/2" round over all edges.
Control cavity cover was fabricated from a piece of clear acrylic sheet from the local Ace. A matching seat routed the same as the thickness finished off that (PRO TIP: leave the protective plastic on both sides till done painting the guitar).
Off to painting there after a nice fine sanding. I didn't use a primer as I wanted some of the grain to show threw the lighter painted areas as a kind of reverse white Sunburst...didn't work out but I kept a patch on the back where I had stained a stripe mostly transparent and spray to cover the rest. dozens of coats of clear Gloss Acrylic finish topped that.
Disaster! Painting hook sliped, Body fell on the concrete...sanded out the poc marks and repainted...stripe visiblily greatly diminished due to absent mindedness.
Headstock got a paint treatment too. Aswell as a transparency printed logo set under the gloss finish.
All nice and dry, peeled off the control cover plastic (nice and clear, not a trace of paint) and started assembly. White pickups and gold hardware everywhere!
I need to practice soldering more but I finished it off by connecting all the electrical and giving it a tune and a slap.
Strap has this nifty feature where the tied part can slide around a bit so to allow the traditional strap positioning or one that gives it slimmer more upright bass feel.
Still kinda mad about the paint job...it's the only part I feel needs to be redone. Properly.
Related content


Comments: 14

Is there a special name for this kind of design?
👍: 0 ⏩: 1

Guitar with 'Sustain bow'. More often you'll see guitars with this feature. Auerswald instruments seems to be the leading authority, having built some of the first versions and having the most models that I've been able to find. [link]
👍: 0 ⏩: 0

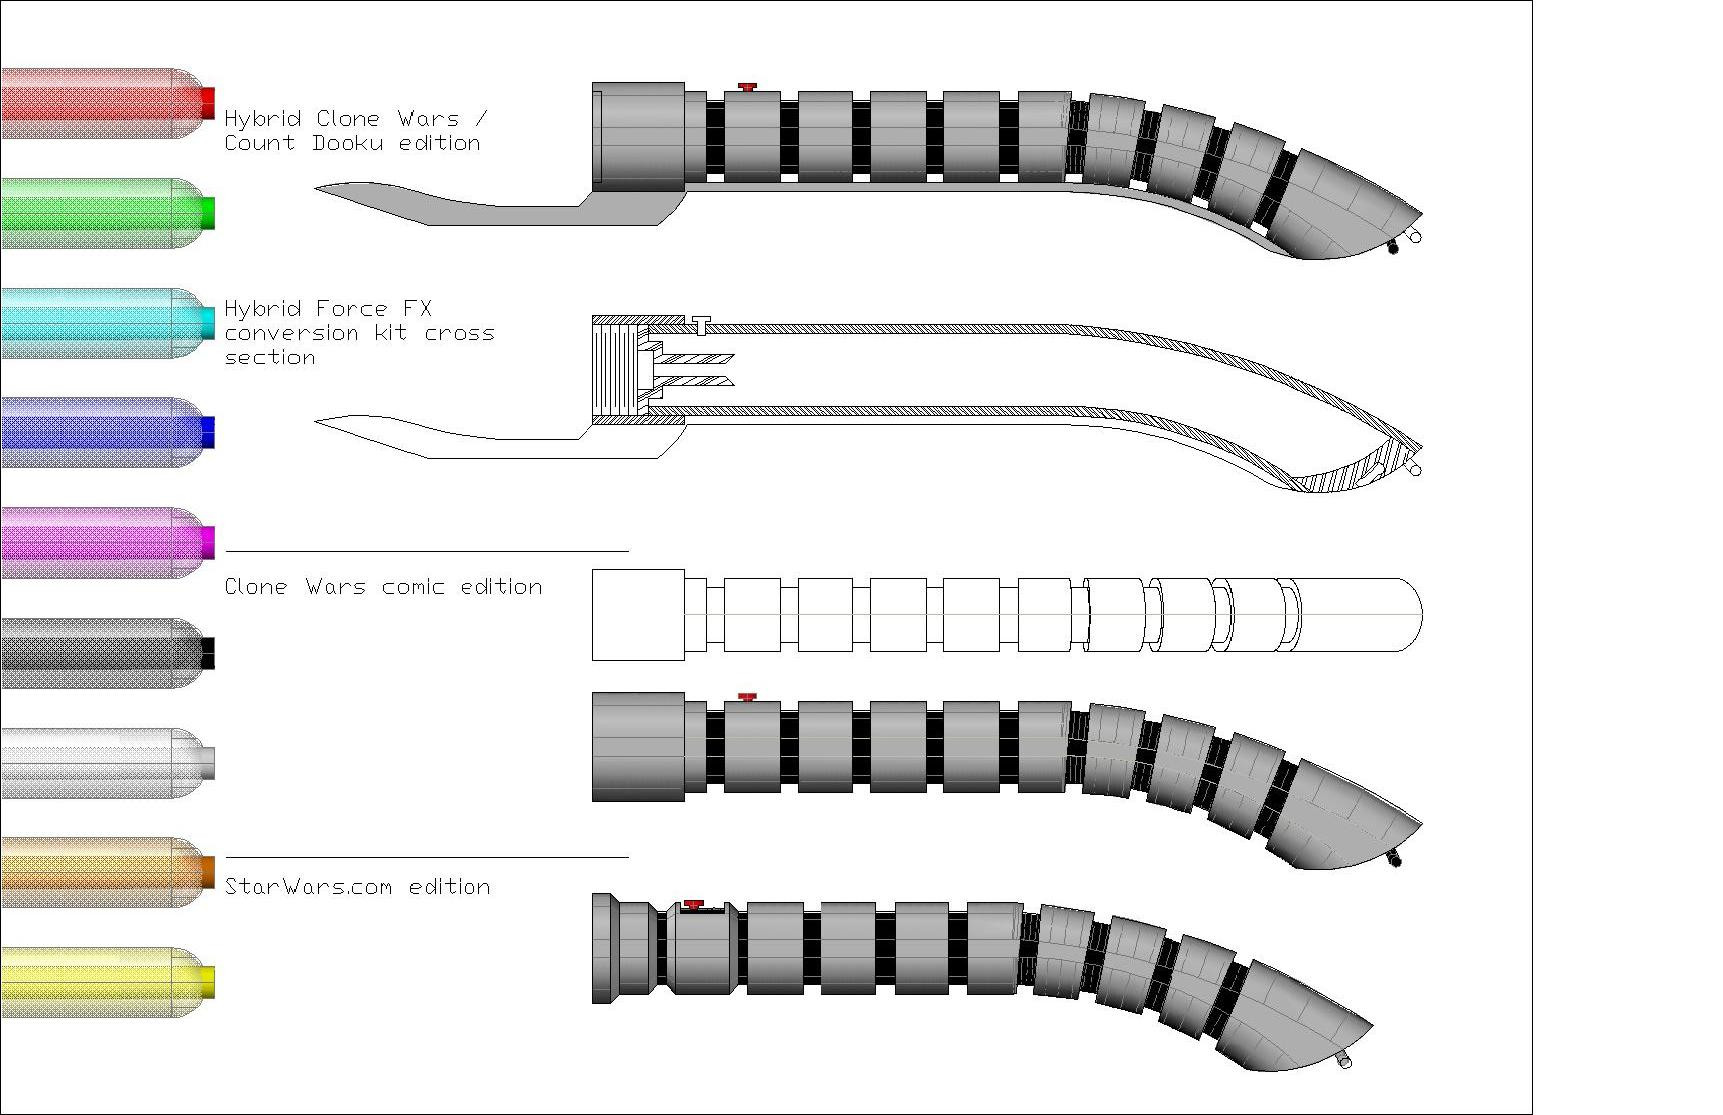
Looks like the ones Yoshimitsu have on his back in Tekken 6 if you costumize him to cyber-yoshimitsu...
")
👍: 0 ⏩: 1
Would it be possible for you to help me find a picture of this cyber-yoshimitsu. My searches yield no images and no one I know has that game.
👍: 0 ⏩: 1
[link]
on minute 1:24 on his back...you can hardly see it...its black...")
👍: 0 ⏩: 1
 (Wink)")


NICE verry unique honestly ive never seen one like this
👍: 0 ⏩: 0

topnotch my man! i especially like the ground rules that you made for yourself.
👍: 0 ⏩: 1
Thank you sir! Also, they double as a nifty means of measuring success. Whether you think about them activly or not, it turns out they're a part of every project.
👍: 0 ⏩: 0


Just so you know, I know next to nothing about guitar, bass or otherwise, construction, so take this advice as it is.
If you going for asthetics, try to hide the controls, unless you can add them in such a way as to be asthetically pleasing. But thats just my 2 cents worth. I don't know what you're trying to get as an end result in terms of appearence, but if you were trying to give it a nice stained finish instead of colored laquer, I just think it would look better is all. But then again, I'm just one of those guys who likes natural wood finishes. And again, I know nothing about guitar design.
👍: 0 ⏩: 1
Thanks for the input! I agree, natural wood tones rule.
👍: 0 ⏩: 0