HOME | DD
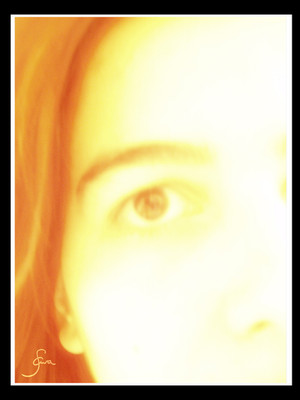
 wala — My First PHOTOSHOP Eye

Published: 2005-12-19 11:10:07 +0000 UTC; Views: 26356; Favourites: 88; Downloads: 4199
Redirect to original
Description
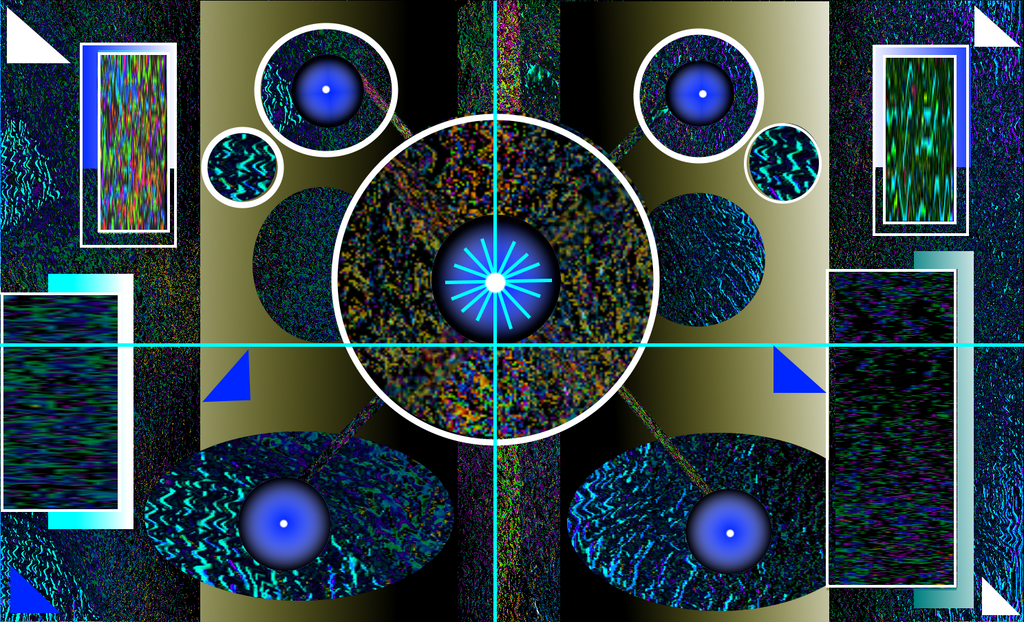
Click to enlarge tutorial")
This is my first eye...
I mada a face with MAYA and always said: I need put in all things: eyes... lips... hair.
This is the first intention. THE EYE.
What do you think about it?????
------
MODO DE REALIZACION (in english more down)
Paso 1 - Empezaremos creando un nuevo archivo, un cuadrado (en este caso de 1000x1000 pixels). Rellena el fondo con algún tono grisáceo (casi blanco).
Después de esto, crea una capa y crea una máscara circular en el centro de la imagen.
Paso 2: Elije tu color favorito de ojos (verde, marrón, azul,...), rellena el círculo con él. Después, crea una nueva capa, realiza los mismos pasos y pinta la pupila de negro
Paso 3 - Utilizando la herremienta dedo, crea algunas imperfecciones como las que puedes ver en la siguiente imagen, siempre desde el centro hacia fuera
Paso 4 - Crea una nueva capa, nueva selección circular y la pintas de blanco
Paso 5 - Ahora, utilizando el filtro ruido (Filtro> Ruido> Añadir Ruido...) (130% uniforme)
Paso 6 - Ahora, aplicaremos otro filtro: Filtro> Desenfocar> Desenfoque Radial...
Selecciona "zoom" y "óptima" y pon un valor muy alto en "Cantidad" (100 o cerca de 100)
Paso 7 - Utiliza alguna opción de mezcla de capas, como Superponer, Luz Suave, ..., o la que prefieras. Después, el filtro "Licuar... " en esta capa. Crea pequeñas ondulaciones
Paso 8 - Duplica la capa de la pupila y altera su color en "Imagen> Ajustes> Tono/Saturación... " o "Ctrl+U". (valores: 189, 53 y +36)
Paso 9 - En esta capa, utiliza tu habilidad paracrear más ondulaciones, esta vez, pintadas con un pincel no muy grueso.
Paso 10 - Multiplica esta capa a las demás con alguna opción de mezcla de capas (superponer, por ejemplo)
Paso 11 - Puedes simular el reflejo de una ventana con otra capa
Paso 12 - Duplica la capa que acabas de pintar y altera su color (Ctrl+U otra vez) hacia uno más naranja o marrón. Elije otro tipo de mezcla de capas para crear un resultado como el mostrado abajo. Rota y escala la capa y, si es necesario, altera la transparencia de la capa para obtener un buen resultado
Paso 13 - Suavizamos la parte exterior del iris para romper la apariencia de pintura. Para ello, utiliza: Filtro> Desenfocar> Desenfoque Gaussiano...
Elije un valor no muy alto parano distorsionarlo demasiado. Por ejemplo "6"
Paso 14 - Para oscurecer y delimitar el borde del iris, utilizamos sombra paralela con "Distancia=0", poca o ninguna "Extensión" y el valor que crear conveniente en "Tamaño". Nota: también puedes utilizar "Resplandor Exterior" para reforzar las sombras
Paso 15 - Selecciona las capas en las que has pintado las ondas radiales y aplícales una "Sombra Paralela", así tendrán volumen y parecerán fibras
Paso 16 - Para hacerlo un poco aleatorio, crea una nueva capa, selecciona color blanco para el fondo y negro como frontal y aplica el filtro "Interpretar> Nubes". Desenfoca los bordes utilizando el "Desenfoque Gaussiano" y multiplícalo con las otras capas
Paso 17 - Añade más detalle a la capas donde hicimos las ondulaciones. Crea una selección circular y ves a "Edición> Contornear... ". Elije un valor alto para el contorno (12, 14, ...). Aplica el contorno
Paso 18 - Utiliza un "Desenfoque Gaussiano" alto de nuevo, de unos 20
Paso 19 - Escala esta capa al centro del iris, añadiendo profundidad en el centro
Paso 20 - No hay... tu ojo ta acabado
-----
IN ENGLISH
1. Begin creating a new file, square (in that case, 1000x1000 pixels). Fill the background with some tone that have a little of gray (almost white).
After, create a new layer and create a circular mask in the center of the image, with close proportions the one in the image on the left
2. After deciding on the favorite color for the eye that you will paint (green, brown, blue), fill in the circle with it. After that, create a new layer and through the same procedure, paint the pupil with black
3. Using the smudge tool (finger), produce some "blots" as suitable in the illustration below, always from center to outside
4. Create a new layer, a new circular selection and paint it with white
5. Now, use the noise filter (Filter> Noise> Add Noise...) and use the same setup shown
6. Now, we will apply another filter: Filter> Blur> Radial Blur... Use the options "zoom" and "best" and put a very high value in "Amount" (100 or close to 100).
7. Use some option of mixing layers, like Overlay, Pin Light, Screen, or the one that you prefer. After, use the "Liquify... " filter in this layer. Through it, create small irregularities so that your image resembles the one shown
8. Duplicate the pupil layer and alter it's color using the menu "Image> Adjustments> Hue/Saturation... " or simply "Ctrl+U".
9. On this layer, use your ability to create more irregularities, this time, painted with a brush not very wide.
10. Copy that layer, set some mixing layer option (overlay, for instance)
11. You can simulate some window reflections with another layer
12. Duplicate this layer that you have just painted and alter the color (Ctrl+U again) for one more orange or brown. Choose another layer mixing type to produce a result as the one shown below. Rotate and resize that layer and, if necessary, alter the layer transparency
13. Softening the iris outlines to break the painting aspect. For that, use: Filter> Blur> Gaussian Blur... Choose a value not very high for not blotting too much. In this case, I used "6"
14. To darken and to delimit the outline of the iris, use the drop shadow with "Distance=0", little or no "Spread" and the best value that you find in "Size". Change "Blend Mode" to produce the best effect. Tip: you can also use "Outer Glow" to reinforce the shadows
15. Select the layers where you painted the radial waves and apply a drop shadow, so their lines will have volume and seem like fibers
16. To randomize a bit, create a new layer, select the white color for the background and the black for foreground and apply "Render > Clouds" filter. Blur their borders using gaussian blur filter and a few times
17. Add more details to the layers where you worked the irregularities. Create a circular selection and go in the menu "Edit > Stroke... ". Choose a high value for the stroke (12, 14 etc).
18. Use the gaussian blur again with a high value
19. Resize that layer to center of the iris, adding certain depth in that central area
Related content


Comments: 27

me quedo fenomenal, me encantó tu tutorial yo simpre andaba copiando los ojos de otras imágenes ahora ya tengo uno propio, Gracias
👍: 0 ⏩: 0

I used this in my windows phone game: [link]
(I credited and linked back to you in the credits)
👍: 0 ⏩: 0


That's amazing.
👍: 0 ⏩: 0


xD genial! yo crei que era real XDD voy a intentarlo! [T.T es que ahorita estoy tratando de bordear un dibu en el pshop DX] haha
👍: 0 ⏩: 1

olé! Alégrome
Cuéntame ¿te sirvió?
👍: 0 ⏩: 1
si, entendi y eso xD pero como no tengo tableta,
mi mouse inalambrico no sirve de mucho, pero
de menos le aprendi como ^^
 (Smile)")
👍: 0 ⏩: 0


This is great,
Wish i had this tutorial, when i did my first eye
👍: 0 ⏩: 0


DAMN IT LOOKS GOOD, im trying to make a virtual 3D person.........i have much to learn.
👍: 0 ⏩: 0

Qué maravilla!!! y encima el "cómo se hizo"!!!! me encanta!!! gracias! no tengo ni idea de photoshop pero en parte es porque no sé ni por dónde empezar... en cuanto tengo tiempo me aplico!!!
Jo! qué bien! y encima el ojo está genial!!!
👍: 0 ⏩: 0

Vaya, vaya... Resulta dificil encontrar por estos lares tutos en castellano.
Muy chulo el tutor.
saludetes
👍: 0 ⏩: 1
muchas asias
👍: 0 ⏩: 1
DE NADA Y DISCULPA EL RETRASO EN REPONDER, PERO HE ESTADO APARTADO DE ESTO YN TIEMPO...
YA ESTAREMOS EN CONTACTO. LOS DE LA LENGUA DE CERVANTES ESCASEAMOS, PERO ESTAMOS.
")
 (Wink)")
👍: 0 ⏩: 0
I'll do it... Take me time... and I'll do it
👍: 0 ⏩: 1

Take your time.
Send me a note if you ever do it.
👍: 0 ⏩: 1
Hey!!!!! know is online
👍: 0 ⏩: 0

...oye...pues está genial, no?...lo intenteré a ver que tal...
👍: 0 ⏩: 1

Well my first creation was in green... but at the end of the tutorial you can see other colours
👍: 0 ⏩: 0