HOME | DD
 Wraeclast — Cloud Tutorial - Sunset
by-nd

#cloud #digital #environment #painting #sky #tutorial #wraeclast #art
Published: 2015-03-05 03:45:47 +0000 UTC; Views: 4230; Favourites: 69; Downloads: 42
Redirect to original
Description
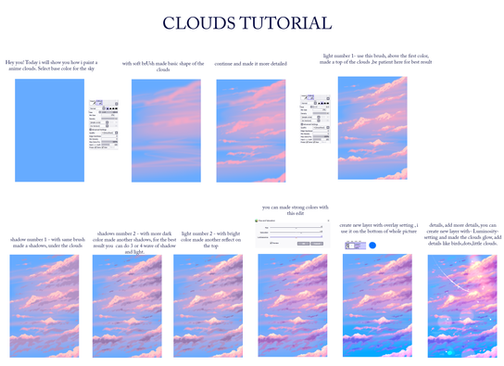
Hey everyone! It's been a while since I've gotten around to doing a proper tutorial, so this is long overdue. See below for full step by step descriptions of what I did from one point to another. I decided to do the clouds at sunset, to show how many colours you can incorpate with this technique, and have it still look quite nice. If enough people want it, I may do a more neutral day time version as well.Step 1:
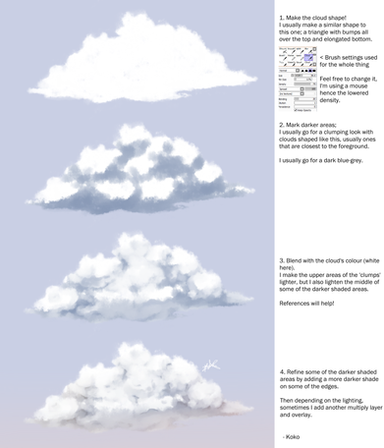
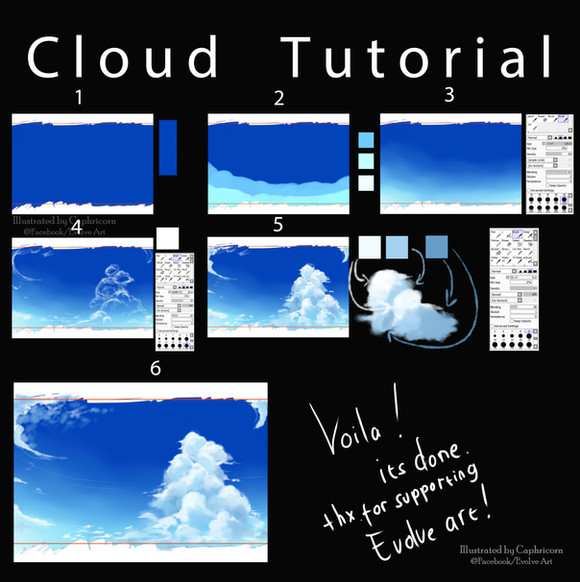
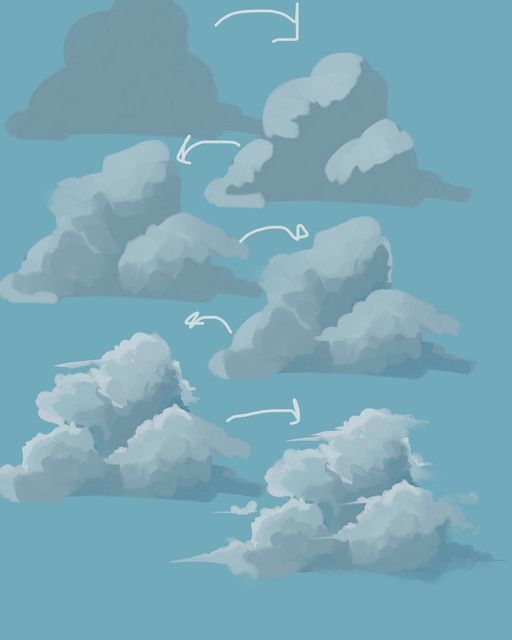
Create a cloud like shape, this is basically just a silhouette at this point. As this is a sunset image, the clouds local colour is quite dark, if this were a day time cloud, you should use a lighter greyish tone.
Step 2:
This stage is where your painting in the main colours for the cloud. Feel free to be rough at this stage, as your basically just blocking in the colours for the cloud at this point, we will go over them later to give it a more "cloud" like look. I mainly used hues of oranges, and some subtle purples in the dark part of the cloud. The lighting will change depending on your scene, but for this image I had the light coming from behind the clouds, as the sun was setting.
Step 3:
Now add the sky colour. This step is rather quick. As this painting is during sunset, I used lots of oranges and a little bit of blue near the top, to make it feel like the sun was setting. If your image has a different lighting scheme, it's a good rule of thumb to find some reference images to help you. You can decide to leave the brush strokes in, or smooth them out, this is more of a style choice.
Step 4:
Another quick step. Add some more clouds to your sky, depending on your scene this could be a few, a lot, or none. For the purpose of this tutorial I made them more subtle in comparison to the main cloud. Use the same steps as before to create the new clouds.
Step 5:
The fun step, the step where you make everything look nice and finished. For this step you need a "fluffy" brush. I used a brush specifically for clouds, but you can use anything with a soft edge. (You can download free brushes online). To give the cloud like look you see in the image you need to layer the brush strokes. Leave your brush at 100% opacity for this. Start at the border of your cloud, pick the colour, and make the cloud as fluffy as you desire. Once you've done this, work your way inwards towards the dark area of the cloud. Add a layer of more subtle greyish orange, then the darker purple colour. To get the proper cloud feel all the way through, you want to layer it like I said before, so you keep getting the silhouette of the brush layered on top of the lighter colour below it. Once you get some practice this will become quite easy. Apply this technique to all clouds in your scene, and your clouds should be finished!
I hope this tutorial could help some of you, I know how tricky clouds can be! And as always feel free to suggest future tutorials for me to do.
More Tutorials/Studies:
