HOME | DD
 XenuxZero — Steven Universe Font Tutorial
by-nc-sa
#font #tutorial #photoshop #stevenuniverse
Published: 2016-11-19 17:56:20 +0000 UTC; Views: 6529; Favourites: 74; Downloads: 80
Redirect to original
Description
That's it!
Español:
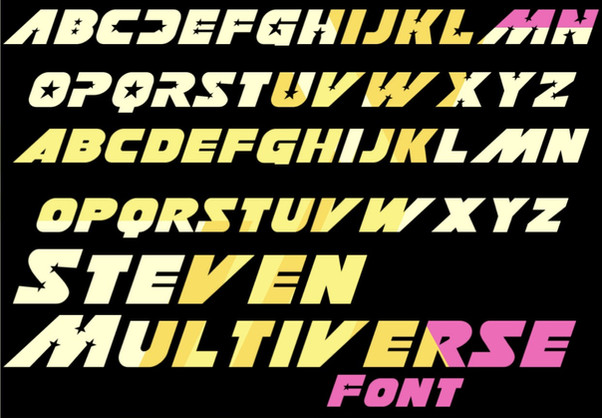
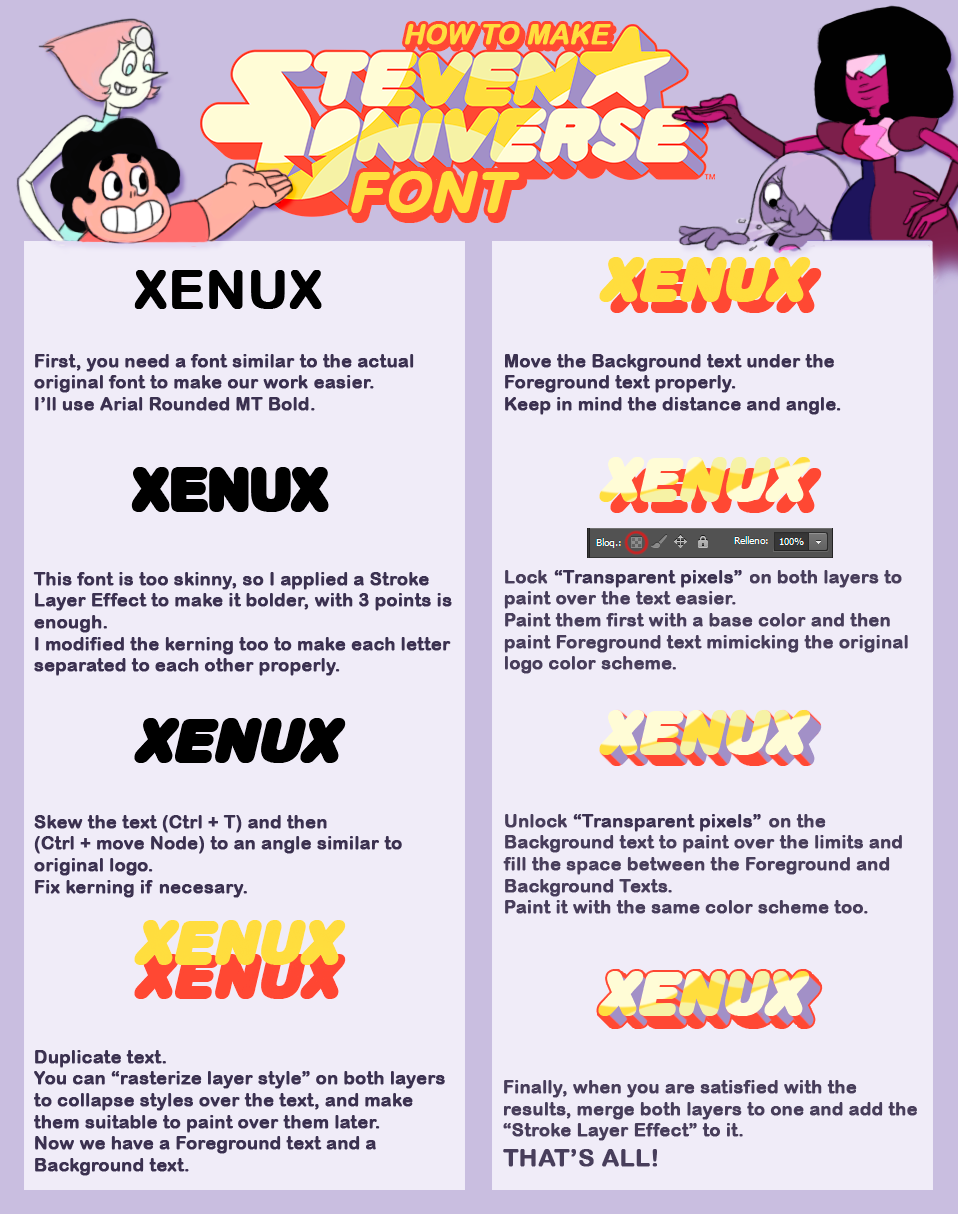
1- Primero, necesitas una fuente similar a la original para hacer tu trabajo más sencillo.
Yo usaré Arial Rounded MT Bold.
2- Esta fuente es demasiado delgada, así que le he aplicado el efecto de capa "Trazo" para hacerla más gruesa, con 3 puntos es suficiente.
He modificado el kerning también para separar cada letra una de otra apropiadamente.
3- Sesga el texto con (Ctrl + T) y luego (Ctrl + mover nodo) a un ángulo similar al logo final.
Ajusta el kerning si fuera necesario.
4- Duplica el texto. Puedes "rasterizar el estilo de capa" en ambas capas para colapsar los estilos sobre el texto y hacerlas aptas para pintar sobre ellas más tarde.
Ahora tenemos un texto Frontal y otro texto de Fondo.
5- Sitúa el texto de Fondo bajo el texto Frontal apropiadamente.
Ten en cuenta la distancia y el ángulo.
6- Bloquea "píxeles transparentes" en ambas capas para pintar dentro de ellas sin salirte, de forma fácil.
Píntalas primero con un color base y dibuja sobre el texto Frontal el esquema de color y formas, fijándote en el diseño original.
7- Desbloquea los "píxeles transparentes" en el texto de Fondo para poder dibujar saliéndote de los bordes. Rellena el espacio entre ambas capas de texto para dar volumen 3D al logo.
Píntalos con el mismo esquema de color del original también.
8- Finalmente, cuando estés satisfecho con el resultado, combina las capas en una y añade el efecto de capa "Trazo" sobre él.
Eso es todo!
Related content
Comments: 13

👍: 0 ⏩: 1

You can almost use the size you want but, I recommend you to use a big size font because when you finish, you can scale it down to the size you need avoiding pixelation issues derived from the resolution.
👍: 0 ⏩: 0

If you paint something in a layer, for example, a simple brush stroke, you can lock transparent pixels in that layer.
This let you paint within that brush stroke, without worrying painting out of it.
It's very useful.
👍: 0 ⏩: 1

yeah I understand but It's more simple to make shapes like ovals and put clipping mask.
👍: 0 ⏩: 1

Each techniques has its pros and cons, but the results are the same.
Use the one that suits you best.
👍: 0 ⏩: 1

yes but what method you use to made the lines between the text layers?Because I use another method and I want to ask you.
👍: 0 ⏩: 1


