HOME | DD
 Aurek-Skyclimber — Library Update 1-18-15 | Circular Rooms
Published: 2015-01-18 07:57:44 +0000 UTC; Views: 1499; Favourites: 12; Downloads: 8
Redirect to original
Description
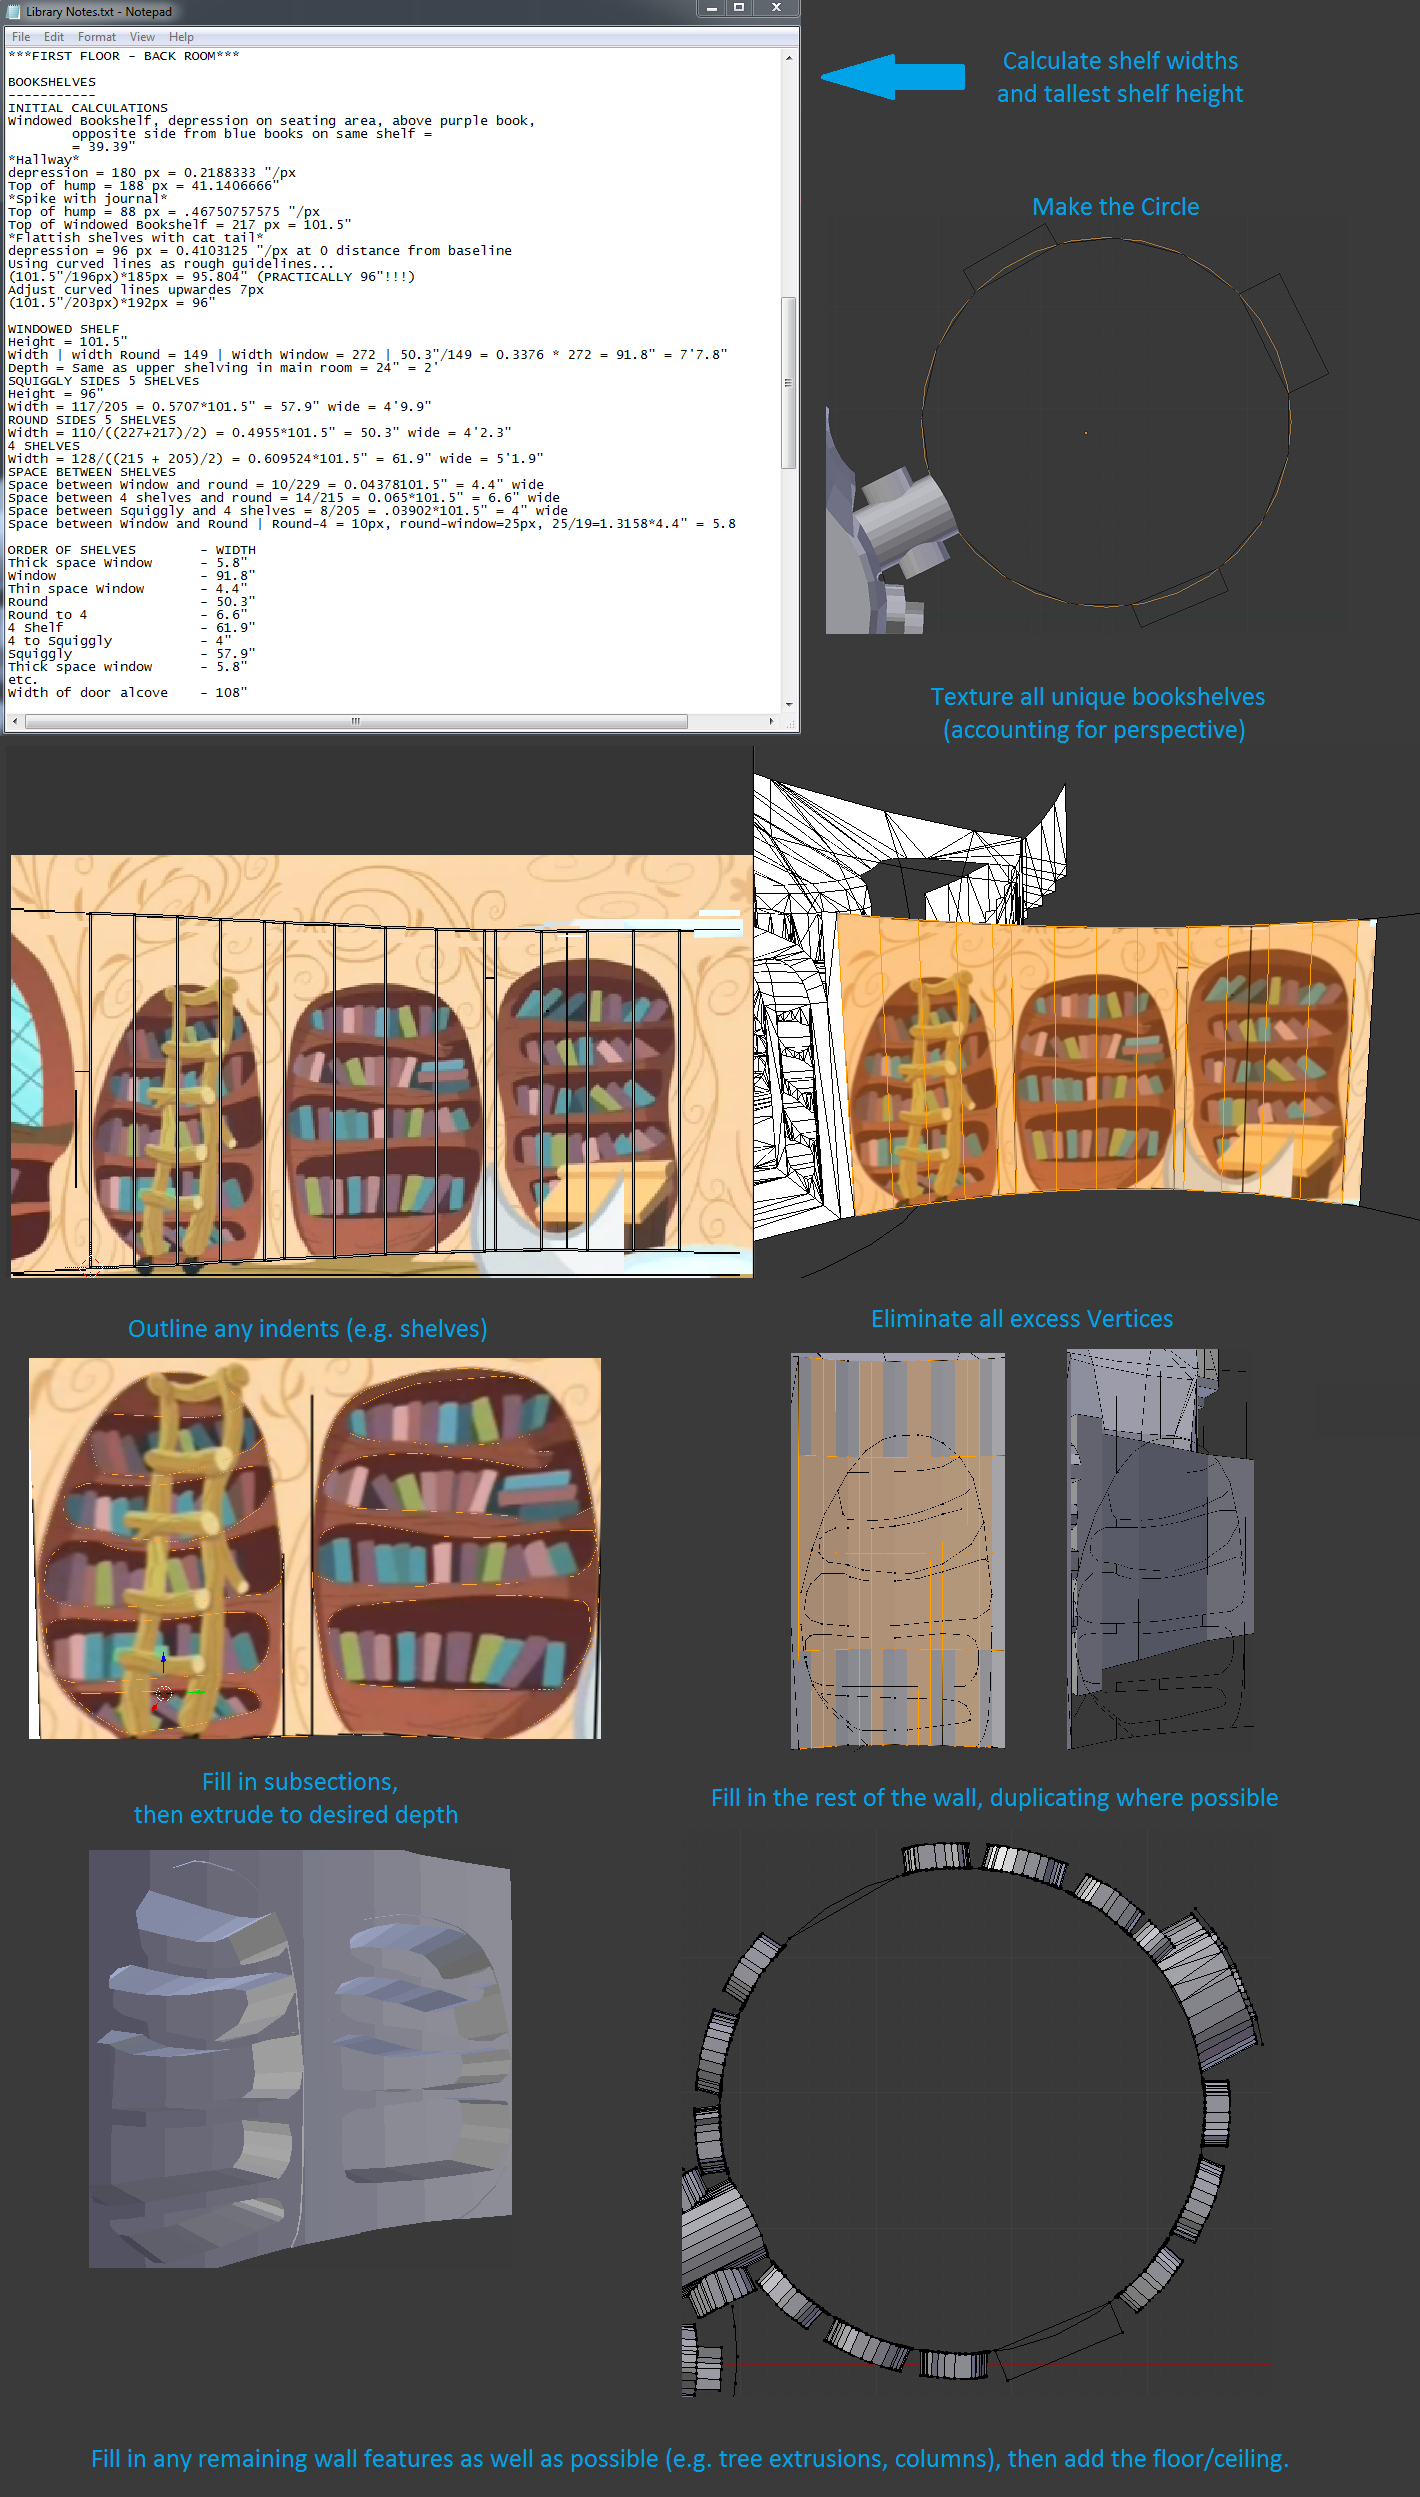
Spent my first week's day on calculations, and my second day on the first three bookshelves / the back door. Next week's day should allow me to finish off the last bookshelf/window seat and a healthy chunk of the tree / columns, with final details on the day after that. (Note: As per usual, I only spend one day a week on this). (Note 2: I have removed one of the windows from the design. It does not make logical sense to have a window that is inches away from another tree trunk and can only see bark.)Anywho, felt like putting together a step-by-step guide thingy on how I'm dealing with circular rooms and the evilness that is round perspective. Probably not the best or most perfectly accurate way to do things, but it gets the job done. (Note: Distances between objects do shift slightly depending on the reference image).
1. Calculations! Find a point where the walls are somewhat straight and are as close as physically possible to some object you know the size of to eliminate as much perspective scaling error as possible. Use that to get the height and/or width of a definitive landmark on the wall. In this case, I chose the windowed bookshelf as my landmark and used the bookcase in the hall for my height reference.
2. Next, find a screenshot where the reference object is visible and lined up fairly straightly with any other objects you want to measure (i.e. the other bookcases). Draw a line that follows the curve of the floor, then vertically mirror the line to create a visual guide of which sections of wall are the same height as your reference object. Use these lines to calculate the width of each object so that you can accurately create the outer wall of your circular room. (Note: Sometimes the upper line shouldn't be a mirror image of the lower line. Use your own judgement.)
3. In your favorite modeling program, create a circle composed of straight lines that are the same length as the previously calculated wall objects. There should be one circle at floor height, and another at the same height as the tallest object.
4. UV Unwrap your walls and apply the reference image as a texture. Notice how the lower and upper UV lines adjust height to match perspective. The vertical lines are scaled to match the edges of their respective object. Make sure to subdivide the walls so that there are enough verts/faces for the ref image texture to not stretch incorrectly.
5. On each wall, outline any shapes that need to be created. In this case, that would be the shelves and the outline of the bookshelf proper. As the walls are not aligned to the x/y axis, expect to do a lot of subdividing of the bottom line for horizontal position (Blender shortcut: w -> s) followed by extruding a vertex on the z axis to get the vertical position (e -> z -> mouse position). Make sure to erase any extra edges created by this extrusion. Also, edge sliding is your friend for precise horizontal positioning (g + g, or Shift + v).
6. Once the edges are created, we no longer need the textured wall. Erase the extra vertices, leaving your edge shapes behind.
7. Now recreate the wall by filling in your various edge shapes. (Note: Make sure to keep each vertical wall subsection contained within the proper edge bounds. Otherwise, you'll end up with faces that are not properly aligned with each other and look horribly awful. You can see that I have four vertical subsections on each bookcase and one extra subsection for spacing between each bookcase.)
8. Extrude the various wall shapes to the desired depth (e.g. to create shelves). Apply any other details you need (e.g. curved surfaces, drawer knobs, etc.).
9. Assuming that some wall objects appear more than once, duplicate and reposition objects as needed to fill in the rest of the wall.
10. Do everything else that can't be completed via the above steps (e.g. round extrusions like those mini tree things).
Related content


Comments: 4

Tracking your progress on this project extremely close, because I really hope,
you will release at least part of it under some kind of GPL license...
Or this is a commission, or this is for sale?
About calculations: I think, if I'll have enough time, I definitely have to do the same...

👍: 0 ⏩: 1

Just like the maps, any 3D models I create will be made available for everyone to use for whatever purpose they feel like for free. Heck, here's everything I've got so far: www.dropbox.com/sh/lmg2qnyz75o… . The folders will update as alterations are made.
👍: 0 ⏩: 1
Oh, sharing this, is very kind from you.
I'll promise, if I ever use any of your works, I'll add all available links to your pages and works.
Too sad, that right now I can only watch, and celebrate each of your wins...
👍: 0 ⏩: 0

")