HOME | DD
 AutodidactArtAcademy — Tutorial - Comic Book Painterly Coloring Technique

#comicbook #sketchbook #stepbystep #tiff #tutorial #comicbookcoloring #coloringtutorial
Published: 2016-08-12 20:38:03 +0000 UTC; Views: 2285; Favourites: 22; Downloads: 12
Redirect to original
Description
Original pencils by Terry Dodson here: autodidactartacademy.deviantar…Not a finished piece, just posting for reference. Just about every piece I've posted on DA has used a different coloring technique because I was still figuring out how to get effects I liked. I'm at the point where I need to settle into a technique for production purposes. So I did a quick and dirty job on this piece playing around with the different techniques I've learned in order to work out a consistent process I could use going forwards. There are some lighting mistakes in this because I was working quickly and was more focused on work process than rendering, but overall I like the technique I came up with. It's relatively quick and still allows me to produce a painterly coloring effect, instead of having to resort to traditional gradient cell shading. As a bonus, it preserves most of the steps on their own layers, so I thought I would upload the file here for you guys so you could flip through them and see how it breaks down. I know that would have saved me MONTHS of trial and error when I was starting out.
File is a .tiff (Sketchbook). Photoshop will also open this file correctly.
Here's the instructions...
Coloring Technique:
Set line art layer to multiply.
Below line art layer, apply flats. Flat colors should be the actual color of the object under white light. Flat each main object on their own layer. Background objects can be grouped on layers together with other objects the same distance from the “camera” so they are all given the same atmospheric value later.
Duplicate flats. Fill with atmospheric color (usually sat 30, lum 50, but will depend on environment, lighting, distance from “camera” - look up tutorials on atmospheric perspective for help). Put above flats on Normal/30%. This tints all the flats into the environmental color. For objects in the far distance (miles away) or in a misty environment, raise the opacity of the atmospheric color layer to 50-70% (again, refer to atmospheric perspective tutorials).
Duplicate atmospheric layer again. Fill with shadow color (sat 30, lum 30). Put on Overlay/100%.
Using hard eraser, erase into shadow color to create cell shading.
Duplicate atmospheric layer again and put on Normal/100%. Fill completely with 50% gray. Turn cell shading layer back to normal and merge with gray fill layer, then turn layer back to overlay. You should now have an overlay layer where you can wand select the cell shaded areas.
Wand select the non-shadow areas and use the gradient tool to apply a highlight color (sat 80-100, lum 70).
Wand select the shadow cell shading. Create a new layer. Set to overlay/100%. Using the gradient tool, apply a sat 60/lum 60 secondary light color coming from the opposite direction as the primary light source.
Create a new layer Normal/100%. Using blending brush, blend cell shading to create painterly effect and render out shapes.
Create a new layer Normal/100%. Using blending brush, paint in second level highlights, increase saturation (and warmth for skin) at shadow/light boundaries.
Create a new layer Hard Light/100% above the line art. With a color sat 100/lum 70, paint in rim light/bounce light coming from opposite direction as primary light source.
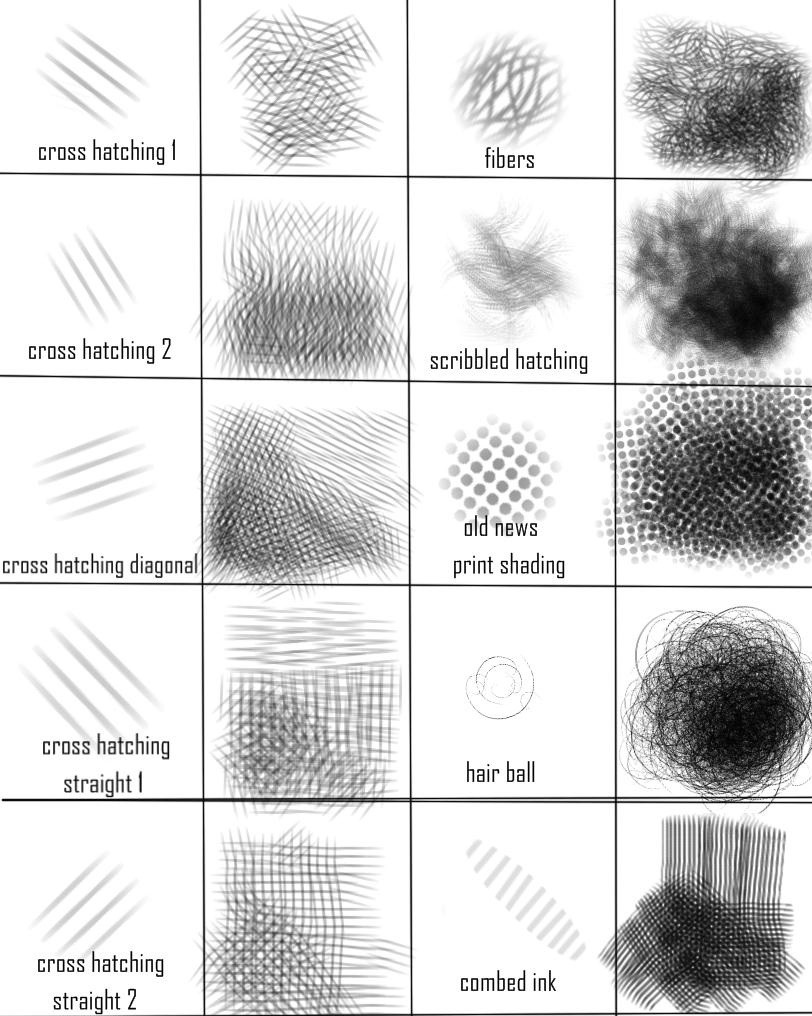
For Hair:
Apply highlights with lasso tool and air brush on overlay layer to create oval highlight areas.
Use hair eraser to erase into edges of highlights, then hair brush to pull strands out again.
Repeat on second overlay layer using smaller oval shaped lasso selections.
On a normal layer, use inking pen brush to pull shadow hairs into highlight areas, using the soft eraser to blend the strokes into the highlights.
On a normal layer above the line art, use the inking pen brush and soft eraser to create stray highlight hairs, add detail.