HOME | DD
 DXBigD — Fire Ant Compositing Tutorial
Published: 2008-07-21 03:12:59 +0000 UTC; Views: 3370; Favourites: 29; Downloads: 89
Redirect to original
Description
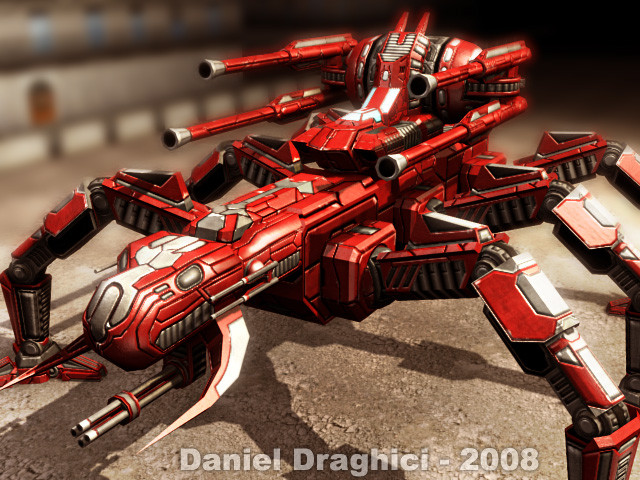
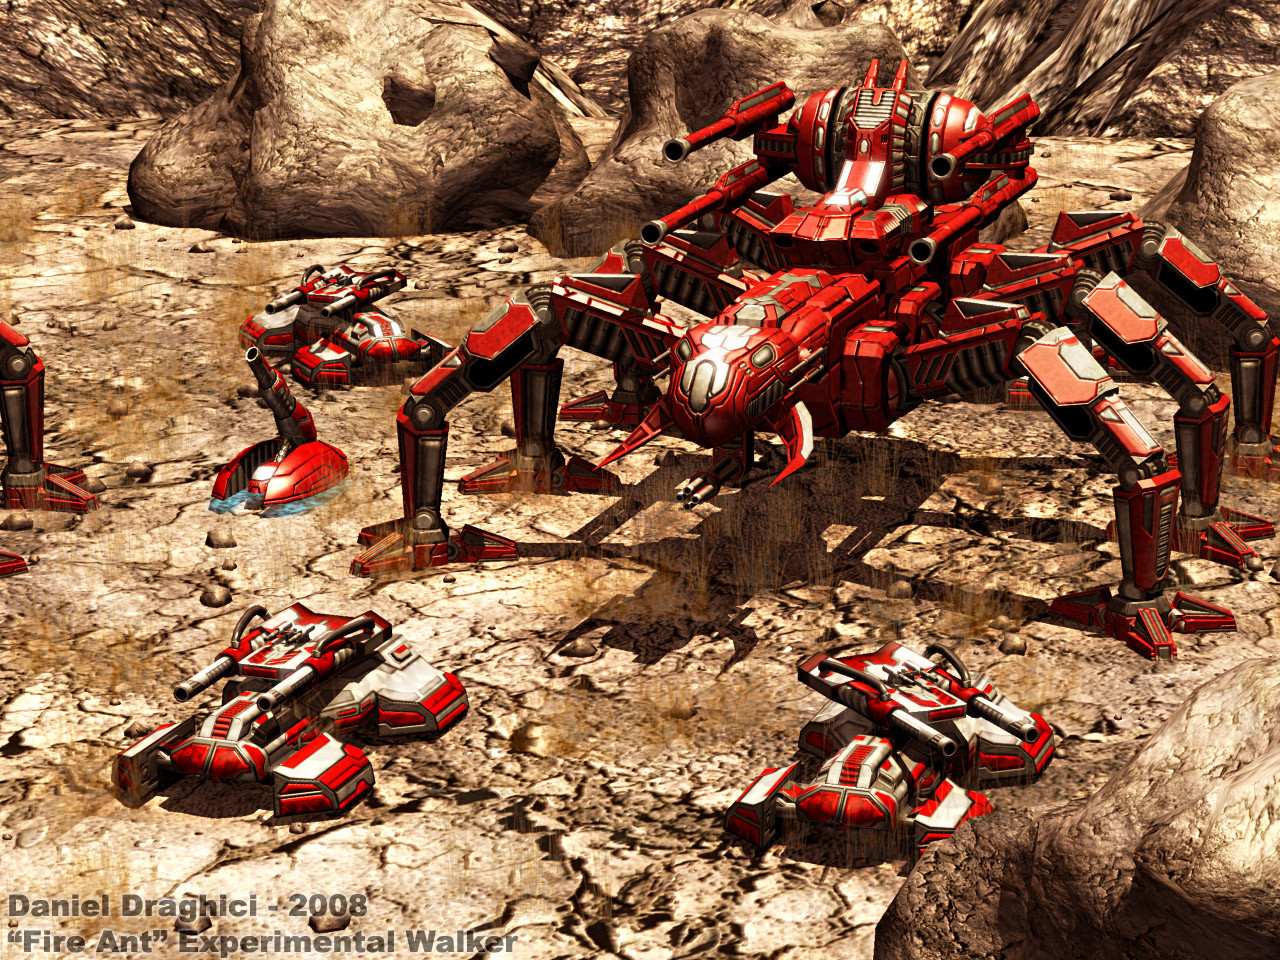
"Red Ant" Experimental Walker videoThis is a Photoshop composited image I used in my "Red Ant" Experimental Walker video . In the video, I showed the end result of different render passes, like the diffuse, bump, ambient occlusion, z depth, specular, etc. I also showed the result of using small, tiled maps for close-up details.
QUICK TUTORIALS ON COMPOSITING IN PHOTOSHOP
You'll need the following: a regular render of your scene, an Ambient Occlusion render and a Z Depth render.
Blending Ambient Occlusion (Improves Lighting And Image Realism)
Open your regular render and your Ambient Occlusion render. (should normally be black and white since you should render everything with a white or light grey color instead of their usual texture)
Put your Ambient Occlusion image on a layer above your normal render and set its layer's blend mode to Overlay. This will make parts of your image darker in places where lighting doesn't really reach/bounce in from the outside, just like in real-life. You might want to play with your AO layer's opacity if you think the image looks too dark.
Adding Depth of Field Effect (Emphasizes Camera Focus)
I opened my rendered image, duplicated the background layer and called it "Depth of Field".
I loaded the Z depth image in another layer, selected its colors (Select > Color Range > 200) then pressed CTRL+ALT+i to inverse the selection.
I Used that selection as a mask on my Depth of Field layer. (Clicked "Add Layer Mask" while my layer and my color range were selected)
I Used a Gaussian Blur filter on that layer to get a smooth depth of field effect. (range was 5 pixels but you can use whatever you like)
This takes seconds to make as opposed to much longer if you render it in 3D. Also, in 3D it tends to look worse unless you turn the quality all the way up and wait hours for one render. (And if you wanted more or less blur, you'd have to make changes and render again)
Using Color Correction (Improving Colors)
I did some color correction by changing the image's levels in photoshop. (Image > Adjustments > Levels) You can adjust colors this way. I wanted to get a more warm look, so I made things a bit more brown/orange.
Adding a Glow
Make a new layer and click Select > Color Range. From the color range menu, select something white or very bright on your image then click OK. (You should set the fuzziness to about 125, but it depends on how bright your image is, so play around with this and see what looks good)
While having white as your foreground color, press ALT+DELETE to fill your selection with the foreground color.
You should select the brightest color of your image for the glow to be realistic. If you want to make, say, a red circle glow red, you should select the red color in your image and fill the selection with red.
Conclusion
That is how you can make some simple changes to your 3D renders very quickly. These changes can add to the realism or looks of your images and they take less time to make and adjust than if you did them in your 3D application. Don't forget you can also make small details stand out more by using the Unsharp Mask filter on your image.
You can test out different looks this way and make your images more realistic or just nicer. You could make a bright scene look like it's taking place at night (Color Correction), or add glows to a sunny scene. You can blur the background or foreground objects around a model you want to focus on using DOF or make an image look less flat by using an Ambient Occlusion layer.
I hope this helped some of you who were looking for some quick, easy ways of improving your renderings.
Related content


Comments: 8

 (Smile)")

This is would look amazing in about any RTS game, especially supreme commander. Have you got any requests for this model yet?
👍: 0 ⏩: 1

A guy offered to try and put it in the game so I sent it to him. I don't know if it'll ever be done though and I don't plan on learning to do it myself...that game really doesn't have a proper editor.
👍: 0 ⏩: 0

Thanks for the tips, and what an excellent bot, too.
👍: 0 ⏩: 1

I'm actually wondering how you made the textures.  (Wink)")
👍: 0 ⏩: 1
Thanks.
I used a lot of lines for the cuts and some tiles. On top, I made custom brushes and used them to add some dirt, scratches, etc. The smaller detailed are really just visible in close-ups, since I wanted the model to be noticibly red from far, so you can easily see what team it's on. (like in most RTS games) It was meant to be a red unit with some white and grey metal parts. That way I can change the color of just one layer to use it for other teams. This isn't how I would have textured it if I wanted it to look realistic, obviousely.
I used mostly the brush and polygonal marquee tool. You can use the brush to make straight lines by holding down shift and clicking. I also used custom brushes with scattering, color variation and "dual brush" to create some dirt, scratches and small details in the detail maps. That way all the major parts are visible from far, but when you get closer you see that the metal's actually a bit dirty, scratched, worn-out, etc.
I generally use the marquee tool to make shapes and quickly fill them in (alt/ctrl + delete). I then use an overlay blend mode or other types, depending on what I need, and add an inner shadow effect for tiles. You can also give them a bit of a glow to emphasize tiles, but I didn't want to do that here, since I used normal maps to show what sticks in and what sticks out. Generally you'd paint some dirt or old paint on the edges of tiles too.
I also used some tiled gradients in some places, like under the legs, sides of the head, sides of the top platform, etc.
That's about it. Really, just making tiles within tiles usually looks good, and if you can make normal and specular maps, they'll improve things even more and you won't have to paint the lighting and shading.
👍: 0 ⏩: 1