HOME | DD
 fence-post — GIMP Contrast Mask Script
by-nc-sa
fence-post — GIMP Contrast Mask Script
by-nc-sa

Published: 2008-01-03 19:52:28 +0000 UTC; Views: 26881; Favourites: 71; Downloads: 6036
Redirect to original
Description
EDIT October 9, 2008: Updated script to work in GIMP 2.6 (the newest stable version.) If you have a previous version of this script, please delete it to avoid conflicts.Let me know if you have any trouble with it.
See update information in bold below....
This script was made as the result of a request by Photocomix (www.flickr.com/photos/97844002… and uses steps he described in creating a contrast mask in a method different from a "typical" contrast mask due to a bug in GIMP's Overlay Mode. It works in GIMP 2.4 only. If you would like a script for GIMP 2.2, click here: fencepost.gimpdome.com/Scripts…
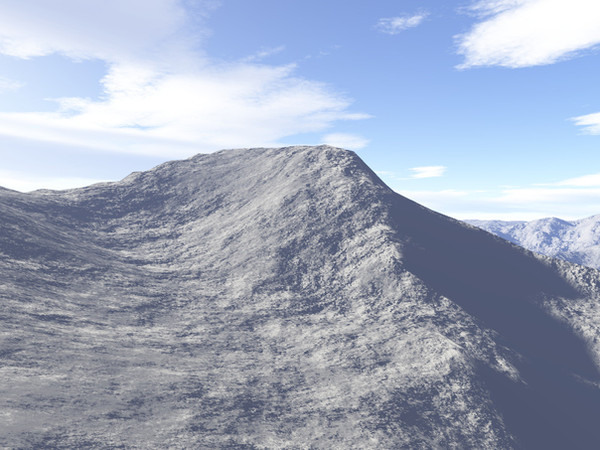
The script makes a duplicate of the active layer and places it above the active layer. The blend mode of the duplicate layer is set to Hard Light. The bottom layer is desaturated using the desaturation type set by the user and the colors of the original layer can be inverted if the user so chooses. A Gaussian Blur is applied using horizontal and vertical blur settings set by the user when the script is first run. The layers can be merged if desired.
Updated 1/16/08: The option to work on the selected area only has been removed. After several tests of my own and comments from PhotoComix, we decided that working on the selected area was just too unsightly and didn't produce the desired results. So, that option's just been removed.
Updated 1/11/08: Based on some suggestions/requests by Photocomix (PC), I've updated the script to work much better. The updates implement some new defaults as requested by PC, as well as allow the user to decide if the script will work on an existing selection only. That way, if you only want portions of the layer affected, the actions will take place on the selected area only. The script actually works on the whole layer, but I've used layer masks to hide the rest of the area. Also, if the merge option is left off, the layer masks will be kept in place you can tweak the mask at your leisure. I've also made the script name each layer based on the appropriate action taken on the respective layer. Hope you like the changes.
Just click on the download link to open the script in your browser window and then save it (File Menu > Save) in your GIMP scripts folder (ie....C
") rogram FilesGIMP-2.0sharegimp2.0scripts)
rogram FilesGIMP-2.0sharegimp2.0scripts)Then, go to the main GIMP window (not the image window) and choose the Filters > Script-FU > Refresh Scripts and the script can be found in the Image's Filters Menu > Photo > Photocomix Contrast Mask...
Enjoy!
Art
Related content


Comments: 56

hello, I'd like to give this a try, but mine gimp is 2.8.22 (most stable version, but not highest in #, lol...is your script safe for me?
👍: 0 ⏩: 0


great! finally I've found some script that works  (Smile)")
👍: 0 ⏩: 0


Some how I can't find it on mine. Could someone help me out?
👍: 0 ⏩: 1

Just a couple of quick questions so I can help you figure out what happened...
What happened when when you clicked on the Download link?
Are you using Windows?
If you're using Windows, how did you save the file?
Let me know and I'll try to help you out.
Art
👍: 0 ⏩: 1
Well when I click on the download link it goes to this white page with a bunch of words that looks almost like html.
Yes, I'm using Windows.
👍: 0 ⏩: 1
Actually, that's the script! Here's what you need to do:
When you open up the script, copy the entire code (Ctrl+A) and then open up Windows Notepad (should be some place like this Start > Accessories > Notepad). When Notepad opens, paste the code (Ctrl+V) into it. Then, go to File > Save As, locate your GIMP Scripts folder (C:\Program Files\GIMP-2.40\share\gimp\2.0\scripts), give the Script a Name (with a ".scm" extension on the end), and then under "Save as Type" select All Files. Hit the Save button. Then in GIMP go to Xtns > Script-Fu > Refresh Scripts and your script should be ready to use.
Let me know if you still have any trouble.
Art
👍: 0 ⏩: 1
You're welcome! I assume, then, that you got it to work?
👍: 0 ⏩: 0


Were you able to get that problem resolved? Itt looks more like a problem with your image host, not the script. Let me know.
Art
👍: 0 ⏩: 0
Oos....didn't give you the new download link: [link]
It's not my day!
👍: 0 ⏩: 1

yeah it works now! thanks a bunch.
👍: 0 ⏩: 1
Glad it works! Sorry for the inconvenience.
Art
👍: 0 ⏩: 0
I think I've resolved the issue. Download this script and let me know if you have any troubles. Thanks for bringing it to my attention. My apologies for the delay in responding and creating the problem.
Art
👍: 0 ⏩: 0
Sorry, I never saw your screenshot. Are you using GIMP 2.2? If so, I think I need to modify the script because GIMP 2.2 has some different commands than 2.4.
Art
👍: 0 ⏩: 0


Thanks PC! Glad you're happy with it.
Art
👍: 0 ⏩: 0

Looks like a great script! I'm definitely going to download it!
👍: 0 ⏩: 1

Nice script F-P, has a nice dreamy kind of quality to it
👍: 0 ⏩: 1
Glad you like it! Thanks!
Art
👍: 0 ⏩: 0

Even more simple
only 1check box
preset "from Camera" (as now 5 pixel blur)
and then lower default value of blur radius to 3 in the "custom" option i mean in the actual slider.
that should allow everybody to find easily the correct settings
👍: 0 ⏩: 0
Instead about the option to skip the "invert value" step.
If i insisted to explain what it does is not because i think that you don't know it but because i fear that option labeled may be no clear
Maybe something as "Don't mask instead boost ( warning:inverted effect)" may give a more clear hint to average users
( while as now is more technically correct but give a hint clear only to who already know the manual procedure to create a contrast mask )
A minor point actual default for blur radius is good for photographer ,meaning for huge images.
that is fine but may be too much for sig or even for wallpaper size as 800x 600 or even 1024x786.
i wonder if for usability may be good offer 2 presets as alternative to manual tuning
as 2 additional checkbox for 2 preset
sig till 800x600wp (3 pixel blur)
from camera (5 pixel blur)
and Custom that is as it is now
This is not something i need for myself i just was wondering if may be useful to other.
Oh well...now that i think about may be very useful for me see how to add checkbox and preset in a script fu,...
Art i'm so happy to see one of my wished tool become real usable
filter and that all for your efforts,...
👍: 0 ⏩: 1
Any of those suggestions are easily done, but I don't know if they'll just end up complicating things more. Remember too, it's good to try and anticipate what others might want and try to meet their needs, but you can never do it all. So, my suggestion would be to decide on what's most important to you and go with that. If someone really needs to accomplish something that this script doesn't quite do, we can either modify it or write another script.
But, whatever you would like, I'll do it (if I can!) Just let me know.
Art
👍: 0 ⏩: 0
About the layer mask i was just offering a possible solution
any other may be good since the result is a option to apply only to a selection
👍: 0 ⏩: 1
Ok. This one might not really need a mask to accomplish it as many of the actions will automatically work on a selection anyway. But, I'll test it out and see what's required....but it should be simple enough.
A
👍: 0 ⏩: 0
Oh about that question sure that is a good thing on some kind of images is exactly what is needed...
👍: 0 ⏩: 1
")
additional option to apply the mask to the whole layer or only to the selection will be possible ? (maybe using a layer mask?)
👍: 0 ⏩: 1
Should be possible and, if I'm understanding you correctly, very easy to do.
Just to clarify, you're wanting to add an option so that the user can apply the contrast mask to a selected area if they so choose? Otherwise, the script would temporarily turn off any active selections, apply the mask to the entire layer and then turn on the selection again? Does it have to be with a layer mask or were you just offering that as a possible solution?
If that's the case, I can simply add in a "test" line to the script. Only take a couple of minutes. Let me know.
Art
👍: 0 ⏩: 0

You're really loving this scripting, aren't you?
Very nice script. The effect produced is very pleasing.
👍: 0 ⏩: 1
Yes, this is an excellent challenge! Thanks for the fave. I've also written a basic scripting tutorial using the Procedure Browser and Script-Fu Console here: [link] Hopefully, it helps others. I really appreciate your assistance.
Art
👍: 0 ⏩: 0

Awesome, the final image looked like someone pumped the bloom dosage up
👍: 0 ⏩: 1
damn i can't edit the previous post, sorry
skipping the invert colors will invert sharpening too, meaning a soft flow effect instead then sharpen (more the blurring radius more the flow...i suppose flow describe this effect better word then blur)
👍: 0 ⏩: 1
Is that a good thing or would you like me to add something to the script?
👍: 0 ⏩: 0
hy Art
a side note script ignore selection if any
I think this is commune to all contrast mask script, not sure about,
anyway in case of need should be easy use a layer mask.
Not sure if most will understand the "invert colors" option:
as default is checked and that is a contrast mask:
it will lower contrast and reveal detail were needed, is useful on over-contrasted images
By unchecking that option result is almost the opposite
is useful on flat undercontrasted images, it will boost contrast on same area...but detail on shadows will be not lost , not totally (as may happen just by increasing contrast) because the blurring still will sharpen and give more relief, and that will compensate, help to preserving details in even over-contrasted areas
👍: 0 ⏩: 1
Actually, the way the script is written, if there's a selection when the script is run, it is temporarily turned off and stored, then reactivated once the script is finished. This way, the script will operate on the entire layer and not just the selection. Is that what you're inquiring about?
👍: 0 ⏩: 0
| Next =>