HOME | DD
 hakuron — GIMP Tutorial featuring Gin

Published: 2009-01-07 21:35:16 +0000 UTC; Views: 10320; Favourites: 65; Downloads: 244
Redirect to original
Description
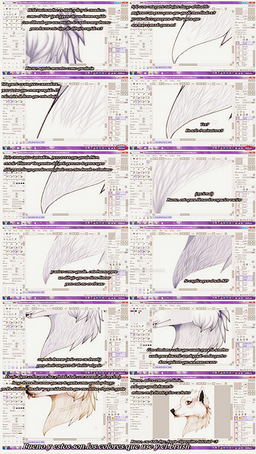
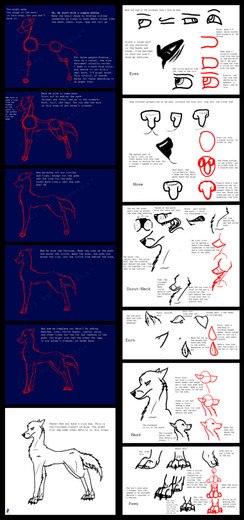
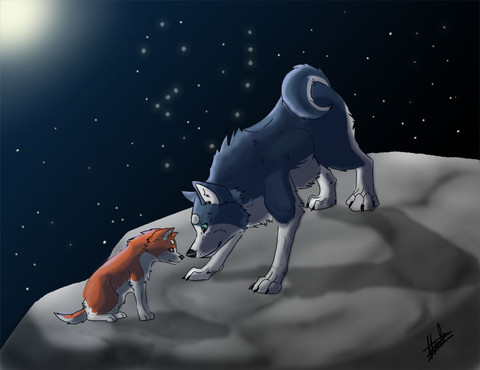
This is a drawing on Gimp tutorial , hopefully anybody will be able to understand it , it works pretty much with the most used drawing programs, basically the difference is just the name of the tools .Contents:
-About:
+Layers
+Brushes
-Line art
-Path tool
-Coloring
-Shading
-Gradients
-Eyes ,etc.
I suggest you to download it because is big and the smallest letters may not be readable otherwise.
Gimp is a free program and can be downloaded here: [link]
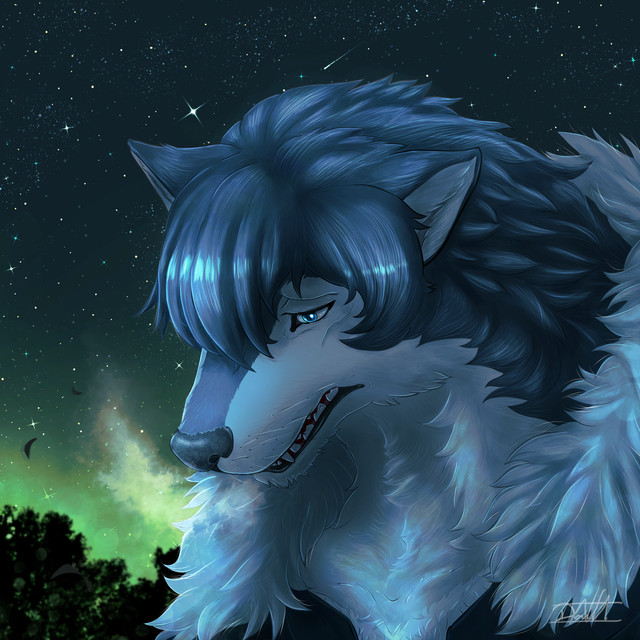
Finished piece: [link]
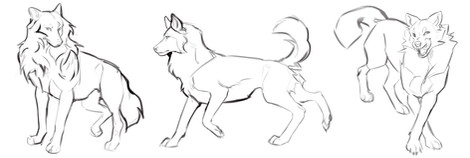
The lineart used in this tutorial may be found here: [link]
Related content
Comments: 43

Great tutorial! I've always needed help with the gradient tool!
👍: 0 ⏩: 0

Hope you find it helpful ^^
👍: 0 ⏩: 0

I'm glad someone made a a lineart tutorial for GIMP. There are all those PS ones so when I use them, I have to modify them in a way that's useful to gimp.
This helps. The only thing I need help on is fur. With my drawings, the way I draw fur differs depending on the texture. But usually for longhaired, semi-longhaired, or tufts of longer hair, I make it kind of spiky (I actually don't think I have an example on here :/). So how would you create a path for that? (Do you get what I mean?)
👍: 0 ⏩: 1

I don't quite get you ^^ , are you talking about the line of the path tool always being of the same thickness and you'd like it going from thick to thin or something like that? .Do I have a drawing on my gallery with that characteristic , so I can see what do you mean? 
👍: 0 ⏩: 1

How 'bout this?: [link]
It's an Old English Sheepdog I did awhile back. You see how the long hair is defined by being "jaggedy"? That's how I draw long hair.
What I want to know is how to draw a path along that. I've tried but I think it's really hard lol ^^ But you've kind of got the idea (the thinning thing might be cool too). Thankfully, I found one after all lol. Sorry if I'm making this more confusing than it should xD!
👍: 0 ⏩: 0

Hmm.. How did you get those lines when you did the path tool? Like when I use the path tool, and create lines, it makes them just one bold line and it doesn't go thinner on the ends.
👍: 0 ⏩: 1

Do you see on my tutorial a picture that has numbers from 1 to 6? just follow that part , but don't forget to mark the box that says something like 'emulate the brush dynamic'
👍: 0 ⏩: 0

I have a question,
that tool that's "not necessary"..
what is that?
cause my gimp doesn't have that..
👍: 0 ⏩: 2

Oh , you mean on the path tool part , on the screenshot with many numbers?, the part that says 'not necessary but cool? . If you mean that , it's just an option that makes the stroke as if it was a brush ... 
👍: 0 ⏩: 1

oh...
maybe I'm doing something wrong..
cause I don't have the little box thingy...
or I prolly have a different version or something...
did you download that?
or...
idk
👍: 0 ⏩: 1

I've got the version 2.6.2 , are you sure you don't have the path tool? , maybe with other name?
👍: 0 ⏩: 1

ahh!
that's it...
thought so...
well thanks anyways~
👍: 0 ⏩: 0

Sorry , I just don't get your question , in which part of the tutorial is mentioned that 'not necessary tool' ? , just clarify me that and I 'll try to help you =3
👍: 0 ⏩: 0

Hey, I have a question: to color, you just color on a new layer, and then go back through and erase along the lines?
'cus most of the other tutorials I tried didn't say to erase.... but every time I try one, I just have big blobs of color....
👍: 0 ⏩: 1

Yep , is almost the same as if you were coloring on a piece of paper ...color and erase along the lines or what you don't want , mistakes , etc....Just remember to select the layer yo want to erase , because if you select another one it wont work...
👍: 0 ⏩: 1

this is pretty cool tutorial but i have a question. what if you already colored the drawing without doing layers? can you still do the shading? im kind'va new to the whole shading and coloring thing. im still learning alot about gimp.
👍: 0 ⏩: 1

Yes , you still can add the shading if you have the image already colored 
👍: 0 ⏩: 1

see, i'm trying to shade this: [link]
and the picture might be a little blurry for some reason but if you click to make it bigger, it looks fine. I know i haven't finished the sword yet but I was going to do her body first before i finish coloring the sword and shaded the sword.
and yes it was colored before i tried looking for tutorials. A friend of mine drawed this for me so I can practice coloring and shading. I just don't get the shading part.
👍: 0 ⏩: 1

Awesome coloring and picture 
Lets see , you have your aresome picture opened on Gimp it doesn't matter if you just used 1 layer or used 50 , just go to the menu at the top layer->New layer ok? , then go to the layer's window and you'll find an option that says OPACITY(you can see that part on the layers section of this tutorial) give it a click and set it at let's say 50% . Then use a black and soft brush and color with it where you want to put the shading .
If you still have questions just keep asking
👍: 0 ⏩: 1

does black go for everything? including the clothes?
i put a new layer. white right? and change the opacity to 50 percent?
then i use black, use the soft brush on the layer. what if it looks dark on the first time round?
👍: 0 ⏩: 1

yes you open you new layer ,but TRANSPARENT 
The more opacity =darker
Less opacity = paler , until it gets transparent
If you didn't change the opacity and left it at 100% , then it'll look all black , just go to the opacity and lessen it .
you can change the opacity of the layer as many times as you need , is reversable...
play with the opacity % until you feel satisfied with the result .You can always eliminate the layer if you don't like it =3.
I'll gladly answer your questions if you have more C:
👍: 0 ⏩: 1

how will I know if it looks right?
👍: 0 ⏩: 1

Just apply the brush wherever you need , set the opacity as you like and see if you like it , if not just delete the layer and do it again , you'll know it's right because you'll feel it , it looks really weird when you put the shading on the wrong places , just follow your light source .
👍: 0 ⏩: 1

im curious. how long did it take you to be good at this?
sometimes im really slow at learning how to do new things.
👍: 0 ⏩: 1

I'm still no good at it , but it took me like ...a few days to reach the point I'm stuck at , but I don't practice that often , so maybe you'll learn faster 
Don't worry about being slow , just go at your own peace and practice ;D.
👍: 0 ⏩: 1

i am. its just hard for me and that impatient too sometimes. i'll keep trying.
👍: 0 ⏩: 1

Don't worry , it's always difficult at first , but you'll see that the more you practice the easier it gets 
👍: 0 ⏩: 1

Muy bueno hace poco me baje ese programa pero me gustaria que lo pusieras en español
👍: 0 ⏩: 1

Lo haré cuando tenga algo de tiempo libre :3
👍: 0 ⏩: 0

Wow, there are filters? Could you tell me where they are? For some reason, I've never noticed them. XD
👍: 0 ⏩: 1

On the menu (where file , edit, select , etc. appear) there is one called 'filter'.
👍: 0 ⏩: 1

OH! Okay, thanks! I can't believe I missed that! XDDD
👍: 0 ⏩: 1

If I got you right , yeah , I drew it , first on a sheet of paper , then scanned it :3.
👍: 0 ⏩: 0

ok sweetie , I don't know if you have a scanner , but let's suppose you have one .I'll try to re-explain it for you
LEVELS
You know that sometimes when you scan an image made with pencil the image appears in a very pale gray .Changing the levels will help you make it darker or black so you can use it as lineart without having to draw it again.
1st-open the scan or wharever you are going to color on gimp
2-on the menu go to : Menu-->Colors---> Levels and play with the options until you are satisfied , don't forget to press accept when you are done =3
COLOR SELECTION TOOL
In this tutorial the most important thing is to make the lineart TRANSPARENT because otherwise it'll color all the color below it so once you've darkened the image with the levels and cleaned up to your choice the color selection tool will help you to select one color .That's the point of tharkening the image, it must be almost the same color ,becuse this tool only selects one color at time . If you click on the darkest part it should select it all .I ise this tool because it only copies the lineart and makes the rest transparent.
now on a new file or on that same file go to the Menu ---- > Edition--->
And you now have your transparent lineart :3
Don't forget to hide the background layer ...or go to Select----->Nothing
PATH TOOL
You have your original image , scan , etc. let's suppose as background layer, so :
1-create a new layer above it
2-Select the path tool
3-make paths over all the lines you want
4-Go to the toolbar (it should be at the bottom)
5-create path -----> and select your options ... That's the part marked with weird numbers on the tutorial.
Hope this makes it a little more clear . If no please ask me until you get it =3
👍: 0 ⏩: 0


