HOME | DD
 HaroldPotter — MoC Toa Tahu Nuva 2.0

Published: 2012-05-04 02:52:33 +0000 UTC; Views: 5458; Favourites: 68; Downloads: 100
Redirect to original
Description
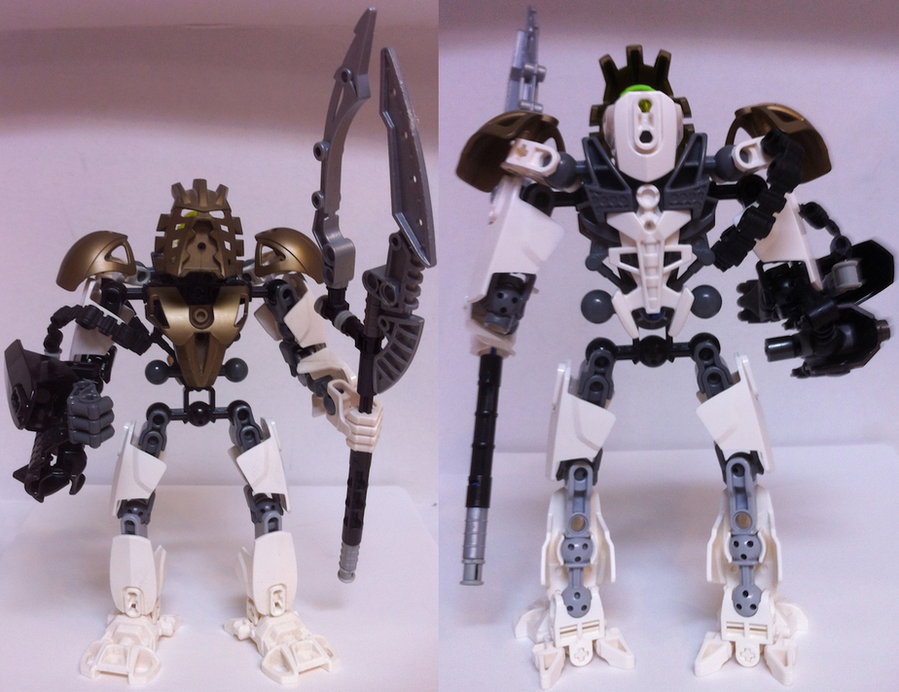
The next part in my Tahu 2.0 series, this time in his Toa Nuva form. I made two design choices for this that determined the rest of the figure: he had to be taller than Tahu Mata, and he had to be symmetrical. While he doesn't really feel like Tahu Mata with extra armor, I think that canonically there were physical changes beyond the armor and new masks/weapons, so I feel justified in my design choicThere's one thing I really like about this, and then one thing that really bugs me about it. The thing I really like is that I was able to work the Nuva shoulder pads in, which I based on my rebuilt Takanuva figure (I'll have that up in a bit), as well as Tahu's flame swords (looking a bit short, but oh well) and Tahnok-Kal's flame disk for backpack armor. The thing I don't like is the jury-rigged neck piece so that I could use the Nuva Hau mask and one of the old heads: it's neither flexible nor pretty. Oh, and on reflection, I don't really like the orange arms pieces, but I really wanted to maintain as much of the original color scheme as I could.
Bionicle is property of Lego
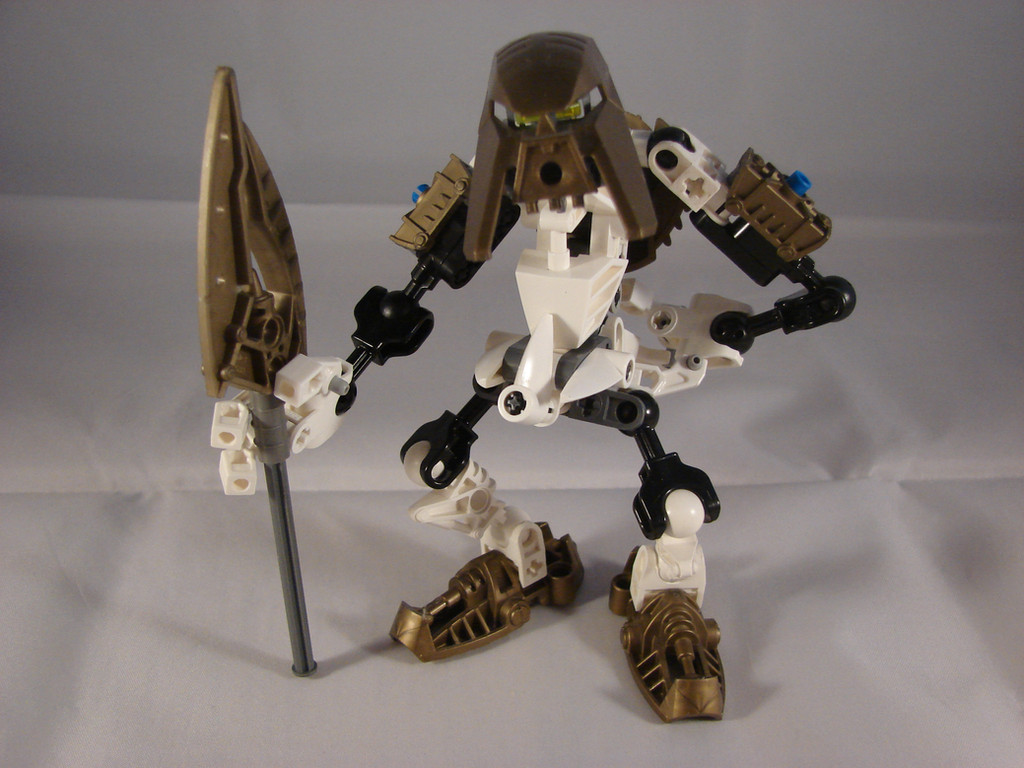
Tahu Mata: [link]
Tahu Golden armor: [link]
Related content


Comments: 26

My ekjr.deviantart.com/gallery/63… has Transformers and Toa Inika as Glatorians! What do you thinks?
👍: 0 ⏩: 0

how did you do the torso setup? I'm rather curious
👍: 0 ⏩: 1

I'm glad to share! It's really simple, but it works GREAT. The torso is made of four pieces:
One Hero Factory torso
cache.lego.com/media/bricks/5/…
One late-gen Matoran torso
cache.lego.com/media/bricks/5/…
One 3-length beam with four connectors
cache.lego.com/media/bricks/5/…
One 3-length friction connector
cache.lego.com/media/bricks/5/…
Start with the Hero Factory torso. Connect the 3-length beam connector to the three vertical holes between the "neck" and the central ball, then put the friction pin with its stopper end first into the hole between the central ball and the hip ball. After that, take the Matoran torso, and turn it so that it's backwards (the little dimpling pattern should be facing away from what you've built so far), and then plug it into your pins, and voila! Torso done, and you can attach whatever Hero Factory-style chest you want to the front to complete the build. It's a very solid construction, and easily customizable, with lots of extra ball connectors for weapons or armor attached to the Matoran torso. The head is actually attached to the Matoran torso's top ball so it can be flexible.
I hope these instructions are clear enough for you.
👍: 0 ⏩: 0

What Hero Factory sets did you use for Tahu and Kopaka?
👍: 0 ⏩: 1
Huh. Good question. Um, looking at the pics, it looks like Tahu is made of the remaining pieces of a Tahu Nuva, the Toa Stars version of Tahu, the Furno 2.0 toy, the 3.0 one, and a few pieces from other sets, including that blue Pirahka character from the Toa Stars. Then the Kopaka one used the remnants of the original set, the Toa Metru ice dude whose name escapes me, a few of the white dudes from Hero Factory, and the Toa Stars version of Takanuva. I just had all the parts in a big pile and pulled them together, so it's kind of hard to separate them out ex post facto.
👍: 0 ⏩: 0

Tahu from Hero Factory?!
Brrr... no!
But the idea is good.
👍: 0 ⏩: 1
Well, it'd be better than the characters we got, after all...
Part of my limitation that forced me to use hero factory pieces was because I had very few of the later sets that had flexible legs and such, so I couldn't use the bionicle style pieces for them. I've slowly been adding to my collection, though, so I may be able to redo these later on. I think the compromise doesn't look too bad. Another complaint of mine is that the older sets are much bulkier than the early ones, so it's harder to capture the Toa leanness of the early sets. And I know, in most cases they're supposed to be the same size, but that just compounds the problem in my mind.
And hey, thank you for not just saying "it's fuckin ugly," like someone said for a different one of these. Because that's SO helpful.
👍: 0 ⏩: 0
Your designs are really cool!
They look so much more realistic now.
👍: 0 ⏩: 1
Thanks.  (Smile)")
👍: 0 ⏩: 0

Taking advantage of the stupid Hero Factory franchise to recreate the glory of the original, much better Bionicle, eh? Sweet!
👍: 0 ⏩: 1
It's a little side-project, but it does mean that I actually look forward to new sets.
👍: 0 ⏩: 0
Color variety. I wanted some red in the armor to tie it all even closer to Tahu. It also works from a crossover sense. If I had silver Hero cores, I'd use them, but since I don't I use related colors on all of my rebuilds.
👍: 0 ⏩: 1

But Tahu's not from Hero Factory. Why would he have a Hero Core?
👍: 0 ⏩: 1
*shrugs* Looks. And because I don't have any of the new big chest pieces in plane silver.
👍: 0 ⏩: 1
Lol. If you are referring to the big chest pieces, I think Brain Attack Ogrum has one. It's a darker shade of silver, but still...
👍: 0 ⏩: 1
And the Hero Factory chest plate also looks a bit more like the Nuva ones. Not much like them, but a bit more.
👍: 0 ⏩: 0
I could probably figure out a parts list if you wanted? I'd have to dip into Lego's official codes to get everything right, but I probably could do it.
👍: 0 ⏩: 1

No, I can figure it out, thanks to the back view. Still, awesome.
👍: 0 ⏩: 1
Well, I did do something kind of funky with the backpack, so I snapped a quick picture.
[link]
I found that the grey connector made it move around a bit more than I wanted (I don't like loose pieces) so I used one of the three-length black technic connectors to secure it. It worked very well.
👍: 0 ⏩: 1
Ah, I see. That's a good idea. I should think that the gray connector would connect properly, but I guess not.
👍: 0 ⏩: 1
Well, it connects great. The problem is that the grey connector is one of the loose ones that allows rotational movement (probably because this piece is designed to connect to two holes at one time, so you want it to be removable), so it wobbles a little bit. I'm kind of a perfectionist sometimes.
👍: 0 ⏩: 1
Ah, that makes sense, but I still wouldn't expect it to be loose. Does it also work with two axles in place of the gray one?
👍: 0 ⏩: 1
Oh, most likely, but I like the spacer because it keep it from being forced in closer.
👍: 0 ⏩: 1