HOME | DD
 indecision-designs — vivant: walkthrough
Published: 2010-04-09 02:58:21 +0000 UTC; Views: 1260; Favourites: 21; Downloads: 43
Redirect to original
Description
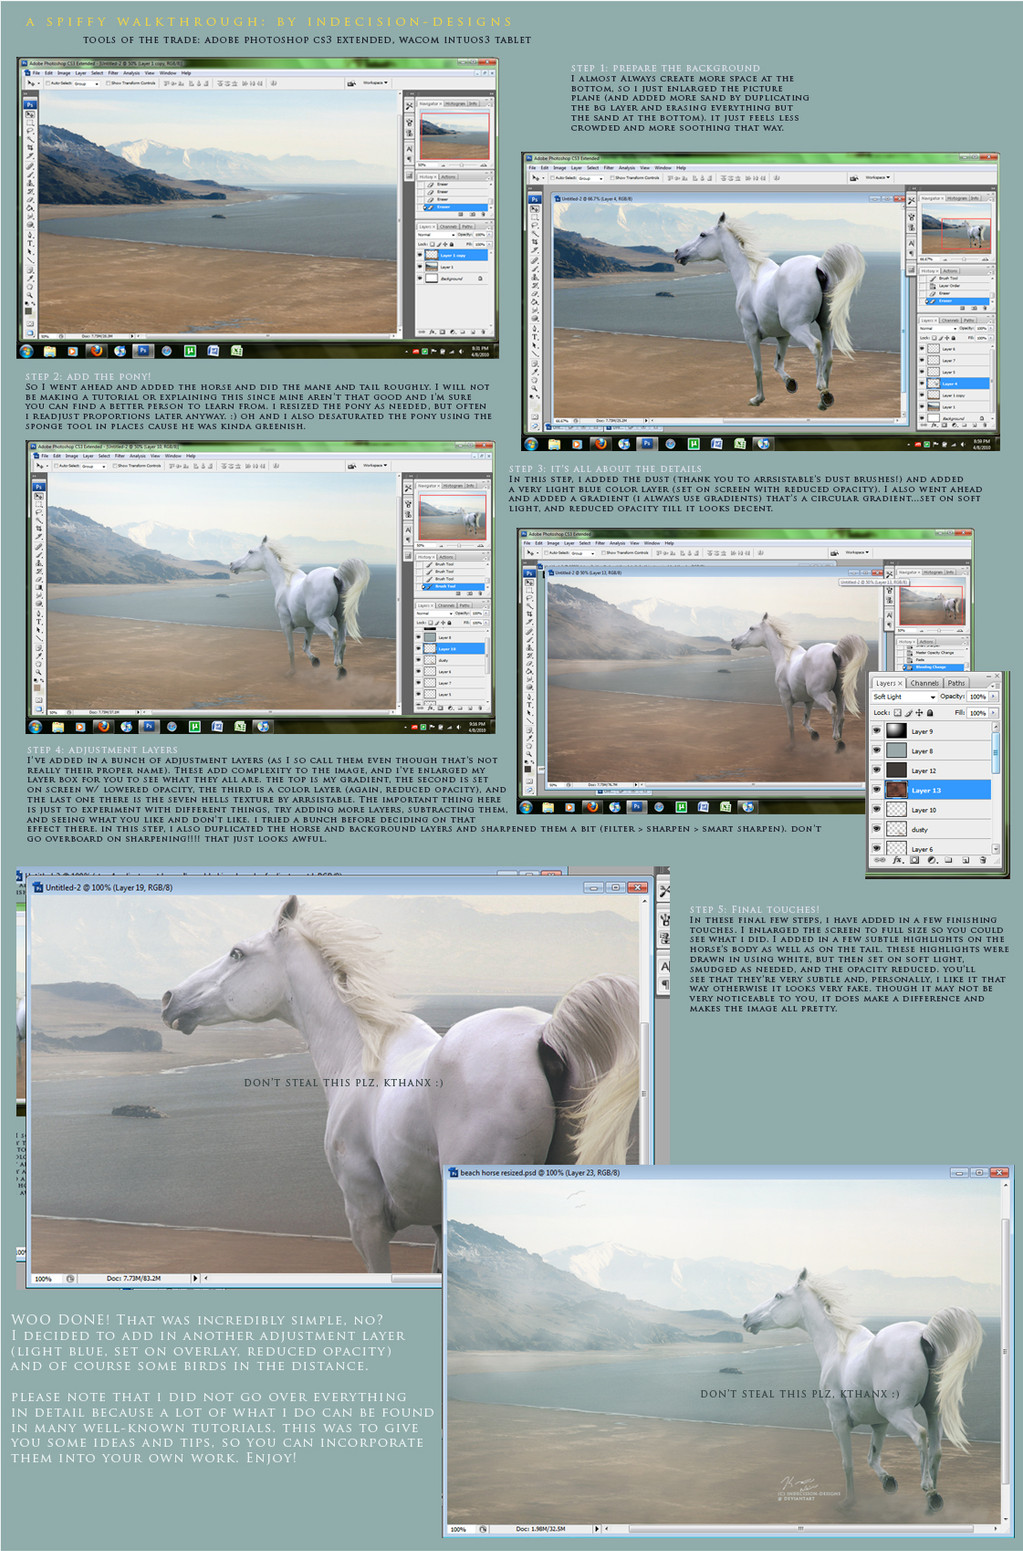
Warning: QUITE large.

 description
A walkthrough for my piece, vivant .
I know I promised you all a walkthrough ages ago and I'm now just getting around to doing it. This piece is very simple, but hopefully this walkthrough is still of some use. This tutorial is not for beginners or people unfamiliar with Photoshop. I explained briefly what I did to give you ideas on what to do in your own work but this is, by no means, a complete tutorial as I didn't give step by step instructions. There are numerous tutorials on everything that I did here, from adjustment layers, manes and tails, adding in highlights, background blending, lighting, etc. A lot of them are actually in my favorites if you're interested.
 (Smile)") credits
creditsAll stock credits can be found on the piece that goes with this walkthrough.
This image is copyrighted to indecision-designs . It is not to be used, reproduced, edited, or redistributed without expressed permission. Look but do not touch.
Related content


Comments: 4

It's really nice to see how two photo's become one beautiful entity! Btw, compared to me you don't use a lot of adjustmentlayers, I go totally crazy with them 

👍: 0 ⏩: 1

Haha yeah, I usually use more than I did on this piece, but ehh not anywhere near 30.
👍: 0 ⏩: 1

👍: 0 ⏩: 1
Yeah, I'm the same way
")
👍: 0 ⏩: 0