HOME | DD
 Raxatech — Tutorial: HDR Environments in Daz Studio
by-sa

#background #dazstudio #dome #environment #hdr #iray #lighting #nvidia #render #tutorial #environmentmap
Published: 2016-02-06 00:23:34 +0000 UTC; Views: 52948; Favourites: 226; Downloads: 657
Redirect to original
Description
This is a very basic tutorial for getting started with HDR environments in Daz Studio. HDR images contain more light data than a standard .jpg or other image formats. When used as an environment setting in Daz, the bright spots in the image will light your scene appropriately. This allows you to very quickly set your background and lighting realistically.1) Click the “Render Settings” tab.
2) Select “Environment” at the end of the list.
3) Set “Environment Mode” to “Dome and Scene”.
4) Set “Dome Mode” to “Finite Sphere”.
5) Set “Draw Dome” to “On”.
Note: If using Iray, you will also need to set your viewport render setings to “NVIDIA Iray” in order to see the image in real time for the final steps.
6) Click on the image box for “Environment Map” and load your image. Note: You may use .jpg or .tiff, but .hdr will give you the best lighting results.
7) Modify “Dome Radius” with a value between 0 and 100 to reduce the background size.
8) Use “Dome Rotation” to shift the background to the desired location.
Tutorial by: raxatech.deviantart.com/
Related content
Comments: 40

👍: 0 ⏩: 1

Thanks for the explanation !! this is a huge help
👍: 0 ⏩: 0
Thank you for this, but how do I see the environment in the viewport so I can position it and the character? I have the render engine set to Nvidia Iray, but I still don't see anything in the viewport but blue, except when I render. I must be missing or misinterpreting something.
👍: 0 ⏩: 1

I'm not certain what could cause that as it sounds like you are using the correct settings. It may possibly be related to a hardware limitation if your scene is very memory intensive. The Daz forums might have a better answer.
👍: 0 ⏩: 0

Thanks for your tutorial. It was a really big help.
👍: 0 ⏩: 0

This is really cool. Thanks for the tips. The problem I'm having is how do I know where to place my camera so everything isn't blurry or stretched?
👍: 0 ⏩: 1

This can be a challenge. Can you post an example pic somewhere? Also, if you are using a free image, post a link to it and I can try to reproduce it. I know that some folks have had luck adjusting the focal length of their camera.
👍: 0 ⏩: 1

Sure! I was trying out the "Wobbly Bridge" on this free sample. It's 8k...
gumroad.com/d/7f6418a116d1e000…
👍: 0 ⏩: 2

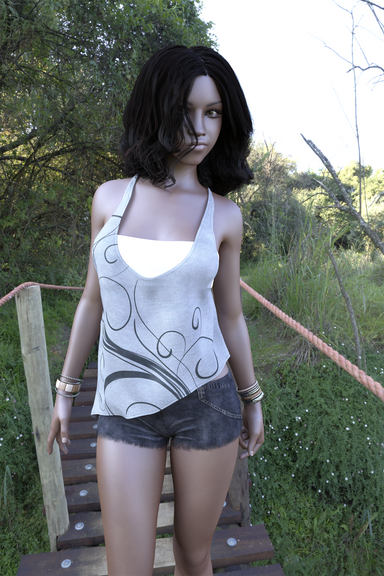
I finished my test and think out it turned out pretty well. Adjusting the camera Focal Length and Frame Width did help. I've included all my settings so you can replicate it and possibly identify what is causing issues.
Wobbly Bridge
👍: 0 ⏩: 1

Wow! It turned out wonderfully. Thank you!
👍: 0 ⏩: 0

I've been playing with it. Is it possible that you selected "Finite Sphere w/ Ground"? Adding the ground definitely distorts the perspective for me in this case.
👍: 0 ⏩: 1

I've also been able to get some better results by playing with the Focal Length and Frame Width of my camera.
👍: 0 ⏩: 0

Item 4 is required only if the setting is "Dome Radius".
👍: 0 ⏩: 1

This is a good point which I didn't originally cover. If you set "Dome Mode" to "Infinite Sphere", then the HDRI will constantly appear far off in the distance. This may provide the desired effect for larger scenes. Setting it to "Finite Sphere" will lock the size which generally works better for closeups and predictability. As jghbxybr mentioned, you can adjust it with "Dome Radius" or "Dome Scale Multiplier" to get the desired size. The main reason for this suggestion is that the background won't change scale unexpectedly when you move the camera around. I'll add an additional step for adjusting the dome scale onto the end. Thanks for pointing this out!
👍: 0 ⏩: 1

I played with the settings to verify the results before I update the tutorial. For the most part, they operate as I expected but there are some limitations. Firstly, there appears to be no functional difference between a "Finite Dome" and an "Infinite Dome" unless you are changing the scale. So if the default size looks good, simply use "Infinite Sphere" as jghbxybr indicated.
Using "Finite Dome" presents you with a few additional options which may be useful.
Dome Scale Radius & Dome Scale Multiplier
The "Dome Scale Radius" is multiplied by the "Dome Scale Multiplier" to determine the final dome size. Setting either dial to a value between 0 and 100 will reduce the size of the dome. It doesn't matter which dial you adjust in this case as long as you only modify only one of them. The size seems to max out at 100 (at least in Daz Studio 4.9). So if you need the HDR environment to appear larger, you'll need to pull your camera back instead.
Dome Origin X, Dome Origin Y, Dome Origin Z
In theory, these settings should allow you to set the exact position where the dome appears in the world. However, I don't believe this is functional in Daz Studio 4.9. (In my testing at least.)
Dome Orientation X, Dome Orientation Y, Dome Orientation Z
These settings allow you to change the rotation of the dome. If you need to skew the background sideways, or flip it upside down, this is how you would do it. Note that "Dome Orientation Y" essentially performs the same task as "Dome Rotation" but in an opposite direction.
👍: 0 ⏩: 1

Dome Origin X, Dome Origin Y, Dome Origin Z
These settings can be very important if the dome of a small radius.
👍: 0 ⏩: 0

Hi Raxatech,
Hope you can suggest something for me, and thanks for the tutorial.
My question below:
www.daz3d.com/forums/discussio…
👍: 0 ⏩: 1

To summarize sleepydem0n 's question for the DeviantArt community:
Is it possible to use an image as an environment background but reduce it's lighting effect in the scene?
In this particular case, an image with a green hill was used as the environment map. Due to the nature of environment lighting, this cast an undesired green hue within the scene's room. As expected, the Daz community did a great job of answering the question before I got around to it but I wanted to circle around and add it here.
Possible Solutions
1) Adjust Render Settings -> Environment -> Environment Intensity. This setting governs the amount of light produced by the environment map. Moving this dial towards zero will reduce the overall lighting effect on the scene. A setting of zero would essentially render the environment as a background image only. If this is the only lighting in the scene, it would be necessary to add additional lights.
2) Simply add lighting within the room to offset the environment map effect. This likely the more natural looking option.
3) Don't use an image within the rendering environment but instead add it to Render -> Environment -> Backdrop. This setting is easy but lacks the ability to make fine adjustments or adjust aspect. You may try it out, but in practice I've never had success in getting the look I was after.
4) Use (or build) a custom backdrop prop. I'll work up a more detailed tutorial at some point, but the basics are:
A) Add a new Plane object to your scene via Create -> New Primitive. (Primary Axis: Z Positive, Size: 10 cm. Add sufficient divisions if you plan to deform it into a curve.)
B) Change the X Scale (Width) and Y Scale (Height) to match your source image aspect ratio. (If your image is 1600×1200, then the aspect ration is 4:3. Adjust X to 400% and Y to 300%. You can use the raw pixel numbers here but you'll need to adjust the overall scale down afterwards.)
C) Add your image to Surface -> Diffuse Color.
D) Re-scale, rotate, and position as needed.
👍: 0 ⏩: 1

Hi,
Thanks for the reply. Lighting is so hard to get right, but I'm getting the hang of it slowly.
But I could never make a character looks like its 'standing' on a hdr image. Not sure if only specific hdr are meant for that.
👍: 0 ⏩: 1

That is a common complaint I've noticed. Sometimes you can fool it with camera placement but more often I've found it less frustrating to either use a ground prop or simply frame the image to omit the feet.
👍: 0 ⏩: 1

How do you normally use hdri? If it's the only light, then it's generally not strong enough or doesn't bring out any details. Do you usually mix it up with spot light?
👍: 0 ⏩: 1

In most cases, I'll end up supplementing an HDRI with other lights. However, that doesn't necessarily need to be the case. You can adjust Render Settings -> Environment -> Environment Intensity to increase (or decrease) the lighting effect. I can often get away with HDRIs as the only light source if the scene is outdoors. I'll just adjust the Environment Intensity by steps and spot render until I'm happy. For indoor scenes, the HDRI is usually mostly serving as a back drop and needs supplementing from other lights.
I should also note that not all HDRI are created equal. Some contain much more lighting information than others. If you can't get the results you want by adjusting the intensity, just through a few more lights at it. In most cases, you can likely compensate by adding a single distant light and maybe one or two spotlights to catch details you want noticed.
👍: 0 ⏩: 0

I've been collecting a few more Free HDR resource sites:
HDRI-Skies - Requires Registration
150 free skies ranging from dawn to dusk. The ground is generally flat, uncluttered farmland without any buildings which provides a very clean horizon. Each 4K (4096x2048) free version is licensed for commercial and non-commercial renders. Massive versions (13K or 15K) are available for 5€ apiece.
HDRMAPS - Requires Registration
82 free stunning and unique indoor and outdoor scenes. Most are 4K-6K ranges but some were much higher. One of them, the Gdansk Shipyard Buildings , even had a free 20K version available. Licensed for commercial and non-commercial use.
HDRI HUB
11 free HDR and sIBL sets of indoor and outdoor locations. Most are available at 8K! Creative Commons license for commercial and non-commercial use with attribution.
Free HDR - EXR Skies
Some great skies with a very flat (sometimes artificial) horizon. This appears to be the freely-given, direct work of the blogger but the site is lacking specific licensing information. I would recommend contacting the author before using for any commercial purposes. All files are are password protected with "cagataykoroglu".
👍: 0 ⏩: 0

You ROCK!! Thanks for making this. One of the best explained and simple tuts around. Kudos!
👍: 0 ⏩: 1

Thanks. My goal was to keep it as simple as possible. Once you get get past that first step, there is lots more to explore.
👍: 0 ⏩: 1

This was very helpful for someone like me who did not know where to start with HDR. Would you consider expanding this a bit to show what to do with the HDR Environment files? When I went to the sIBL archive I found one that i liked and it came with 2 hdr files, one with 3K in its name (this is the image file) and one with Env in its name which looks like the lighting portion. Following your instructions I was able to use each individually but I could not find anything on the sIBL page specific to Daz that explained how to use both of them at the same time.
Thanks for taking the time to put this info out there!
👍: 0 ⏩: 1

Pointing to sIBL sets may not hay been the best advice for when you are first starting out. It's just the first site that came to mind.
As you pointed out, HDR images come in different versions. The short answer is that the 3K version will be better for background but have less lighting ability. These are the ones that I would recommend using for learning. The environment version will contain more lighting info, but is typically blurred as well thus making it not the best choice for a background. You can find higher quality versions of the background-type HDRs which will render much better than the 3K ones I pointed you towards. One potential site is:
HDR Panos
This thread goes into much greater detail:
Iray - Tips and Tricks
mjc1016 gave the best short summary of the difference:
"To expand a little on what Kamion99 said, there's basically two classes of HDRs. Those that are usable for just light information and those that are usable, also, as backgrounds. The problem is most of the HDRs that are/have been used in Studio are of the first group...they tend to be small in size (both pixel count and file size) and are often intentionally blurred. These can't be slapped up as a background and have any hope of clarity. The others are usually OVER 6000 x 3000 px and multi-megabytes in size. These are usually very clear and crisp...
A minimum for use as a background is probably 4K x 2K (8K x 4K is the minimum I like to use)...and then it wouldn't be a very detailed background. I've seen 'pro' grade HDRs in the 20K x 10K and weighing in at over 100MB."
I had a fun time with the tutorial and definitely have an intention of doing more when I feel my advice is at the correct level.
👍: 0 ⏩: 0

You can find free HDR images all over with a simple web search. Here's one site that has several sets for starting out:
sIBL Archive
👍: 1 ⏩: 1

Thanks - that site looks really useful
👍: 0 ⏩: 0

