HOME | DD
 rockgem — Fractal Manip. Tutorial For PS
Published: 2011-09-13 15:08:56 +0000 UTC; Views: 2317; Favourites: 32; Downloads: 131
Redirect to original
Description
On the heels of my ’fake fractal’ tutorialThis is a little tutorial for manipulating fractals using photoshop I’ve been asked how I make some of my fractal manipulation abstract images and for ages I’ve been intending to do a tutorial on how I create some of them
This is more or less how I can often start with a random batch that is a little plain and vamp it up into something with more flair…
i made this using photoshop but its possible to apply the same sort of process using other photoediting programs


 special thanks to ~AnthroShogun for sending me the random batch fractal I’ve used for a majority of this tutorial
 All other images used are my own random batches and fractal manipulations
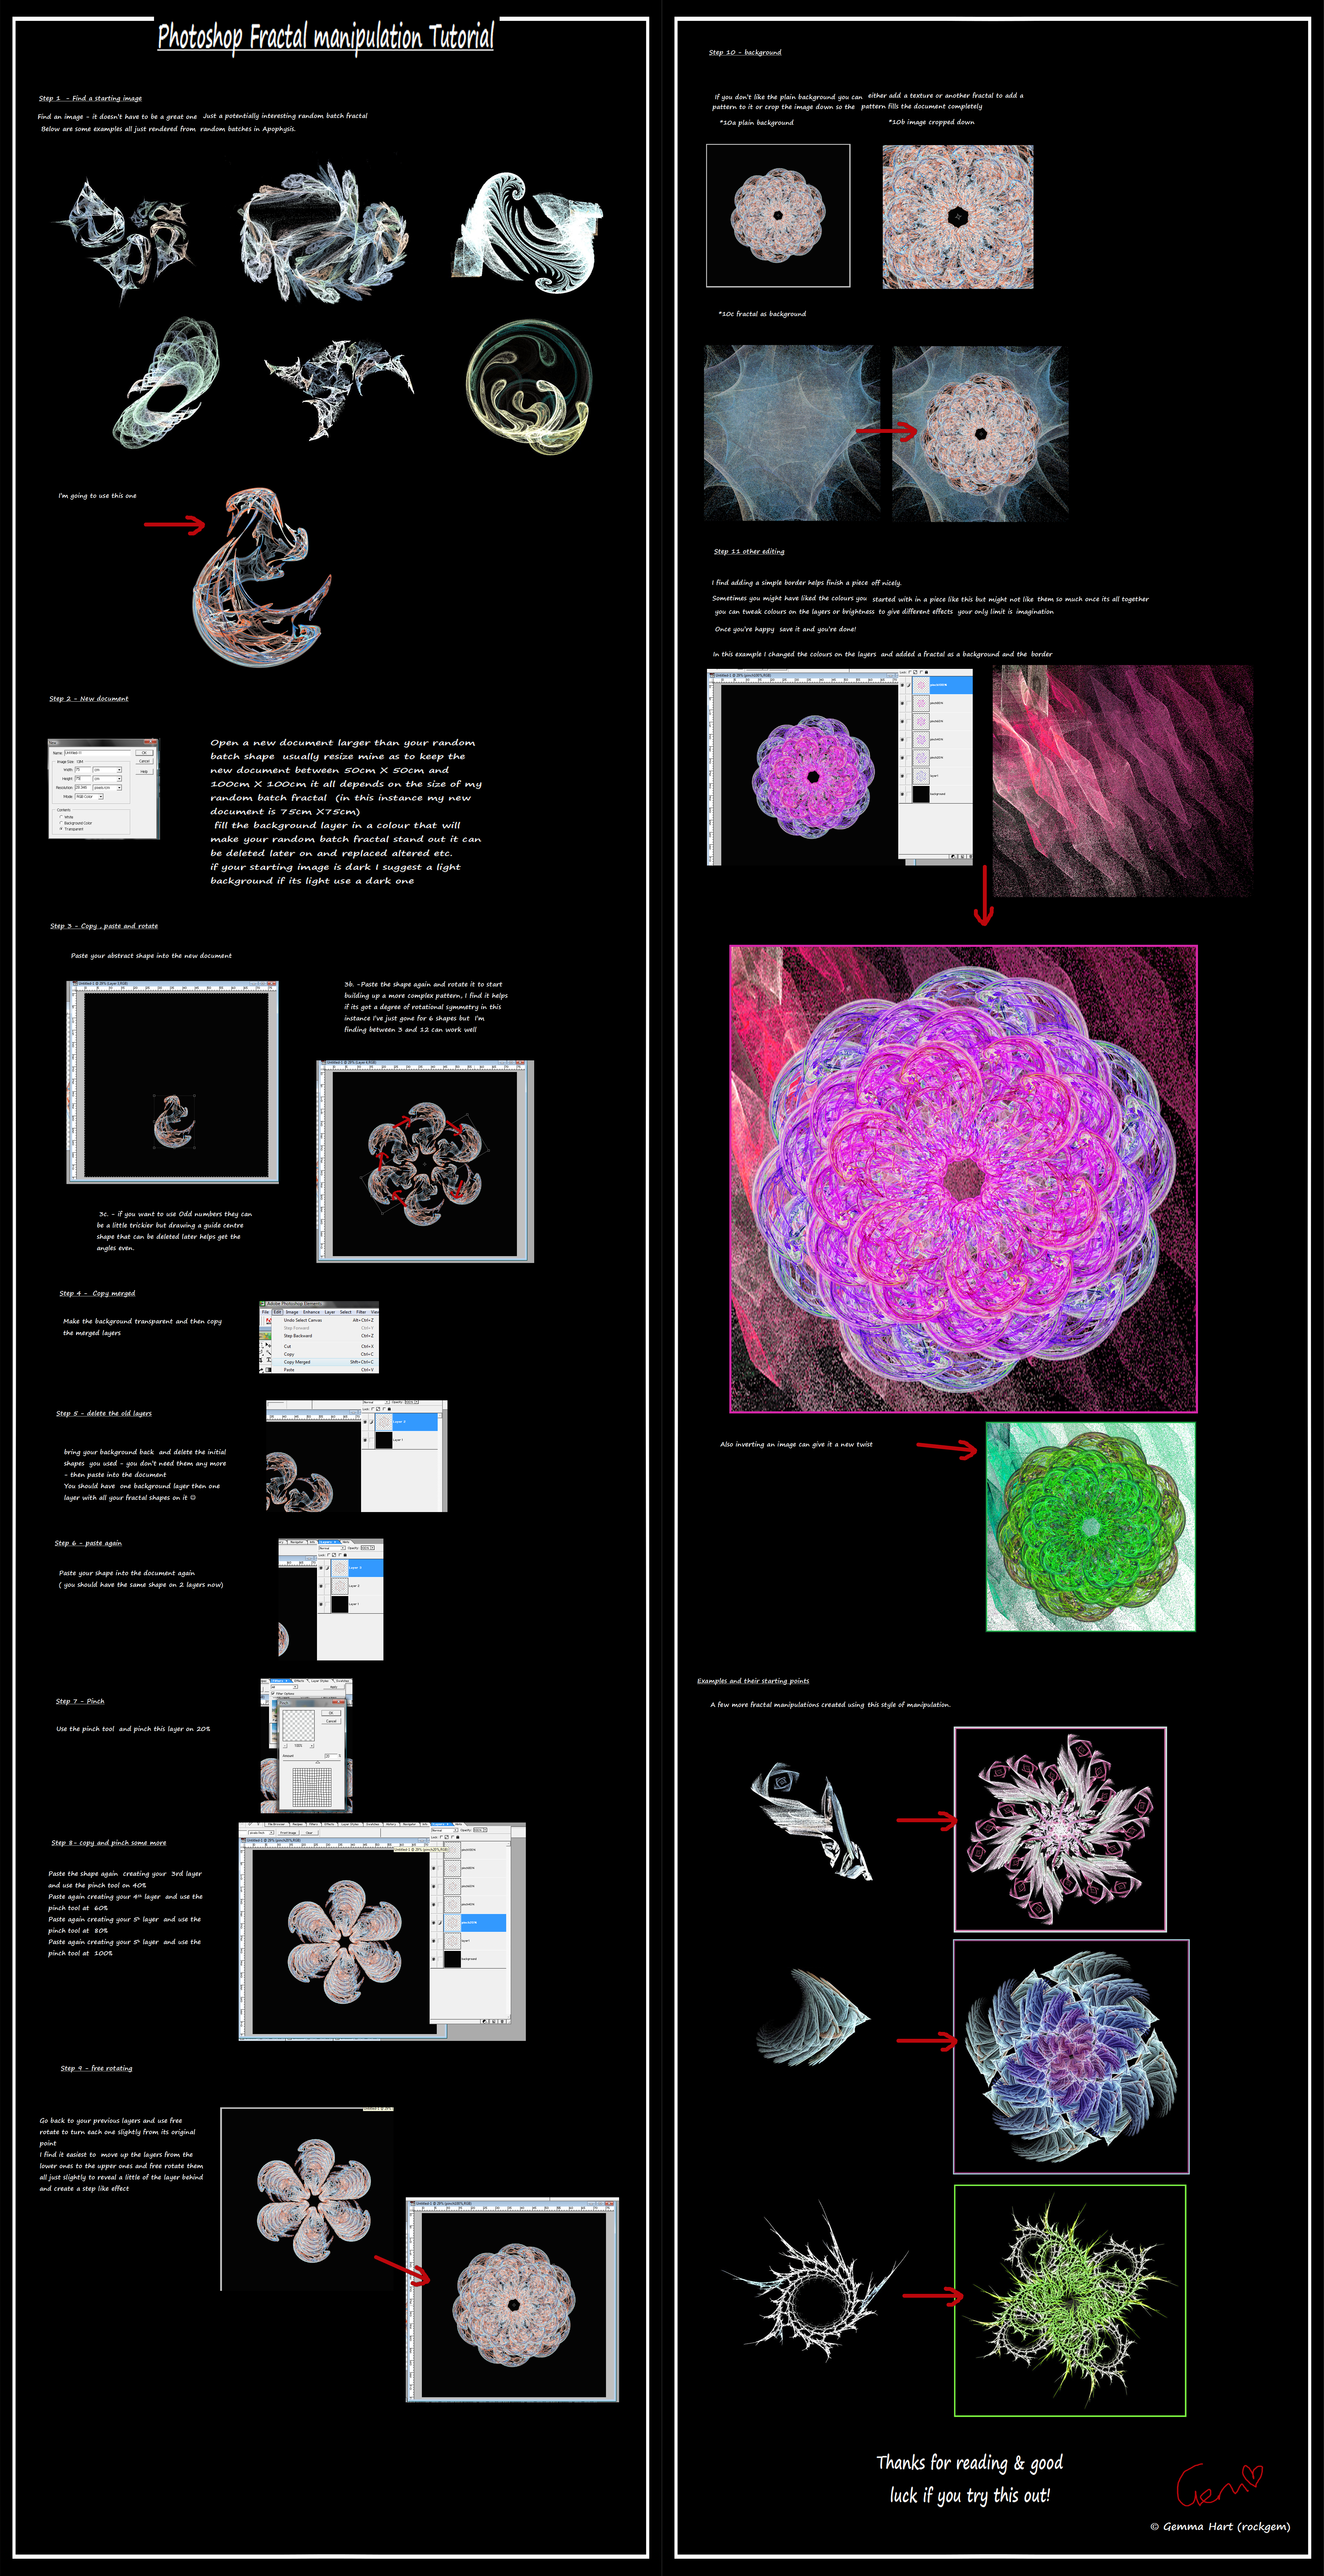
Fractal manipulation Tutorial ( for Photoshop)


 Step 1 - Find a starting image
 Find an image - it doesn’t have to be a great one
Just a potentially interesting random batch fractal
Below are some examples all just rendered from random batches in Apophysis.


 Step 2 - New document
 Open a new document larger than your random batch shape usually resize mine as to keep the new document between 50cm X 50cm and 100cm X 100cm it all depends on the size of my random batch fractal (in this example I’ve used 75cm by 75cm )
fill the background layer in a colour that will make your random batch fractal stand out it can be deleted later on and replaced altered etc.
if your starting image is dark I suggest a light background if its light use a dark one


 Step 3 - Copy , paste and rotate
 Paste your abstract shape into the new document
3b. -Paste the shape again and rotate it to start building up a more complex pattern, I find it helps if its got a degree of rotational symmetry in this instance I’ve just gone for 6 shapes but I’m finding between 3 and 12 can work well
3c. - if you want to use Odd numbers they can be a little trickier but drawing a guide centre shape that can be deleted later helps get the angles even.


 Step 4 - Copy merged
 Make the background transparent and then copy the merged layers


 Step 5 - delete the old layers
 bring your background back and delete the initial shapes you used - you don’t need them any more - then paste into the document
You should have one background layer then one layer with all your fractal shapes on it J


 Step 6 - paste again
 Paste your shape into the document again
( you should have the same shape on 2 layers now)


 Step 7 - Pinch
 Use the pinch tool and pinch this layer on 20%


 Step 8- copy and pinch some more
Paste the shape again creating your 3rd layer and use the pinch tool on 40%
Paste again creating your 4th layer and use the pinch tool at 60%
Paste again creating your 5h layer and use the pinch tool at 80%
Paste again creating your 5h layer and use the pinch tool at 100%


 Step 9 - free rotating
 Go back to your previous layers and use free rotate to turn each one slightly from its original point
I find it easiest to move up the layers from the lower ones to the upper ones and free rotate them all just slightly to reveal a little of the layer behind and create a step like effect


 Step 10 - background& border
If you don’t like the plain background you can either add a texture or another fractal to add a pattern to it or crop the image down so the pattern fills the document completely
*10a plain background
*10b fractal as background
*10c image cropped down


 Step 12 other editing
 I find adding a simple border helps finish a piece off nicely.
Sometimes you might have liked the colours you started with in a piece like this but might not like them so much once its all together
you can tweak colours on the layers or brightness to give different effects your only limit is imagination
Once you’re happy save it and you’re done!
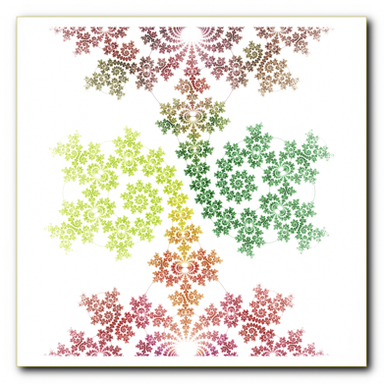
In the main example I changed the colours on the layers, added a fractal as a background and then added the border.
Also inverting an image can give it a new twist
All three example images are older works of mine found in my gallery
All images and literature/written work in =rockgem's gallery are © Gemma Hart. All rights reserved. Reproduction and/or retransmission of all or any part of this gallery are prohibited under copyright law. Users desiring to reproduce or retransmit all or any part of this gallery must first secure in writing the appropriate copyright and other authorization from the copyright owner. My work is not public domain.
Thankyou.
Related content
Comments: 18

interesting 
I like manipulations, so maybe I'll have a look in my old Fractal-Folders
👍: 0 ⏩: 1

thankyou - glad you liked it 
👍: 0 ⏩: 1

I tried and played around with an old simple fractal
here you can see my outcome Apo fireworks
Thanks again
👍: 0 ⏩: 1

hope you had fun experimenting 
👍: 0 ⏩: 0

thankyou for the compliment 
👍: 0 ⏩: 1

you're welcome - hopefully it might be useful to someone here on dA
👍: 0 ⏩: 0

I always wanted to know how you made your fractal manips and I thank you for your tutorial!
I bet it will be used many times by myself and others.
👍: 0 ⏩: 1


👍: 0 ⏩: 0

I love how you take a so-so fractal and make it something with a bit more 'pop'. Have you tried using the keyboard shortcut Command + Shift + Alt + T to copy and paste new layers each with the exact sort of transformation you did to the original? (meaning it reduces size and rotates each new layer by the same amount as your original tweak, each time being applied to the shape that came before, getting smaller or bigger with the same degree of rotation)
With that one little short cut you can create a cool fractal from a basic shape like a circle (it just needs to have more then a solid color to it, like a texture or emboss etc. so that each shape actually stands out instead of blending together).
👍: 0 ⏩: 1

well this is a development from my previous tutorial where it was taking any old image and making what i will term a 'fake fractal' from it - i do use shortcuts from time to time but i don't always opt for the same degree of rotation or pinch when i am working and i'd rather go step by step that way i can change my mind on edits as i am working ( i can be so indecisive) i just made this because people asked me how i made my works like this 
👍: 0 ⏩: 1

Anything that keeps us out of mischief eh!? LOL
I absolutely love the concept you have here, I don't know if I would have ever thought of it!
I just thought if you didn't know that particular keyboard shortcut it might help, I know when I found it I sort of went mad at first Hahaha!
I kinda wish I knew more of those sorts of shortcuts but since I am teaching myself from trial/error and online tutorials (like yours) it takes time to learn all the cool stuff you can do with PS
👍: 0 ⏩: 1

well to be fair it would be nice to have a bit more time to get into mischief 
it a sort of very simple idea but its effective and that's generally why it works as it were.
i find shortcuts by accident usually but i just usually click away happily with my mouse 
generally as much as i dabble i find i am continually learning when it comes to photoshop
👍: 0 ⏩: 0


