HOME | DD
 soup-sammich — Decisions...

#iray #scifi #decisions #sciencefiction #scifisciencefiction #daz3dstudio #irayrender #genesis8female
Published: 2018-10-09 01:11:10 +0000 UTC; Views: 4609; Favourites: 76; Downloads: 210
Redirect to original
Description
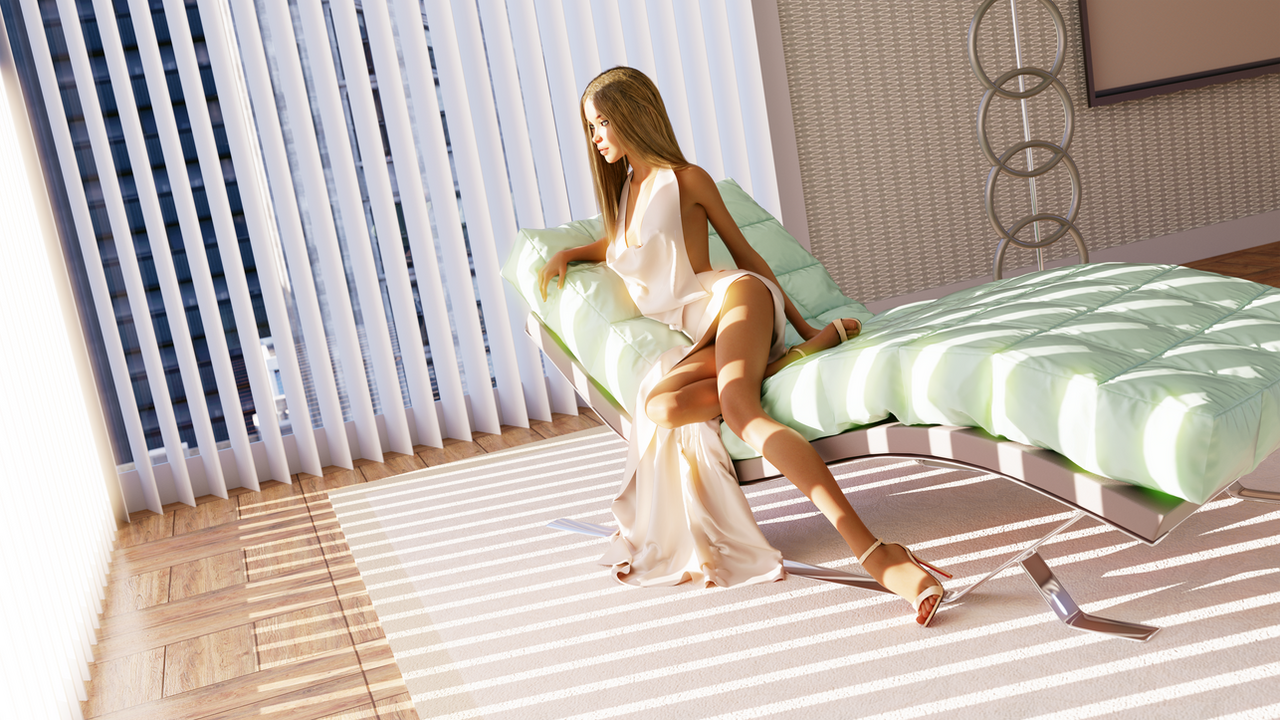
Wow, this took a LONG time to render... It didn't help that I needed to restart it about 3 times... Anywhoo...
A couple weeks ago I felt like doing something a little different and this is what I came up with... Enjoy!
Related content


Comments: 73


Superb SciFi render! The lighting has subtle painterly glow that really adds to the scene: it helps give all the details a much nicer look instead of the harsh oversharp look 3dCG sometimes has.
👍: 0 ⏩: 1

Many thanks! It was one of my first uses of the native bloom effect in Daz. That's what gives the light and reflections such a soft glow. As for eliminating the sharp edges, that's definitely something we need more in our 3D world... I was working with a fairly old set (by computer standards) and it had too many sharp edges, so I added a smoothing modifier to almost EVERYTHING in the scene. It was a fine line between breaking the forms with smoothing and knocking the sharpness off the edges...
👍: 0 ⏩: 1
It worked very well! And thanks for sharing some "inside baseball" on your method. I'm only barely starting to tweak settings. Always endeavoring to make my work better too.
👍: 0 ⏩: 1
Well, if you're looking for unsolicited advice, or technique sharing in general, you've come to the right deviant! If there's anything you want to know about how I created something, or resources I use, please ask. I love talking shop and helping others to create better art. I am by no means an expert in 3D, but I've been around the block a few times and I know where the sidewalk pops up and tends to trip people. Most of my knowledge comes from things you can buy/download from Daz at the moment, but I've been branching out to many other programs as I've found the need... So, again, ask away!
👍: 0 ⏩: 1
Thank you very much. I will be bugging you from time to time. Same goes for me if there's something I can help with like the stereo 3D stuff. Or any questions on techniques or assetts used etc.
👍: 0 ⏩: 1
Nice! Mutually beneficial!
👍: 0 ⏩: 0

Stunningly beautiful, love all the realism and details. The bunny slippers are a great touch
👍: 0 ⏩: 1
Many thanks! The bunny slippers were quite fun to do. I didn’t rig them, though... They’re pretty much just a static .obj in that pose...
👍: 0 ⏩: 0

Hope, I can see her decision and that this decision will be really sexy
👍: 0 ⏩: 1
Her decision can be as sexy as your imagination wants it to be!
👍: 0 ⏩: 1
Yeah, but my imagination needs a little bit support, I believes (Wink)")
👍: 0 ⏩: 1
Unfortunately mine would, too... I also lack the time for another render at the moment... Too much to do...
👍: 0 ⏩: 1
Good work needs her time
Don't be in a hurry!
👍: 0 ⏩: 0

This is a great picture on so many levels. It plain to see that there was a lot that went into it.
👍: 0 ⏩: 1
Many thanks! I really enjoyed making it, in spite of how long it took!
👍: 0 ⏩: 0

I LOVE the slippers!
The blown out highlight of the window looks like what I've seen photographers do, and isn't easy in a 3D render, light seems to be wrapping around the character rather nicely - Emmisive source from a Primitive or a Light ?
This one is only zooming to part of the screen, not sure why, maybe something to do with how DA handles PNG instead of JPG ?
👍: 0 ⏩: 2
Oh, and the light is thanks to enabling the Bloom Filter and tweaking the settings. I'll upload my settings on this image when I get home!
👍: 0 ⏩: 0
Interesting that you’re having zoom issues... I couldn’t zoom in at all on desktop, but it works fine on my mobile... weird... Anyway, glad you like the slippers! ")
👍: 0 ⏩: 0

BRAVO
GOOD THING ARE WORTH WAITING FOR, ..... EXCELLENT ! ! !
(SO DETAILED I'D LIKE TO SEE IT LARGER)
👍: 0 ⏩: 1
The full version is available to download! 2440x1080 I think... I rendered it twice the size, but the polys in the cloth were just too noticeable, so I blurred them a bit and shrunk it to (something)x1080 to hide some of that jaggedness...
👍: 0 ⏩: 0

Know how you feel as regards renders.
I've been struggling to get anything out of late while using 3delight - first tests are quick, which raises my confidence, then whatever I do for finishing touches, glass, a replacement hairdo, and bang! first ten minutes it bogs down on a bit of the image and my heart sinks, an hour later and it's settled into grinding through the same rough patch which it is still chewing on 38 hours later.
I never want to cancel because what it has done looks great.
👍: 0 ⏩: 1
I know that if you’re using Iray, and you use the “Iray Shading” option for your viewport, it’ll reduce the time it takes to render the final image (only because it’s already done the initial calculations, and I think only in Daz 4.8 or newer). Granted, it takes a little longer to do anything in the viewport, but it does seem to take less time to do the initial calculations in the viewport than it dies in the render screen...
👍: 0 ⏩: 1
Yeah, I knew there was a setting recommended to leave at one setting while prepping and using Nvidia view and to toggle before real render, but I've not noticed much speed diff (and I keep hitting render while having left headlamps on half the time, I don't want another button to forget to hit as well - if only the camera headlamp auto would work as correctly as it does for 3DL lights, but some Iray lights don't light the viewport).
👍: 0 ⏩: 1
Agreed. Unfortunately, Daz does not recognize Iray emissives/mesh lights and hdri as “lights.”
The Iray viewport is something I rarely use. It’s kind of a “I’ve gotta speed this up a bit” kind of thing once I’ve done a couple test renders... What I typically do is set two viewports up... That way I can turn off my camera headlamp and still use the perspective view. The camera viewport I almost never touch after I get the right angle and perspective. The only trouble with doing things that way is you’ve got to remember to click on the camera screen before rendering... Otherwise you’ll end up rendering just a hand/foot/hair/whatever...
👍: 0 ⏩: 1
I used to use the Aux viewport in place of the main and have the main detached and one the second screen. But it proved annoying after a while, some Window managers (I use Linux) didn't handle the floating Wine Qt window well and it would keep snapping back from fullscreen or sliding about.
Now using a slightly high def monitor (not as high as I'd like tho), and need to slide the parameters or content out of the way less. I need to figure out how to do my own layouts, all the presets are not useful. Main bugbear is content, keep moving to and fro, could do with a second or (better) multiple Content Windows like a tabbed or split window file manager.
👍: 0 ⏩: 1
You can set Daz up how you like and save it as a config file. That’ll keep everything exactly in the same position. I can’t remember where the save as .conf is at the moment, but it’s in there somewhere!
👍: 0 ⏩: 2
I know I can, I just seem to break it every time I try.
I've sort of customised it, and saved the setting so it persists, I'm just fairly sue there are some layout abilities I'm not aware of.
I managed to get a really complex layout with Foobar 2000 the music player with zero docs, but I'm not having the same luck with Daz.
👍: 0 ⏩: 1
Yeah, with the amount of settings Daz has you’d think that they would have a more streamlined UI... That way we could actually use all of the software’s potential... Every time I go research something I find a feature that has been in Daz for ages but is completely new to me...
👍: 0 ⏩: 1
Took me two years to work out applying Smoothing and additionally Push Modifiers practically autofitted Mil-3 and Gen-4 clothes. Before that, each attempt felt like open heart surgery with a spoon.
Saw a video on Youtube recently on using Push and Dformers and the video person knew about Geoshells but used a second figure load ontop of the first instead...Using a Geoshell would have simplified and uncomplicated the process but they were taking the viewer through how they were most comfortable, not the simpler way.
👍: 0 ⏩: 1
You’re talking way over my head right now... If I fit something to a model and get a lot of poke through, I’ll typically just try to scale it/morph it, and if that doesn’t work I might up the collision iterations. But if that fails, I just look for something else, or make it myself...
👍: 0 ⏩: 1
I am????
Genesis clothing and up has smoothing already applied
Gen-4 and older do not.
(Scene Tab Triangle Menu > Edit > Geometry > Apply Smoothing Modifer (and then same menu point Then you can alter Smoothing to combat poke thru in Paramters Tab Still no good? Scene Tab again (with clothing item selected) Edit > Geometry > Push Modifier [give it a name or leave default] Clothes offset from figure by 1.0 reduce in Paramters Tab (mesh offset) until poke thru gone and no more 0.3-0.7 usually does it. You can take offset above 1.0, but clothes start looking like padded raincoats. I've had mixed results with Collision iterations (often end with origami triangles poking out of garments which I don't spot until 40mins into a render) Morphs, especially on Gen-3 clothes are annoying futery just to locate and scaling parts of clothes leaves fuller figures looking like the Michelin Man. Still use morphs (loosen all etc) a little though (torso abdomen, waist, hips..) and Mil-3s are still a problem as skirts are often poorly rigged for movement. There's also such a thing as painting weight maps to deal with poke through (seen vids of people exporting to Blender for that) but looks like a limited version is possible through Daz itself via push the Youtube Vid I watched was sketchy on that bit, seemed more like an afterthought 'cause the presenter had time left or got too into explaining. I've not got as far as making things myself - most I've managed is a few texture edits in Gimp - I'd like to be able to replace one colour for another, but the likely tool fails to do it. 👍: 0 ⏩: 1
Ah, the Push Modifier and Geoshells is what I was unfamiliar with... Something I'm going to have to look into...
Texture edits is where I began, if you'd like help getting them to work, just let me know!
👍: 0 ⏩: 1
Are you familiar with Gimp?
I was trying to replace one colour with another on a UV for an item of clothing (change the trim from purple to red) but the tool runs but doesn't change anything) the trim is textured so bucket fill doesn't reach much than a tiny area - but I had the same problem with a simple floor tile with colour replace, but bucket fill worked on that occasion.
I might try knocking up an imagemagick script to do the colour replace, it'll also do fuzzy match to the colour you want to replace.
But other than that, any suggestions?
If you have a recent wet-look, dirt or wound product or Jepes Jewels and tears, SKin Blender, Fuzzy Cloth Shader or dirt, moss or snow shaders, all use Geoshells.
Select Figure (or prop) Create MEnu > Create a Geoshell Select the Shell under figure in para, select surface tab and apply Uber Iray dispersive water shader = instant wet look
(might want to switch off some Geoshell surfaces, like eyes, mouth , nose, scalp if you've hair.
👍: 0 ⏩: 1
I used GIMP for several years, and still do occasionally. I’m sure I’m not the best with it, but I’ve gleaned a few tricks over the years...
Since you’re looking to change a trim color, the best way I’ve found is to create a mask of the area you want to change. Be warned, it is fairly labor intensive...
-Duplicate the original layer, then use desaturation/B&W to remove most of the color data.
-Bump up the brightness/contrast until you’re left with something close to pure black and white. Depending on how much “color fade” you need, the brightness/contrast might not need to be maxed. This step may need to be repeated several times to get the desired result. (You may also want to “posterize” your mask as well. This should replace larger sections of colors with a single color.)
-This should leave you with a mask that is pretty close to something you can bucket fill.
-Select the areas you want to change with the magic selection, hide the mask layer and select the original, then bucket fill to your hearts content.
-You may need to make a couple masks in order to isolate very specific areas. The process should be roughly the same.
-You might also need to make an additional inverted mask. The process is the same, just invert the image after your initial desaturation.
-In case you’re unaware, the GIMP magic selection tool can also be tweaked for color sensitivity. The smaller the value, the more sensitive to changes in color it is. i.e. if set to 1, you’ll only be able to select a single color. If you bump it up to 50, you’ll select a very large portion of the colors, and 100 will get you almost all, if not every, color. I think its default is 15, but I usually set it around 8-12.
-GIMP’s Grow and Shrink Selection tools are (in my opinion) superior to that of Photoshop’s version. With GIMP you can select the amount of pixels to grow/shrink your selection. This can be extremely helpful in further fine tuning your selection for changing a color.
-Remember, the “fuzzy” brush is your friend, but he’s kind of a dick sometimes. Since there is so much pixel color variation in digital imagery, you may need a bit of color bleed at the edges of your new mask. If you run an appropriately colored fuzzy brush over your image after changing your color you can “re-blend” your colors. Any fuzzy brush in GIMP that is smaller than 5 pixels doesn’t have much “fuzz” to it, so this method isn’t preferred. It also requires you to go over every area by hand, so it’s slow and tedious.
-I’ve used the following trick in PS for adjusting DOF, but I’m pretty sure GIMP has similar functionality. Just create a layer of the color you want using whatever selection method you prefer. Ensure your new layer has an alpha channel so you are only working with your color and transparency. Then select all of the new color layer and apply a Gaussian blur. The blur value should be minimal to avoid unwanted color creeping into other areas.
-Hide your mask layers and leave your color layers visible. Then save and apply new textures, render, and bask in your newfound awesomeness!
I’ve also used similar methods for creating every “black and white with a splash of color” image I’ve uploaded... I used a mask to change the color of the Aiko-Bot skins in my “Final Inspection” image. Granted the magic selection and bucket tools worked pretty well in that case because the colors were all similar to start. I still needed to use a mask to get everything perfect, though...
Geoshells sound INCREDIBLY useful! I’ll definitely be experimenting with those!
👍: 0 ⏩: 1
Cheers for that long instruction set.
Basically I'm going to have to learn masks and layers.... damn, I was hoping I'd be able to avoid that.
Imagemagick via script, sounds easier (and if it's possible to batch automate, so much the better). I've a background in coding so some things just come easier via a script rather than having any skill with paint programs.
I've already done one to replace the textures on TrekkieGrrls sharecg Blanket prop to replace the horrible greenish with some nice tartan seamless tiles.
Unfortunately the ruby bindings 'Rmagick' are still up in the air after a major Imagemagick update.
Geoshells are great. I'm starting to get the hang of dFormers too (they really need to sort out the unfeasibly large 'percentage' on the Dform Field though, nothing should be allowed to start with a default percent over 100.
👍: 0 ⏩: 1
I suck at writing code and scripts... ImageMagick wouldn’t work too well for me... It looks like it can be pretty powerful, though, so I wish you many successes in the future!
And as far as the default settings on a dformer, I think they might be using 100% as a marker for a “original mesh 100%” as opposed to 100% dformer. Daz does some weird stuff with their numbers that doesn’t always make sense at first...
👍: 0 ⏩: 1
I think they use Bistromath, especially when it comes to store discounts.
Non of my invoices would pass muster on an audit.
👍: 0 ⏩: 1
Bistromath is a certainty when it comes to Daz... They really should send you a towel when you create an account...
👍: 0 ⏩: 1
If Daz are Hoopy Froods, there's a surprising lack of towelling fabric shaders - I've usualy had to make-do with velvet.
👍: 0 ⏩: 1
A fair point. They're probably more like the mice...
👍: 0 ⏩: 1
The mice just wanted to do the Tri-Tv chat show circuit, they were media-whores...
👍: 0 ⏩: 1
Unfortunately, I have a shit memory and when it comes to Douglas Adams I’m only familiar with the movies... I remember mice being the “villians” in the more recent version... Bent on world/universal conquest... Seemed fitting...
👍: 0 ⏩: 1
The (2005) movie interpretation was flawed. So divergent from the original plot it may as well be telling a different story with some of the same characters.
In the original audio radio play and the books, the answer to the ultimate question was an accidental sideline for most the characters for most the story. Zaphod was involved in a plot to find out who actually ran the Galaxy 'cause it certainly wasn't him as Galactic President. It was almost incidentally revealed near the end of that arc that the earth was destroyed by a conspiracy of Psychiatrists, who employed the Vogons to ensure the population didn't get any meaningful answers and would therefore keep needing to see psychiatrists, which was pointless anyway as both answer and question turned out to be unhelpful. The mice were the descendants of majicthighs and Vroomfondel, unionised Philosophers, initially against deepthought tackling the ultimate question until the computer convinces them they can cash in on the inevitable media debate as to what the answer will eventually be.
Best version is the audio play (more of it - 26 episodes) - the books are also good (5 books), and even the BBC TV series version (much abridged to 6 half hour episodes - but nonetheless much the same cast as the radio play).
My favourite quote :
“And this is your cave is it?” said Ford.
“Er, yes,” said Arthur. He felt very strange. After nearly four years of total isolation he was so pleased and relieved to see Ford that he could almost cry. Ford was, on the other hand, an almost immediately annoying person.
“Very nice,” said Ford, in reference to Arthur’s cave. “You must hate it.”
Arthur didn’t bother to reply.
👍: 0 ⏩: 1
I've been telling myself that I need to read the books since the early nineties... One of these days I'll get around to it. Assuming, of course, that I can find the time to read anything for fun...
👍: 0 ⏩: 1
That's where the audio version comes in great (in this case it's actually the definitive version, not the book it was a radio play first) you can be doing something else while listening to it.
👍: 0 ⏩: 1
An excellent point! I usually have something on in the background for audio stimulation while I work... Might as well be something funny!
👍: 0 ⏩: 0

There are two ways to avoid the camera-headlight disturbing the render in case you forgot to switch it off (two ways that I am using, that is):
1. There's is a "prop" called "Head lamp Blocker". It is an invisible light - without any influence on the scene illumination - which is still 'seen' by the renderengine and is interpreted as if there was a "real" light in the scene, even if it else is completely illuminated by meshlights only (like all my pictures are). So the camera head lamp switches off automatically (if it's set-up like that) for the render.
2. My default scene render-settings are "Sun-Sky Only" for any render, and I choose a time 'in the middle of the night', where the sun isn't visible and no light is coming from the sky (like 3 AM or so). In this case you also can leave the head-lamp on (in automatic mode, of course) for the scene building and it switches off automatically in the render, even if you have only mesh-lights in the scene. Your render-engine is tricked by the "Sun", even if it is invisible and is giving not light to the scene.
(and just in case: This comment is also for you GafftheHorse  (Smile)")
👍: 0 ⏩: 2
| Next =>