HOME | DD
 XnaFreak — New XPS Render Groups
#download #rg #shader #tuturial #xps #xnalara #rendergroups
Published: 2018-07-13 09:34:41 +0000 UTC; Views: 6165; Favourites: 45; Downloads: 186
Redirect to original
Description
Just read I wish there was one (RG) that had "Diffuse, Normal, Emission, & Environment"So I did a research if this is possible. And yes, generating new user customized render groups (RG's) for XPS is actually possible.
My first thought after reading the journal New and improved format for XNA Lara/XPS (NGFF) was:
WOW,
no more Render Groups: This mean that we just put any textures in any order we will like.
No more specific order such as -diffuse, light/ao, normal/bump, specular. No more use of dummy textures if we don't need them (why puting a bump_null just because the RG needs a normal/bump texture?). And also, no more removing textures because the render group doesn't support that textures we would like to use (have you ever wanted to use speculars with environment textures in the same mesh?)
The bad news, a quick test has shown that the development of the NGFF has not been completed.
The NGFF currently does not support environment textures or emission (glow) textures
")
Then I found in the journal of junkymana a comment of the XPS developer: Right, without having RG's (NGFF) this is possible.
After a few tries I found the key to the solution: "User written shaders", assigned to the material groups!
Sounds complicated, but it's easy.
HOW to make new RG's?
Just do not do it.
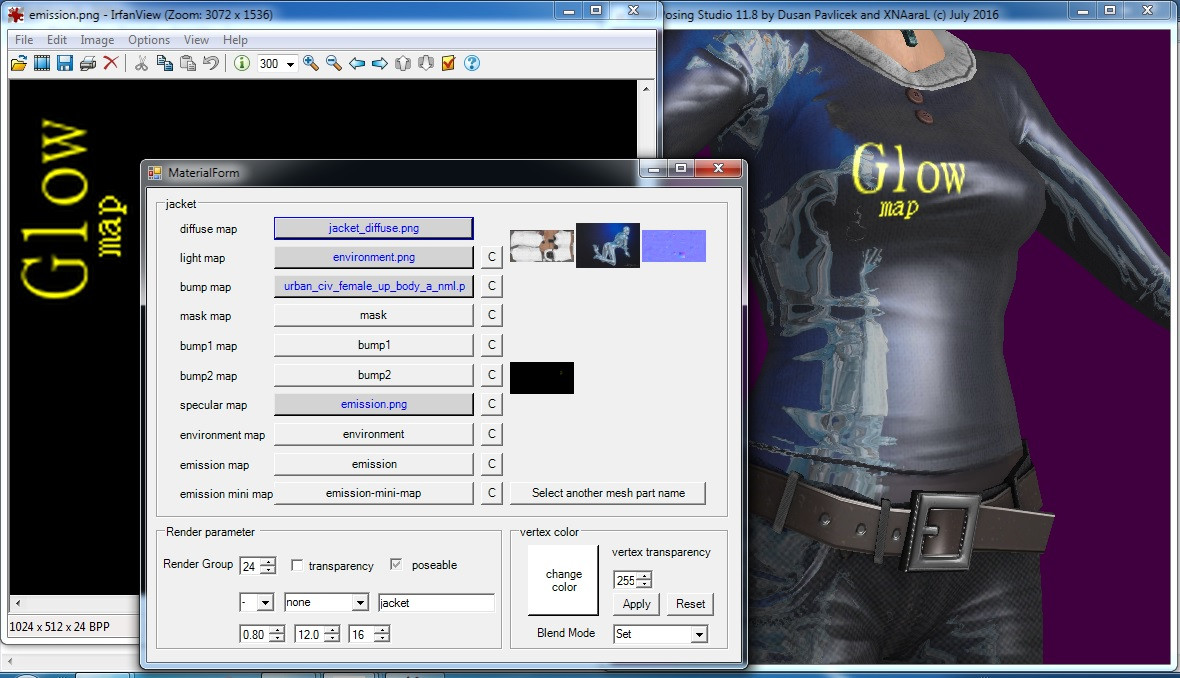
How can we use a material that supports "Diffuse, Emission, Normal & Environment" textures?
- Put your Environment map into the "light map" slot
- Put your Emission(Glow) map into the "specular map" slot.
- Adjust your Environment blend value (Ex: 0.8) with the first render propertie
you will find something like:
newmtl Modeljacket_Material001
Ks 0.8 0.8 0.8
map_Kd jacket_diffuse.png
map_Kn urban_civ_female_up_body_a_nml.png
map_Ka environment.png
map_Ks emission.png
sc +X -Y +Z
cm none
opaque yes
shader NewRGs;DiffuseEnvBumpGlow
The result will be:
newmtl Modeljacket_Material001
Ks 0.8 0.8 0.8
map_Kd jacket_diffuse.png
map_Kn urban_civ_female_up_body_a_nml.png
map_Ka environment.png
map_Ks emission.png
sc +X -Y +Z
cm none
opaque yes
shader NewRGs;DiffuseEnvBumpGlow
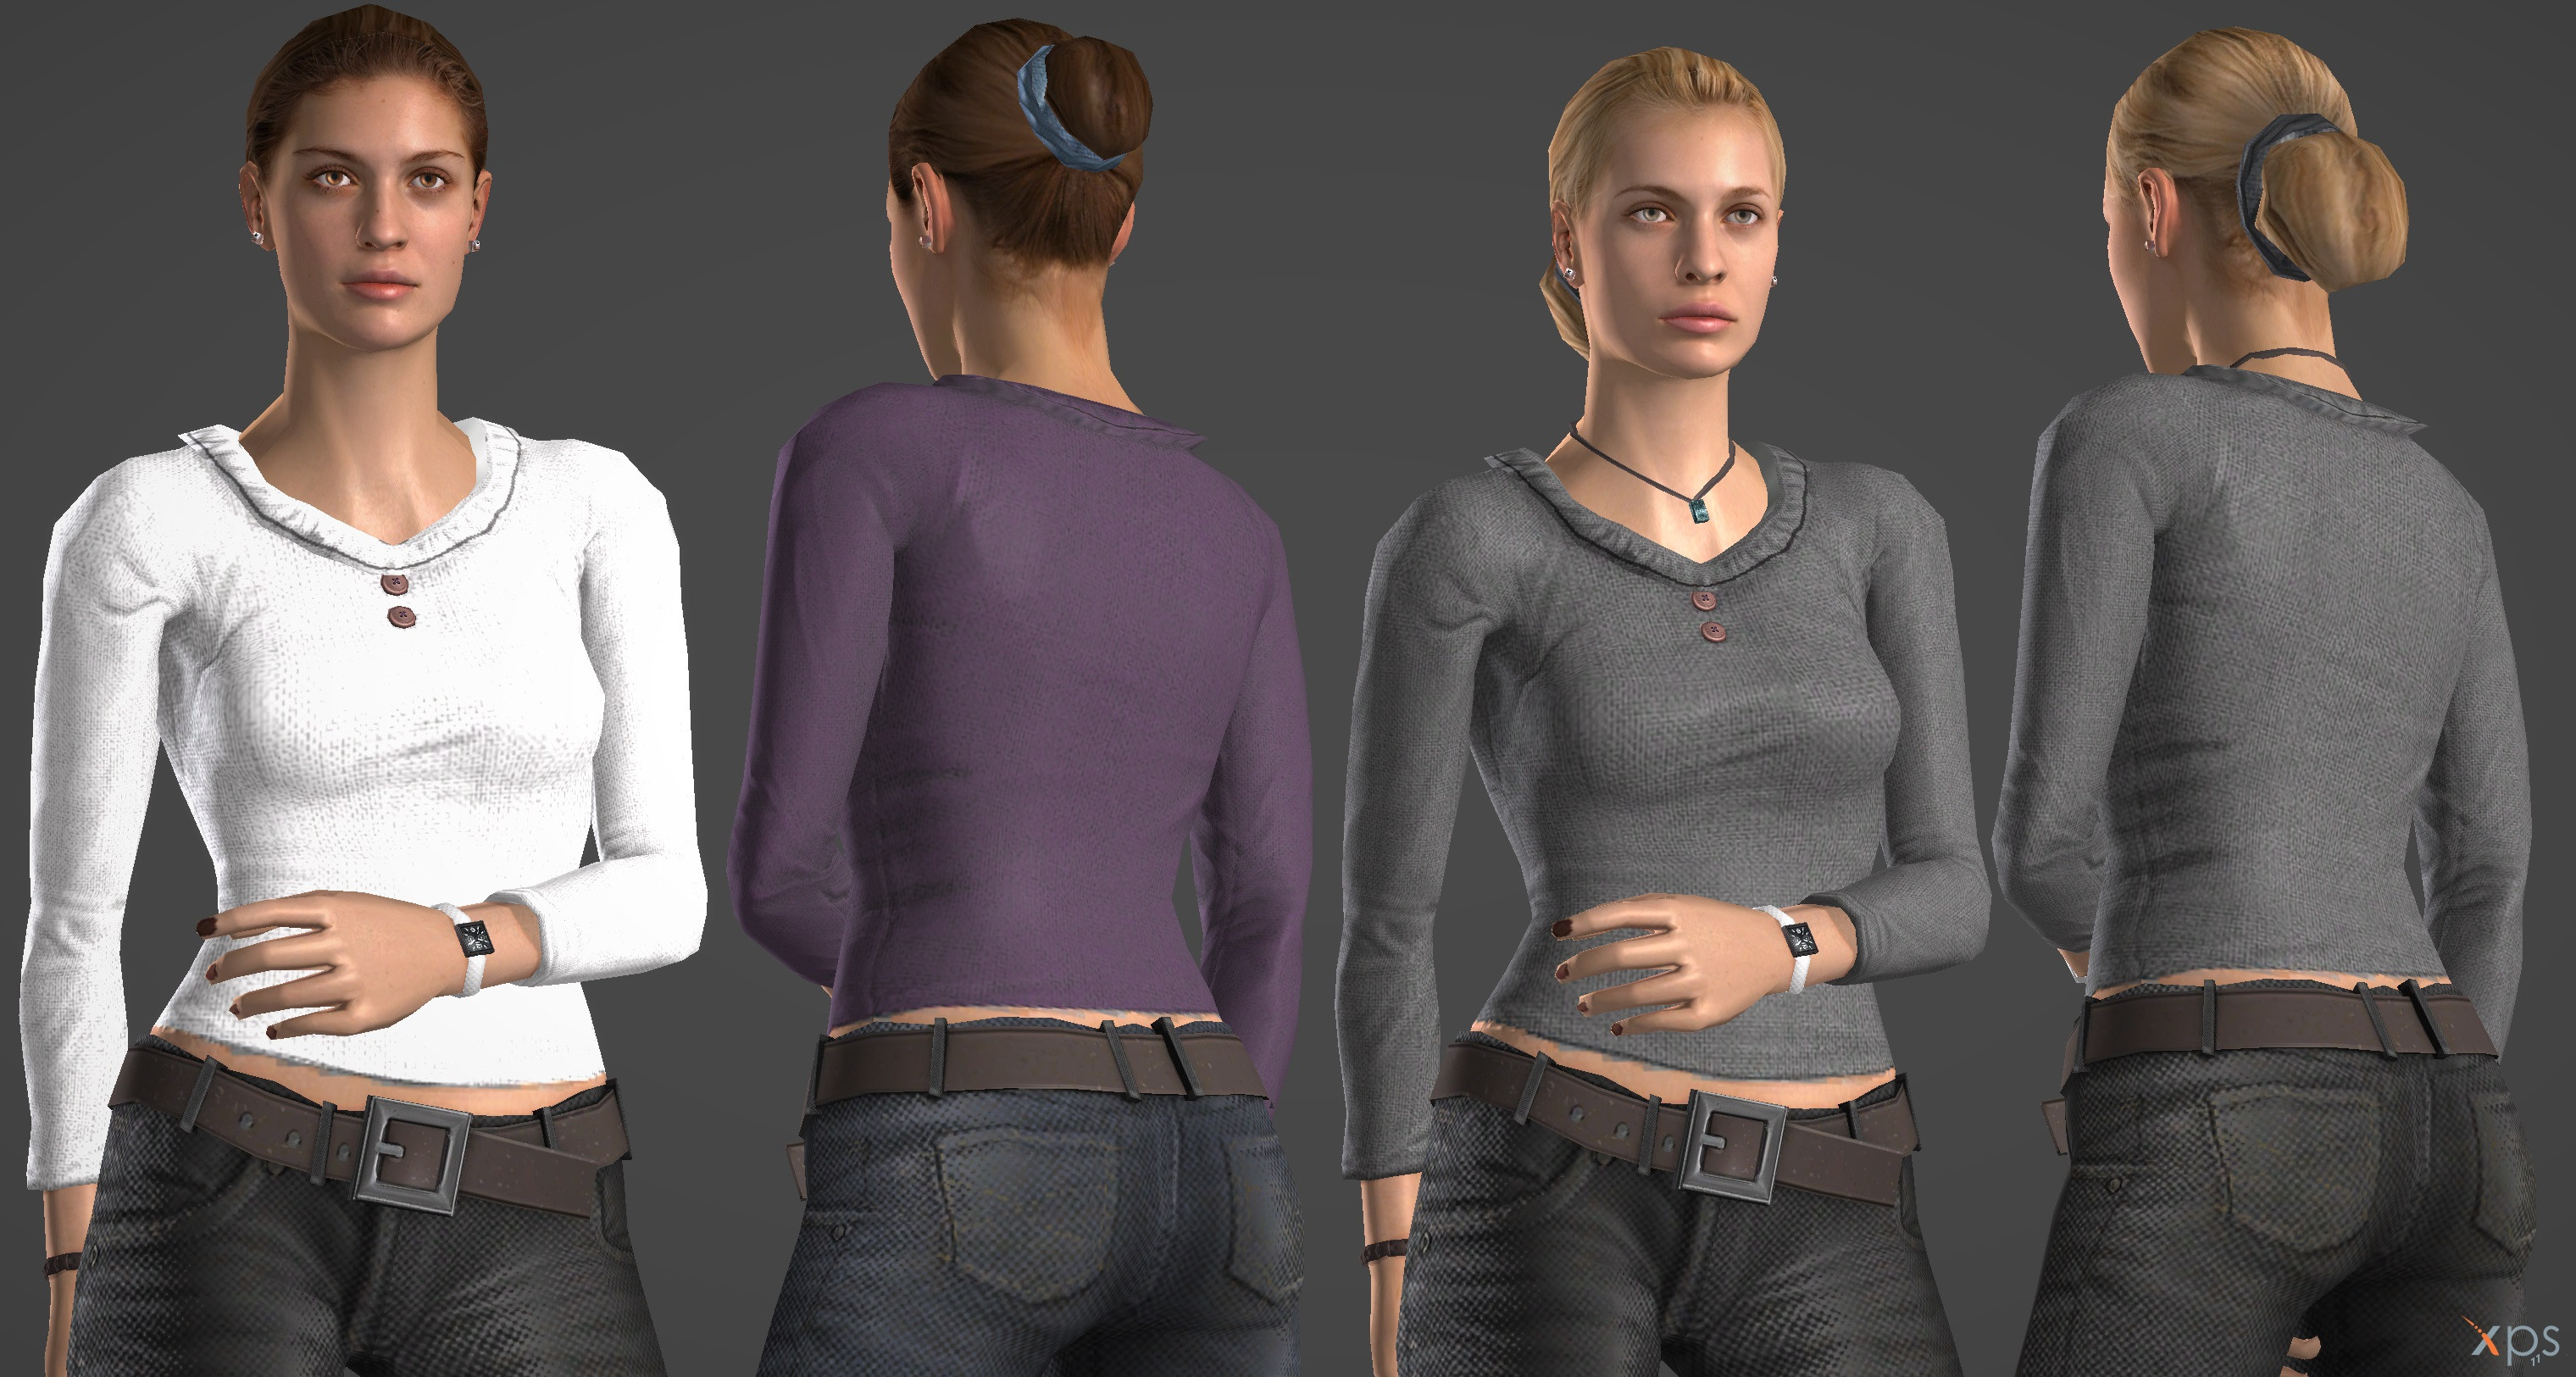
Load your NGFF model, like normal ("File->Add", "Modify->Load Generic_Item" or Drag&Drop),
and
... drumroll
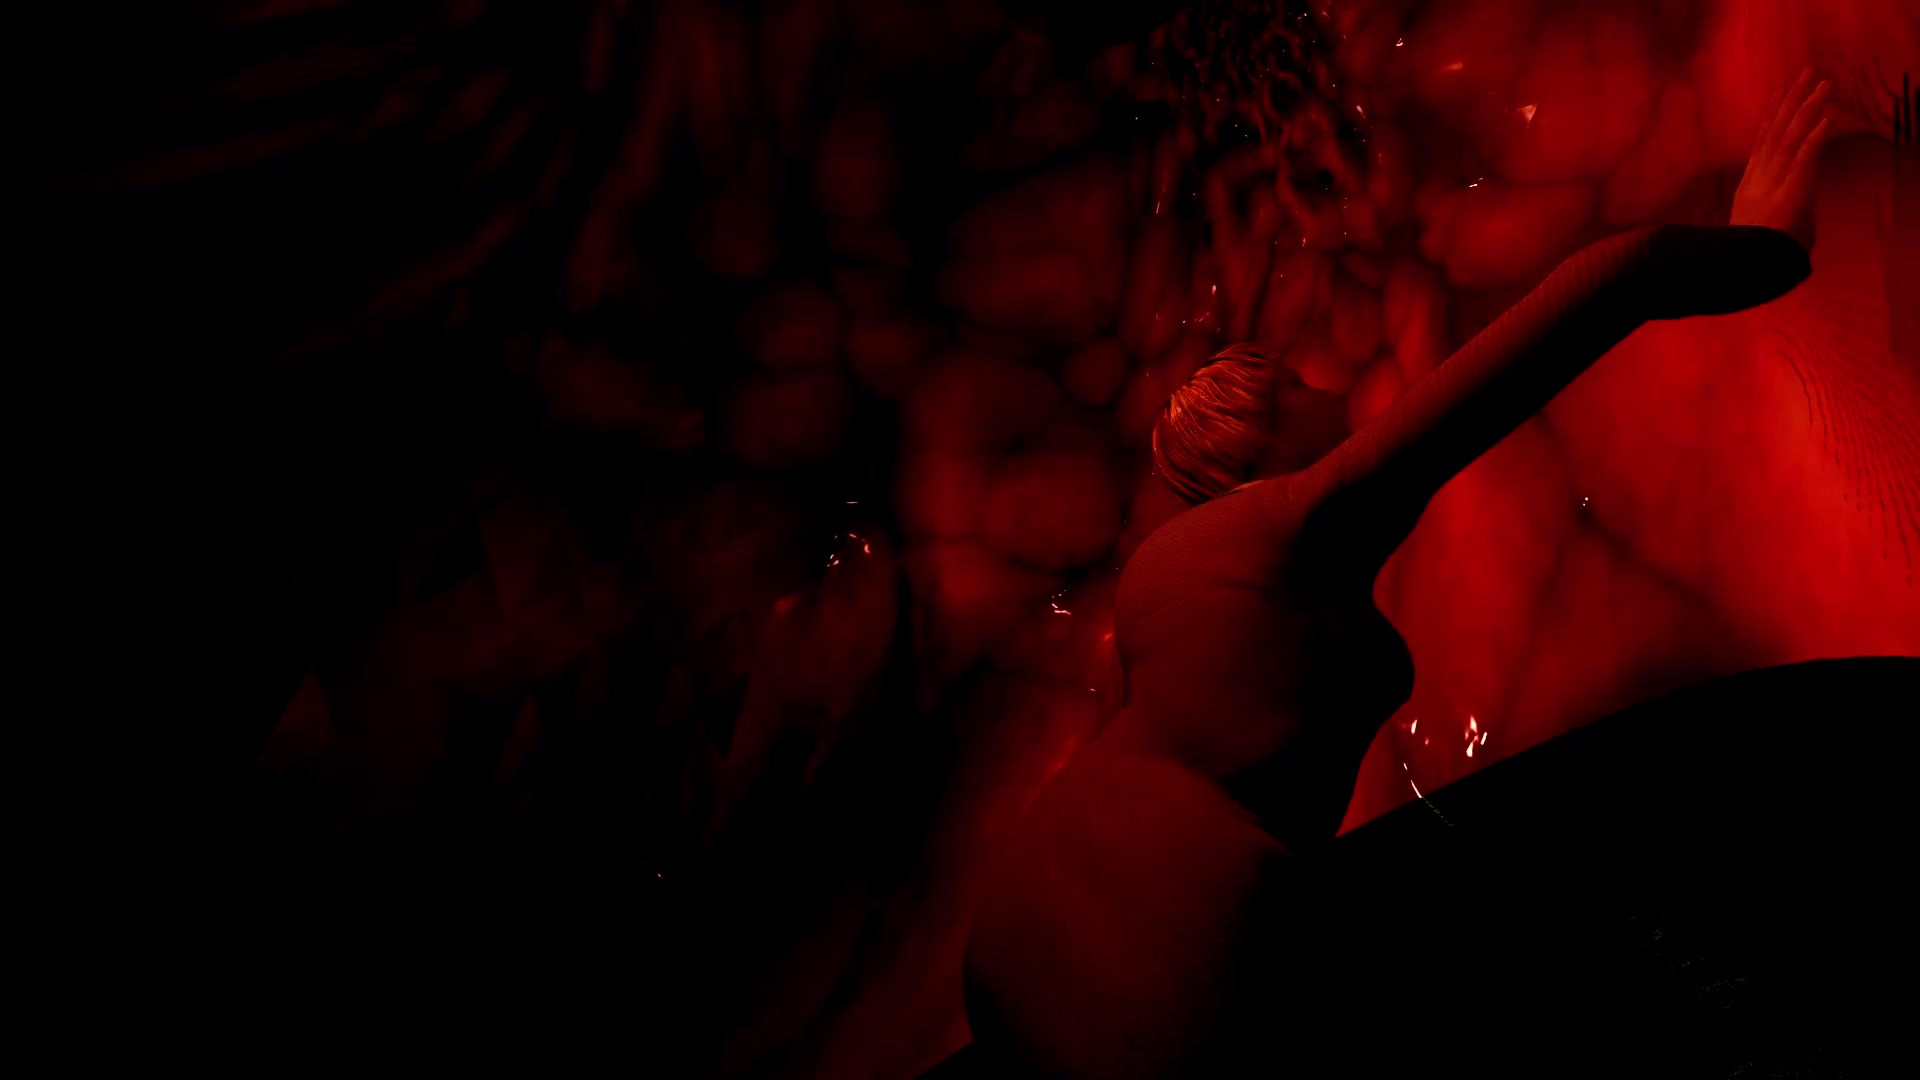
"Diffuse, Emission, Normal & Environment" textures
 (Smile)")
If I already create a new shader, then I also implemented:
"Diffuse, Emission, Normal & Specular" textures
How make "Diffuse, Emission, Normal & Specular" happens
 (Wink)")
shader NewRGs;DiffuseEnvBumpSpecular
Have Fun.
Related content


Comments: 26

👍: 0 ⏩: 1

Flagged as Spam
👍: 0 ⏩: 1
👍: 0 ⏩: 0
👍: 0 ⏩: 1
👍: 0 ⏩: 1
👍: 0 ⏩: 1
👍: 0 ⏩: 3
👍: 0 ⏩: 1
👍: 0 ⏩: 1
👍: 0 ⏩: 1
👍: 0 ⏩: 0
👍: 0 ⏩: 1
👍: 0 ⏩: 0
👍: 0 ⏩: 3
👍: 0 ⏩: 0
👍: 0 ⏩: 0
👍: 0 ⏩: 0

Thank you so much for actually reading my comment. This is great. Do you know if there's a way to do all of this and include the mask part so that only the parts I want will shine?
Sorry for asking so much. I am new to XNA Lara and you seem to be very knowledgeable of it.
👍: 0 ⏩: 1
I consider the the mask part as a wrong design decision.
All parts of the "glow map", which are in black color are always without any shine.
So just blend the mask in Photoshop over the glow texture.
👍: 0 ⏩: 1
I'm sorry I phrased that badly. I meant: Is there a way so I can make only certain parts of the model have the metal environment reflection? Normally having a "mask" piece will make any white parts not have a metallic reflection, but you can't use that here.
👍: 0 ⏩: 1
Ahh, Environment map.
Unfortunately, the NGFF format only allows 4 textures. The Mask would be the fifth texture.
One possible solution I could implement, would be to use the alpha channel of the normal map as a mask. On the other hand, I never noticed that someone used my shader. So it would be a waste of time to expand it.
👍: 0 ⏩: 0

Always happy to see someone still working on improving XPS
👍: 0 ⏩: 1

Alone this feature implemented in Xps would satisfy a new Xps version.
Really have to dig into what NGFF's actually are.
I think thats the only option in Xps i have never used.
Thanks again for your scripting and scripting challenges hunger
And that you share your results with us.
Just one stupid question of me:
Put your Normal map into the "bump map" slot
Would a normal map into the normal map slot work also?
I mean from the lessons i read normal maps are mainly something like the HD version of bump maps.
Beside that normal maps provide x.y.z informations to a polygon and normals work with their simple black for depth and upside down technique.
You are awesome
")
👍: 0 ⏩: 1
The question is not stupid. On the contrary!
Your statement "Beside that normal maps provide x.y.z informations to a polygon and normals work with their simple black for depth and upside down technique." is wrong in roots;
but it is a very common misstake.
Short version: Yes, use the normal map as before.
(In XPS the Name for the slot is just wrong translated, like the saying "I know that I know nothing " is wrong translated.
The saying, though widely attributed to Plato's Socrates in both ancient and modern times, actually occurs nowhere in Plato's works in this form.
Evidence that Socrates does not actually claim to know nothing can be found at Apology 29b-c, where he claims twice to know something. See also Apology 29d, where Socrates indicates that he is so confident in his claim to knowledge at 29b-c that he is willing to die for it. In Apology, Plato relates that Socrates accounts for his seeming wiser than any other person because he does not imagine that he knows what he does not know.
I seem, then, in just this little thing to be wiser than this man at any rate, that what I do not know I do not think I know either. True Translation:
)
Long version:
The "Label (button)" text in the XPS "Material Form(Editor)" is stupid.
The material Editor call the slot for (tangent space) Normal maps with "bump map"; and not with "normal map". That's wrong and confusing.!
No slot in XPS is labeled as the normal map slot, .
So, your question was not stupid.
Normal maps are NOT mainly something like the HD version of bump maps.
To produce a "Bump mapping ", there are basically 4 techniques (I will ignore "World space Normal maps").
They all contain data for representing apparent small detail on the surface of simpler polygonal meshes, but they each store that data in a different way.
1) "Bump maps":
This technique is the oldest one, developed by James F. Blinn, and described 1978 in Simulation of Wrinkled Surfaces
A "bump map" is a Grayscale Image. The bump map is a kind of highmap with all the information in just 1 (color) channel.
This method of using a texturing function to perform a small perturbation on the direction of the surface Normal before using it in the intensity calculations (shading).
2) "Tangent space normal maps" bluish, greenish or reddish; depending on the swizzle coordinates : (That's the only one what XPS supports)
This technique is currently the usual method in video games.
For tangent space normal maps the Information (X,Y) is in 2 (color) channels, and it bends the direction of the surface Normal before using it in the intensity calculations.
The Tangent space normal maps stores the Information relative to the underlying surface Normals.
One advantage of tangent space normal maps is that the normals are always pointing outwards, so assuming unit length, the normal z coordinate can be reconstructed from the x and y components. After the coordinate expansion from 0..1 to the -1..1 range, the z component can be computed in the shader with this formula: z = sqrt(1 - x*x + y*y). This makes it possible to use two-channel textures (2 bytes per texel) to store normal maps.
Usually the Resource Compiler compresses all normal maps in the 3Dc format (1 byte per texel). When no 3Dc hardware support is available, some graphics drivers can emulate it by converting back the texture to a different format (e.g. U8V8, 2 bytes per texel). On older hardware that does not have 3Dc support at all (e.g. ATI 9800), the engine will convert normal maps to the DXT5 format at loading time. However, using the DXT5 format requires different shader combinations and the quality is a bit worse compared to 3Dc.
3) "Object space normal maps" (Rainbow colors):
This technique is sometimes used in video games.
For Object space normal maps the Information (X,Y,Z) is in 3 (color) channels, and it replaces the the surface Normals before using it in the intensity calculations.
For Object space normal maps the information is relative to the object orientation.
4) "Displacement maps"
This technique is used in some Next-Gen video games.
Unlike the other bump mapping techniques, it not only affects the shading. The displacement map affect the surface itself. The surface looks 3D (high poly) when seen from an angle.
A simple kind of displacement maps are build using a "Tangent space normal map" information in the red and green channel of the texture, and a "bump map" (highmap) information in the blue channel.
Displacement maps are used to change the location of actual vertices in a mesh and to produce new Vertices. This kind of displacement doesn't add any additional detail to the model itself. Instead, it is used to generate in your Video device otherwise complex objects. An example of this type of displacement is how terrain is often generated from a texture.
Another use for a displacement map is parallax mapping (also called virtual displacement mapping), which is a more advanced technique in which a game engine attempts to offset the texture coordinates away from the camera. This is pretty computationally expensive, but it can lead to good looking results.
The most important advantage of this is that we can use angle information to artificially bend edges of adjacent faces toward each other to produce a bevelling effect. This cannot be done with only height information, because the renderer would have no way of knowing in which direction the edges should be bent.
Softening sharp edges sounds simple, but it gives a surprisingly large jump in visual quality. This is because in real life nothing has completely sharp edges.
👍: 0 ⏩: 1
At first sorry for the late reply.
I just found the muse to really read it with my brain set to active today.
This sentence "Beside that normal maps provide x.y.z informations to a polygon and normals work with their simple black for depth and upside down technique"
was more of a typing error.
I wrote "normals" twice. The second time its supposed to be bump. Grayscale surely is a difference from black and white but thats how i refered to it.
The "Displacement Map" was most interesting to me. Ofcourse Next-Gen enjoys also a better hardware but the displacement maps sounds like it needs more
computing power and memory space overall.
XNA-Freak said:
---
The "Label (button)" text in the XPS "Material Form(Editor)" is stupid.
The material Editor call the slot for (tangent space) Normal maps with "bump map"; and not with "normal map". That's wrong and confusing.!
---
--> Thats something that always confused me. Then i tried to really apply a bump map and it looked awful.
I need to read the philosophy part in german again to be certain that i understood it.
But so far i dont get why "not imagine(ing) that he knows what he does not know." makes you wiser.
I would say it makes you less hungry for new knowledge and less scrutinizing circumstances.
👍: 0 ⏩: 0