HOME | DD
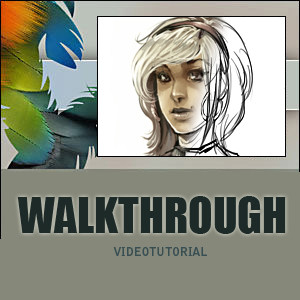
 Abuze — Walkthrough Videotutorial
Published: 2007-01-25 10:11:02 +0000 UTC; Views: 59241; Favourites: 1416; Downloads: 8177
Redirect to original
Description
warning - HUUUGGGEEEE FILE (about 20 mb) and sorry for my really really crappy english.to go on - click on the arrows next to the "restart" button
-------------------------------------------------------------
Hi guys,
some people asked me how i am drawing my pictures- so i decided to record a little video to show my work process -
as you can see it is the german version of photoshop - so i will explain some of the things i did while i was drawing this piece so everyone can understand it
 (Smile)") .
.- i started with a simple sketch and cleaned it up a little bit (flipping the canvas is a good way to see the mistakes you made- that way you have some kind of different view on the picture and can find them more easily)
- i created a new layer over my sketch layer and set the mode to ---multiply---. here i did the flat colours and painted all over the picture
- after that i created an ---adjustment layer--- ( layers>adjustment layer>curves) and played around with the settings so i got a darker picture. now i filled the adjustment layer with a black colour and started painting on it -- and there we have shadows
")
- i added a new curves adjustment layer and set the mode to ---screen--- and worked just like the layer before- fill it with black and paint on it with white
- when im satisfied with the lights and shadows I create a new layer on top of all the layers and start painting on top of it all - when im finished you almost wont see anything of the outlines
- i added a new adjustment layer on top of this one (you already know how this works now
 (Wink)") ) and lightened up the shadows a bit
) and lightened up the shadows a bit- when im finished with that i do some final color corrections et voila
Related content


Comments: 230


i quite like the way you use adjustment layers. i think i'll try messing around with those now
thanks for the lovely tutorial
👍: 0 ⏩: 0

amazing!
can you do a cg background tutorial with the same technique o other? (sorry for my english)
👍: 0 ⏩: 0

Wow das ist wirklich beeindruckend. Du benutzt allein zum Colorieren gerademal 2 Ebenen und den Rest mit Regler-Ebenen (eine Funktion, die ich so noch gar nicht kannte). Du benutzt hauptsächlich einen sehr breiten, waagerechten Pinsel - gibts den schon so in deiner Photoshop-Version oder hast du dir den selbst erstellt? Es ist leider nicht so deutlich, ob dieser Pinsel irgendwelche Eigenschaften, wie z.B. Verläufe, Härte usw. hat - kannst du darüber etwas erzählen?
Jedenfalls vielen Dank für diesen Einblick in deine Arbeitsweise, das war wirklich sehr lehrreich
Mach bitte weiter so, deine Werke sind spitze!
👍: 0 ⏩: 0


go to image > image rotation > flip canvas horizontal
👍: 0 ⏩: 1
i m sorry i don t understand what you mean with "shoetcute"
👍: 0 ⏩: 1

lol ;D I just forgot the R to say ( shortcut )!
👍: 0 ⏩: 0

There isn't a shortcut for that in Photoshop, you'll just have to resort to going into the menus.
👍: 0 ⏩: 0

i dont get the 'adjustment layer' at all....
my picure gets a darkish backround all uglyish x.x and i cant draw on it only on the 'skin' layer below the adjustment layer its very weird...
ty
👍: 0 ⏩: 0

this tutorial is super helpful
👍: 0 ⏩: 0

You are absolutely fantastic! This video is really helpful.
👍: 0 ⏩: 0

ich find das video soooo klasse 
ich kenne deine tutorials schon seehr sehr lange,
habe VERSUCHT zu zeichnen bevor ich mit der fotografie begonnen hab XD
dann war mir das pc colorieren aber irgendwie zu doof .. ich habs nie gecheckt ..
aber jetzt möcht ichs noch einmal versuchen 
eine frage hätte ich, und ich wär dir sooo dankbar wenn du sie mir beantworten würdest!!
beim colorieren fährst du mit dem pinsel und der farbe einfach über die outlines und es bleibt alles schön abgegrenzt, die hautfarbe bleibt genau im gesicht, haarfarbe auch genau dort wo sie sein soll, kein einziger pinselstrich geht über die outlines oder in die andere flächer rüber ..
hast du da irgendwas eingestellt? ich hab mir früher immer die mühe gemacht jede fläche dann mit dem zauberstab zu markieren das ja keine farbe "über" die outlines geht, weil das löschen dann ja auch wieder so mühsam ist ..
kannst du mir da vielleicht helfen? ")

👍: 0 ⏩: 1
sorry für die späte antwort- hoffe es hilft dir trotzdme noch- in der Layerpalette hast du unter dem feld wo du deine ebene auf normal/multiplizieren etc. stellen kannst das wörtchen "lock" und daneben ein kleines gerastertes kästchen. wenn du deine ebene auf der du die z.b gesichtsfläche gemalt hast nun auswählst und das kästchen drückst kannst du nicht mehr über den rand hinausmalen.
👍: 0 ⏩: 1
VIELEN DANK für deine Antwort, auch wenn meine jetzt ein wenig zu spät kommt
sehr lieb von dir ^^
👍: 0 ⏩: 0

uhhmmm what adobe version do you have?? since I was wondering how you switched the thinges... I mean the drawing ~~ uhh I can't explain welll D:
👍: 0 ⏩: 1
pohhh i think that was photoshop cs2
👍: 0 ⏩: 0

so cool!! thanks for uploading such amazing tutorials!
👍: 0 ⏩: 0

Wonderful. I've been looking for a useful way to paint with/over lineart for a while. Can't wait to try this out, thanks so much for sharing.
👍: 0 ⏩: 0

Wow. I only found this now. So how do you make the blacks darker and brighter? I suck at photoshop and I'm trying to learn more. Can you explain this process a little bit more detailed?
👍: 0 ⏩: 1
hmhmhm i dont know if i can explain it nore detailed- i simply added an adjustment curves layer and played with the curves until it looked pleasant to me. theres not much to describe
👍: 0 ⏩: 0

Really, this has got to be one of the best tutorials here on da. The way its broken down into steps with the video to actually show how you go about painting.
It's brilliant and so very helpful. Thank you
👍: 0 ⏩: 1
im really glad you like it and it helped you
👍: 0 ⏩: 1
^_^ Gladness. Thank you for it. ^_^
👍: 0 ⏩: 1


Incredibly. I love watching how other artists work, and this is just a splendid feast for my eyes. Very informative!
👍: 0 ⏩: 1
im glad you like it. thanks for the comment
👍: 0 ⏩: 0

I like this tutorial =] and unlike my friend who was nice enough to comment down there i don't think the quickness matters when it comes to getting the job right and making it look its best ^^
👍: 0 ⏩: 0


I think that the end product is really good, but in my opinion there are much easier and faster ways to do this, especially with the adjustment layer thing.
not the tutorial for me, but I'm sure many other people might prefer this method.
👍: 0 ⏩: 1
yes i agree- there are soooo manyy ways to draw a picture-
the tutorial is just one of hundrets of possibilities
👍: 0 ⏩: 0


hey can you tell me how to set up my workspace like that.
👍: 0 ⏩: 0

wow truely amazing, one thing, how do you have your brush settings??? it seems different than mine but very clever on that actually wathing you paint it, it makes techniques much easier to pick up
👍: 0 ⏩: 0

Also echt super Arbeit... Soweit möcht ich auch gern sein, aber ich arbeite dran
kann man sich das auch irgendwie runterladen?
👍: 0 ⏩: 0

This is exactly what I was looking for in a tutorial, I... I feel like making love to the plant next to me.
Thank you... my god. D8

👍: 0 ⏩: 0

you spelled click wrong at the beginning, but other than that, this tutorial was awesome, thanks for posting it! (: <3333
👍: 0 ⏩: 0

This is really well done! Thanks for the directions on how to shade the basics, took longer when I did it with a brush alone
But just wondering about the adjustment layer; You seem to be moving the curve-thing up to the left hand side, instead , I have to move it to down to the right hand side, and it manages to mess up. Apprieciate it if you can help
And thanks for a wonderfully easy tutorial ^^,

👍: 0 ⏩: 0


hello thx for the tutorial.how did you fill the curve mask black?
👍: 0 ⏩: 0

O.O Wow. I thought you were good, but seeing this, HOLY COW! Keep up the EXCELLENT work!
I'm a big fan!
👍: 0 ⏩: 0

What brush did you use making this? Looked so flat. I want it.
👍: 0 ⏩: 0


Your wonderful tutorial has been featured here.[link]
Thank you for providing the gallery with such awesome Resources.
👍: 0 ⏩: 0

Wow exlent, but since you have I begin to put two eyelashes, in one you were drawing and in other one it was appearing.
since it does to make her like that!
👍: 0 ⏩: 0

Boar, ey...
1000 und 1 
Das lässt ja absolut nix zu wünschen übrig! Man erhält einen so wunderbaren Einblick in so viele *geile* Techniken... Ich hoffe, ich finde bald Zeit, um mich damit mal richtig intensiv zu beschäfigen um auch mal annähernd so effektiv mit PS zu sein.

Und vielen, vielen Dank für dieses Video. Bewegte Bilder sind ja doch noch einen Tick schöner anzusehen, als "ruhende" :>
👍: 0 ⏩: 0

| Next =>