HOME | DD
 Armenoc — Dagger Progress Pics
Published: 2012-09-16 23:02:46 +0000 UTC; Views: 4102; Favourites: 5; Downloads: 0
Redirect to original
Description
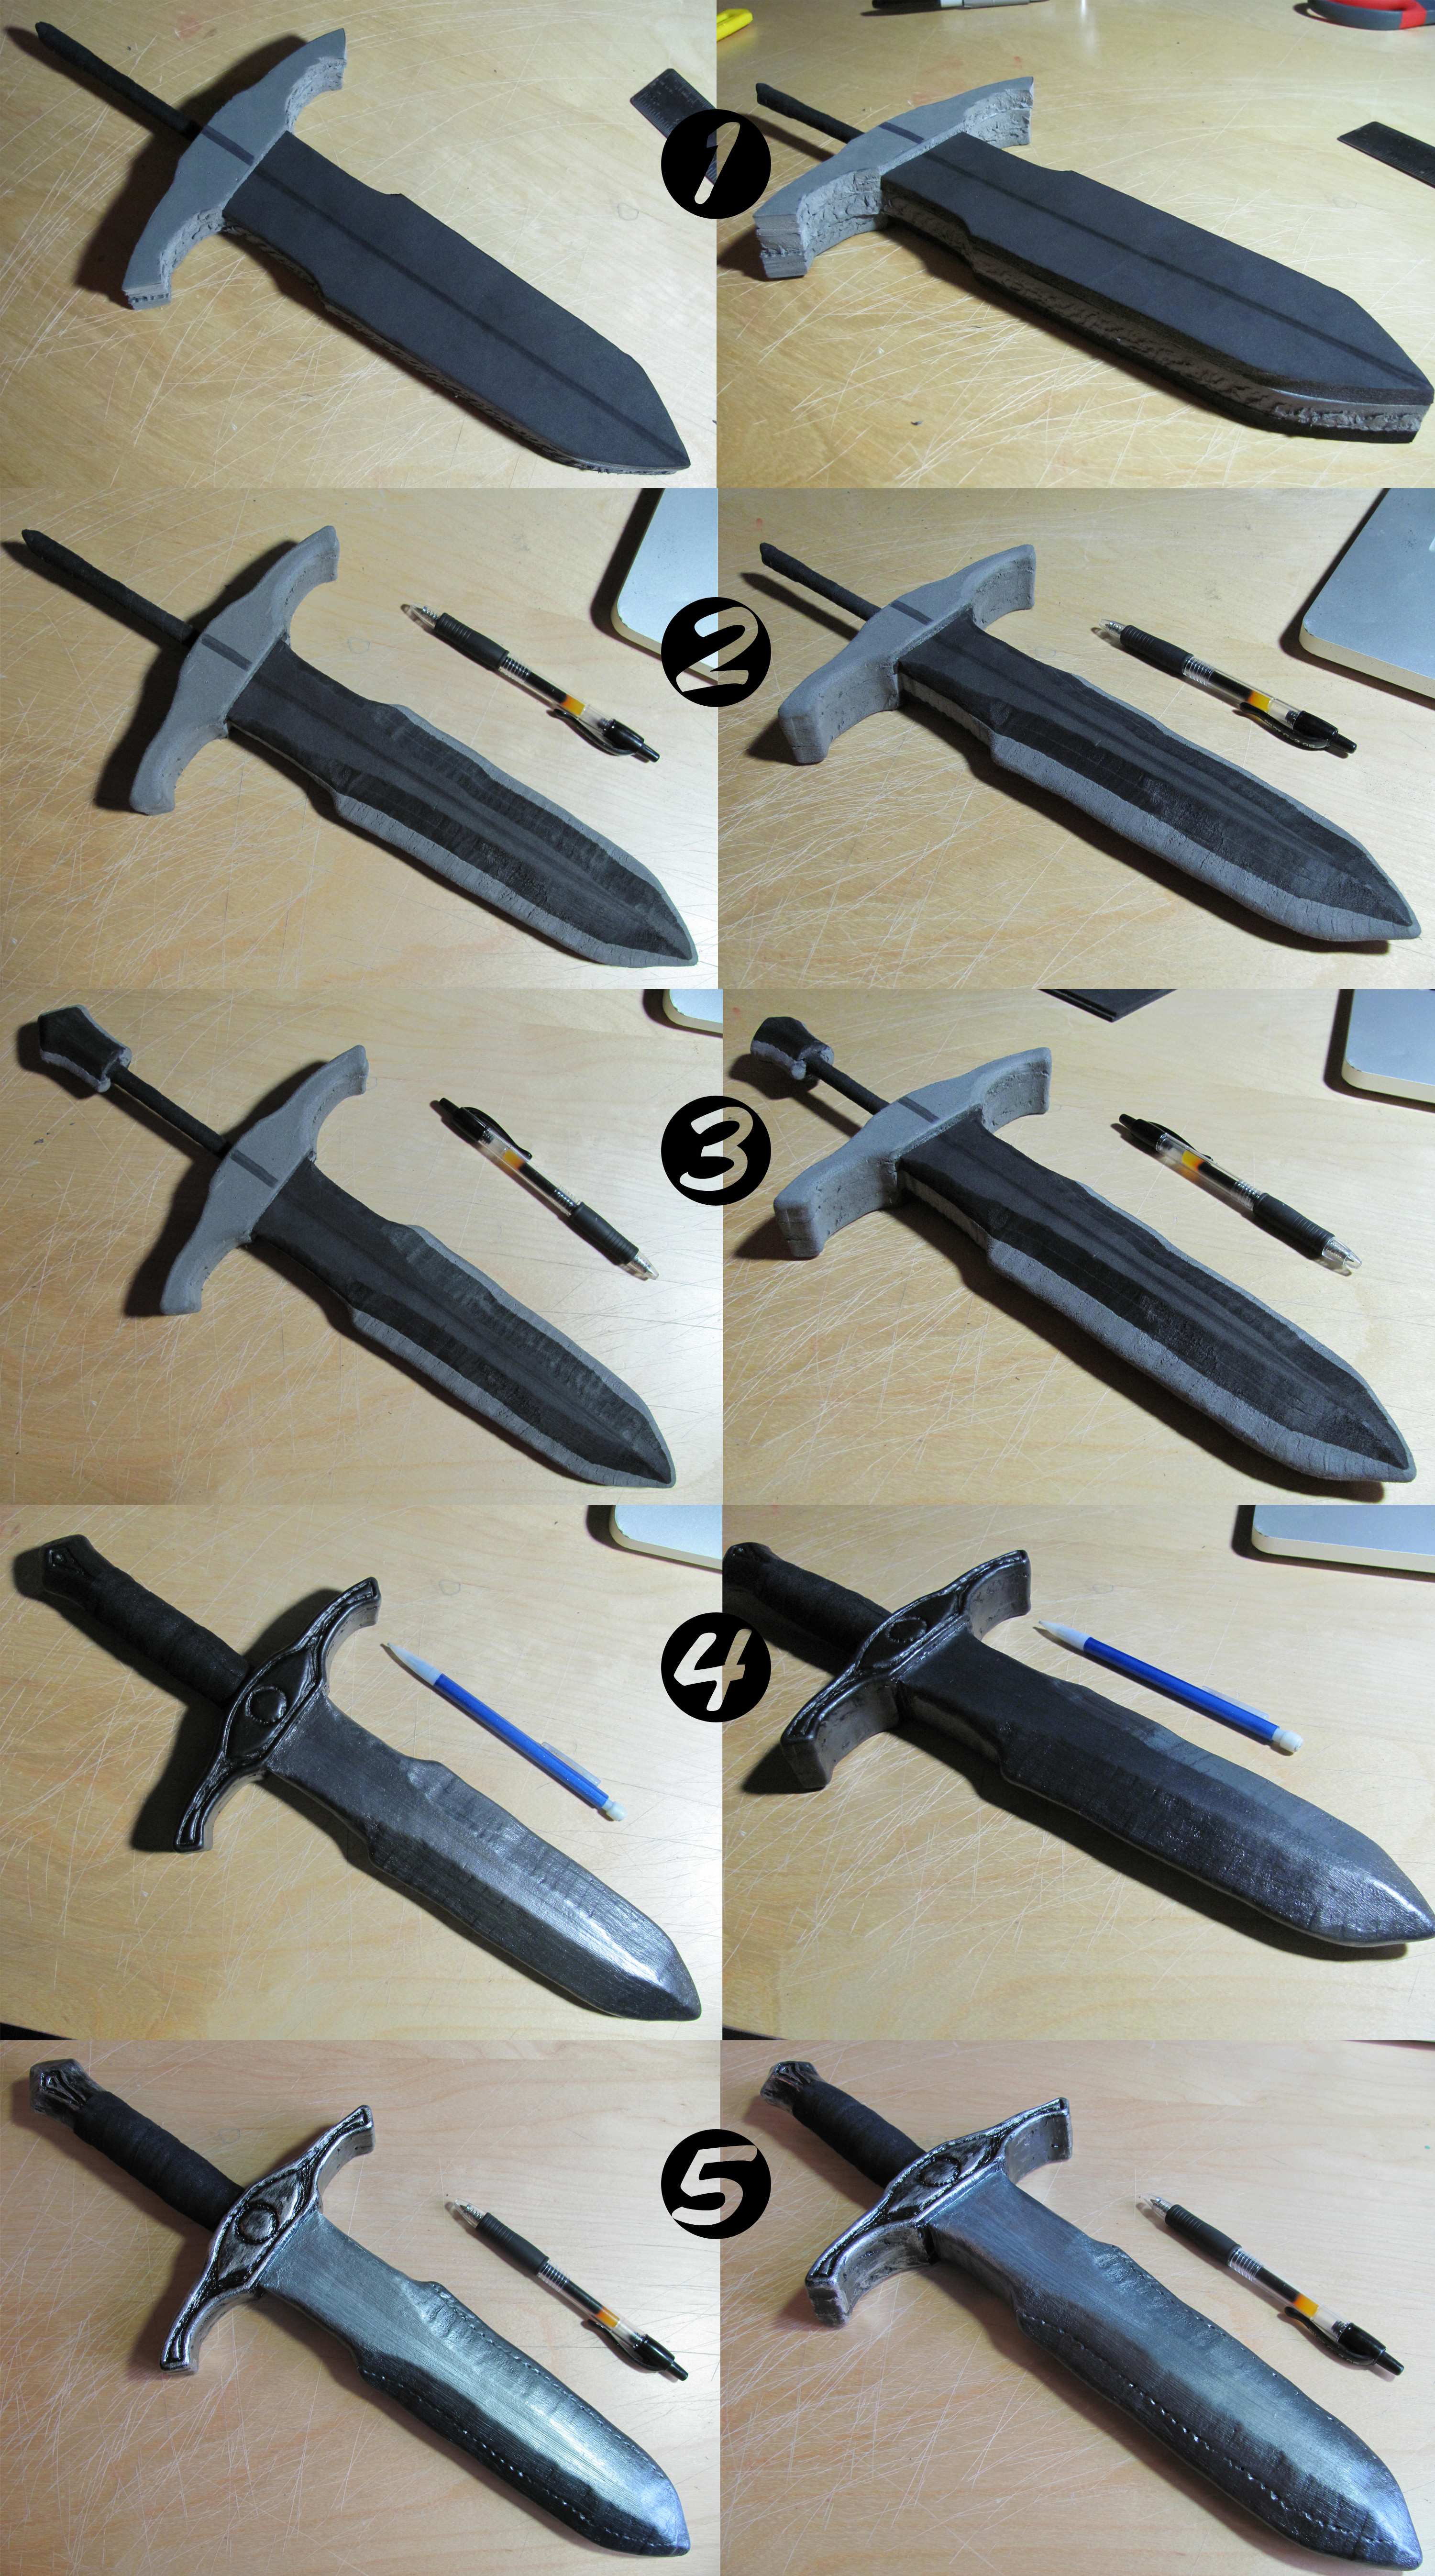
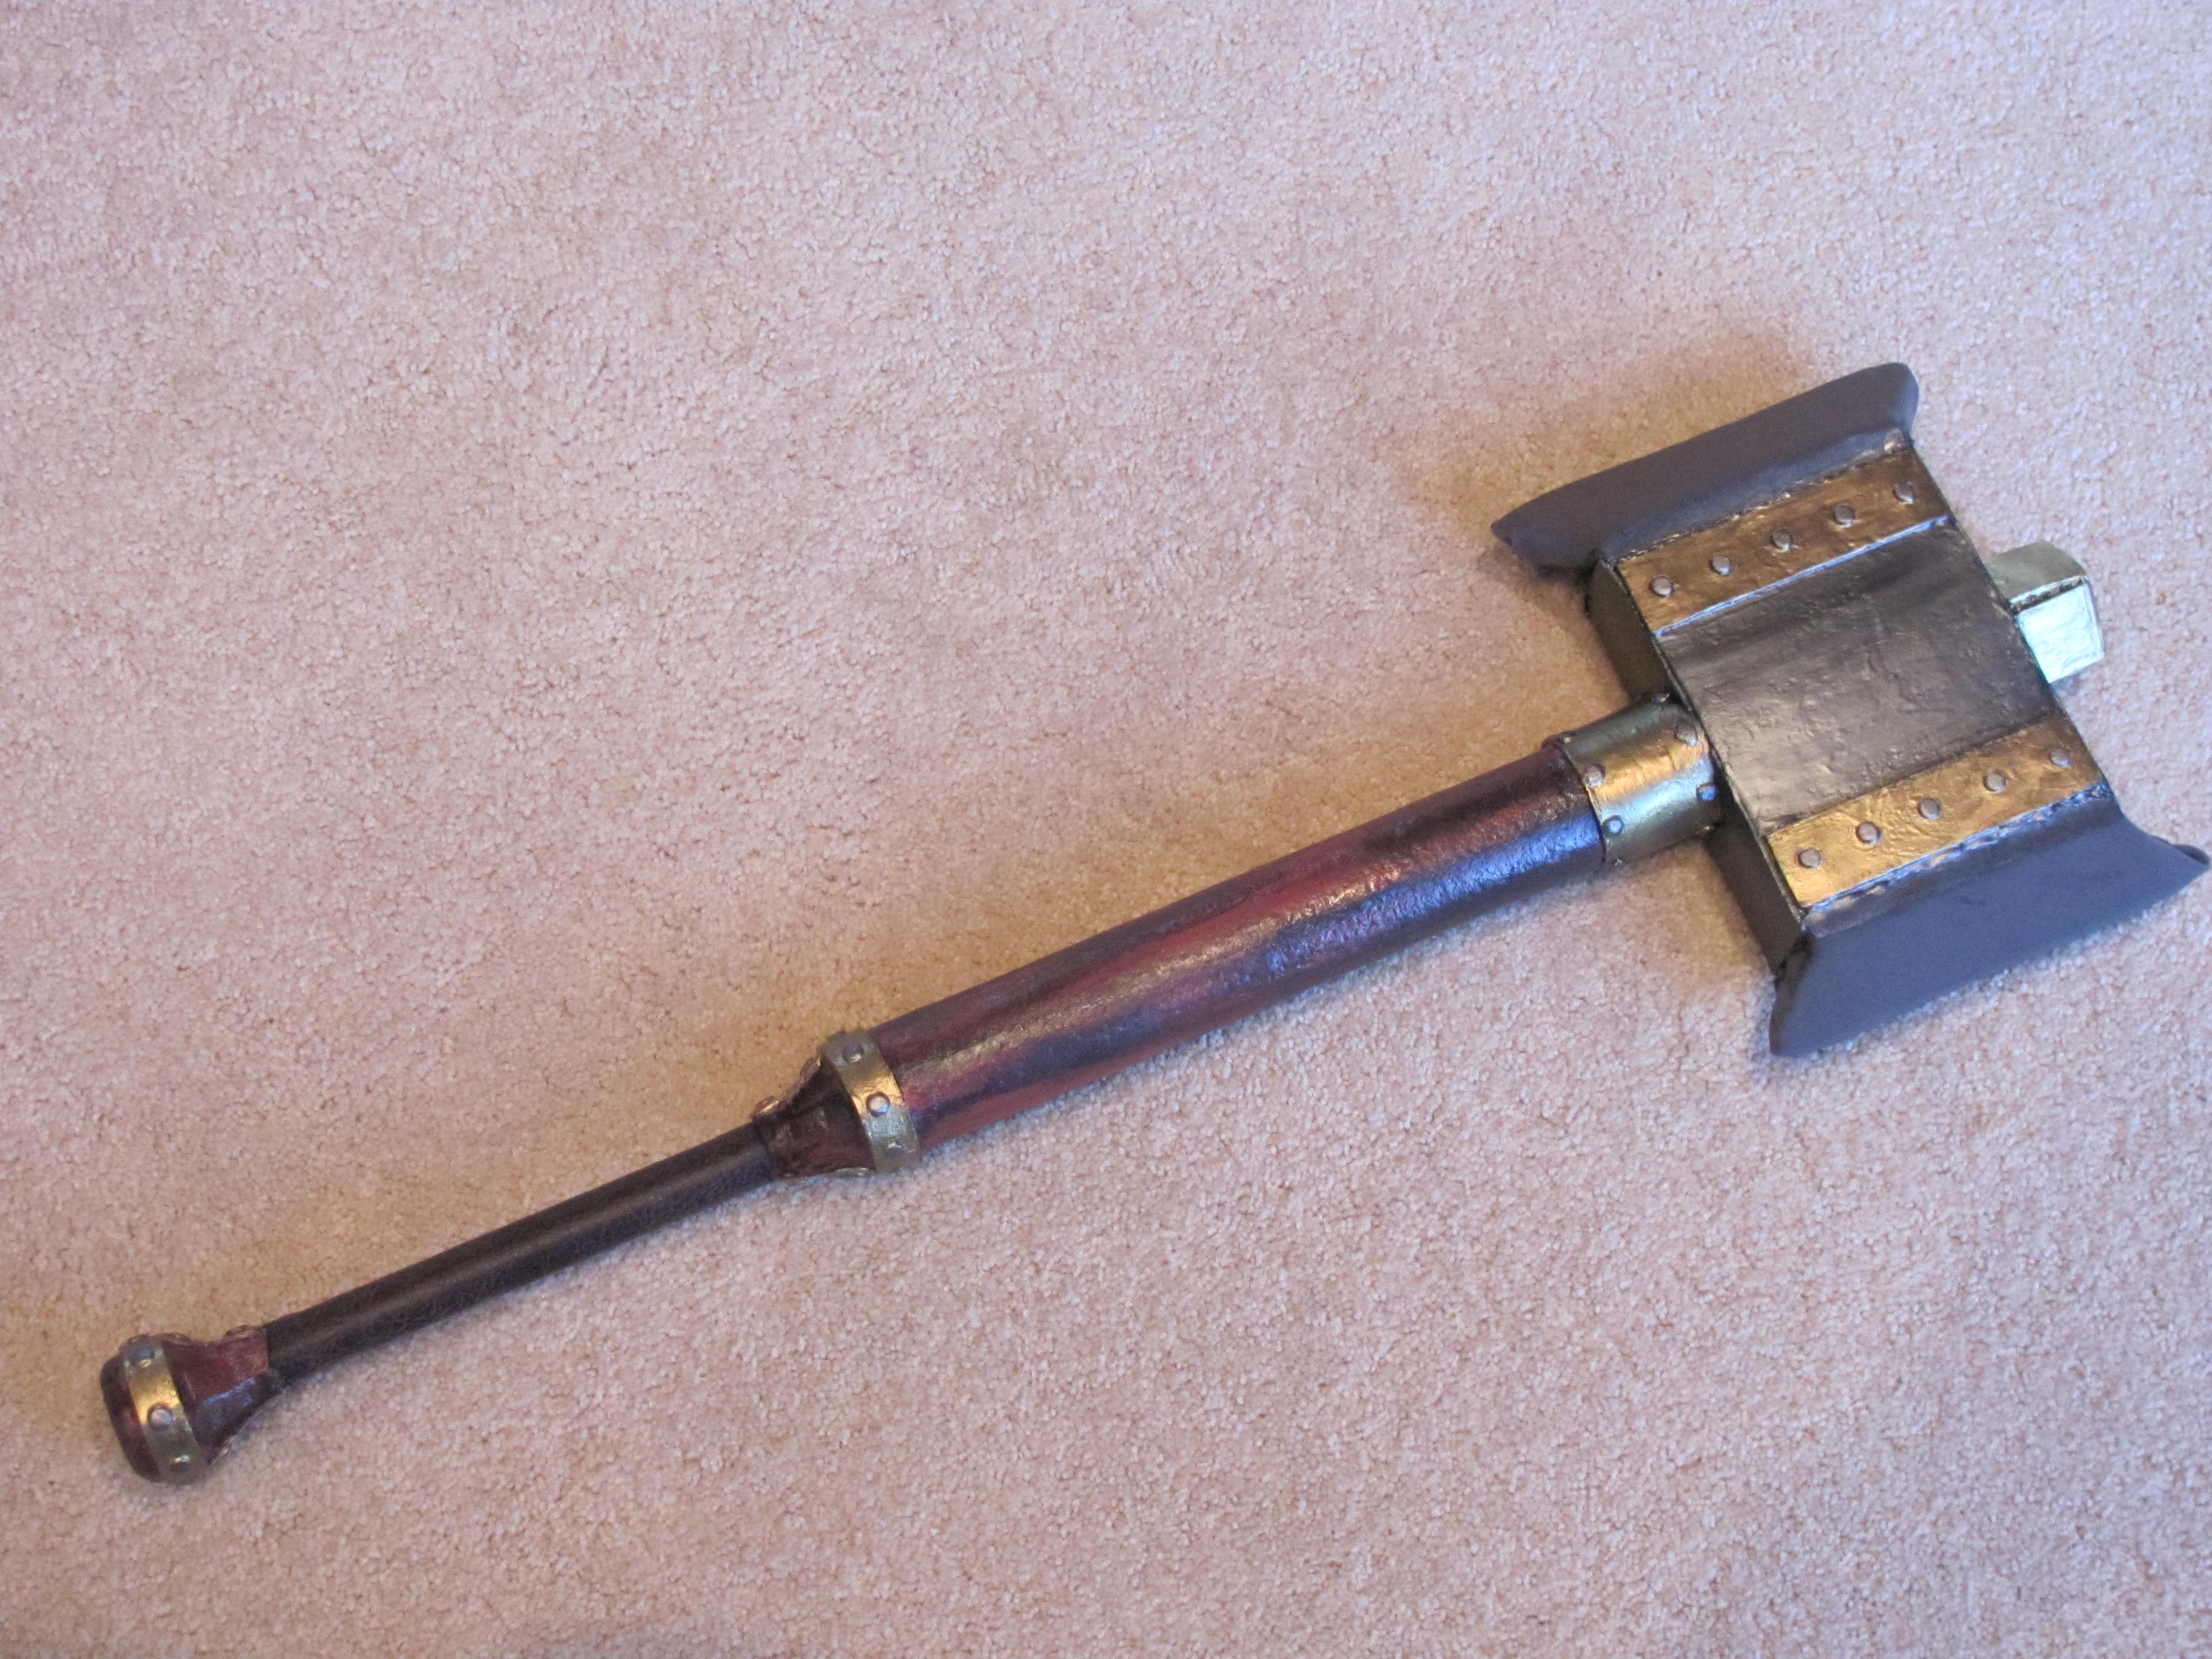
This is just showing the progress pics from near completed physical construction to fully painted and finished product. comments, questions, and critique welcome.Related content


Comments: 3

Just read that you're likely using plastidip.
👍: 0 ⏩: 0
Is this one of the knives we were talking about.
My tips would be:
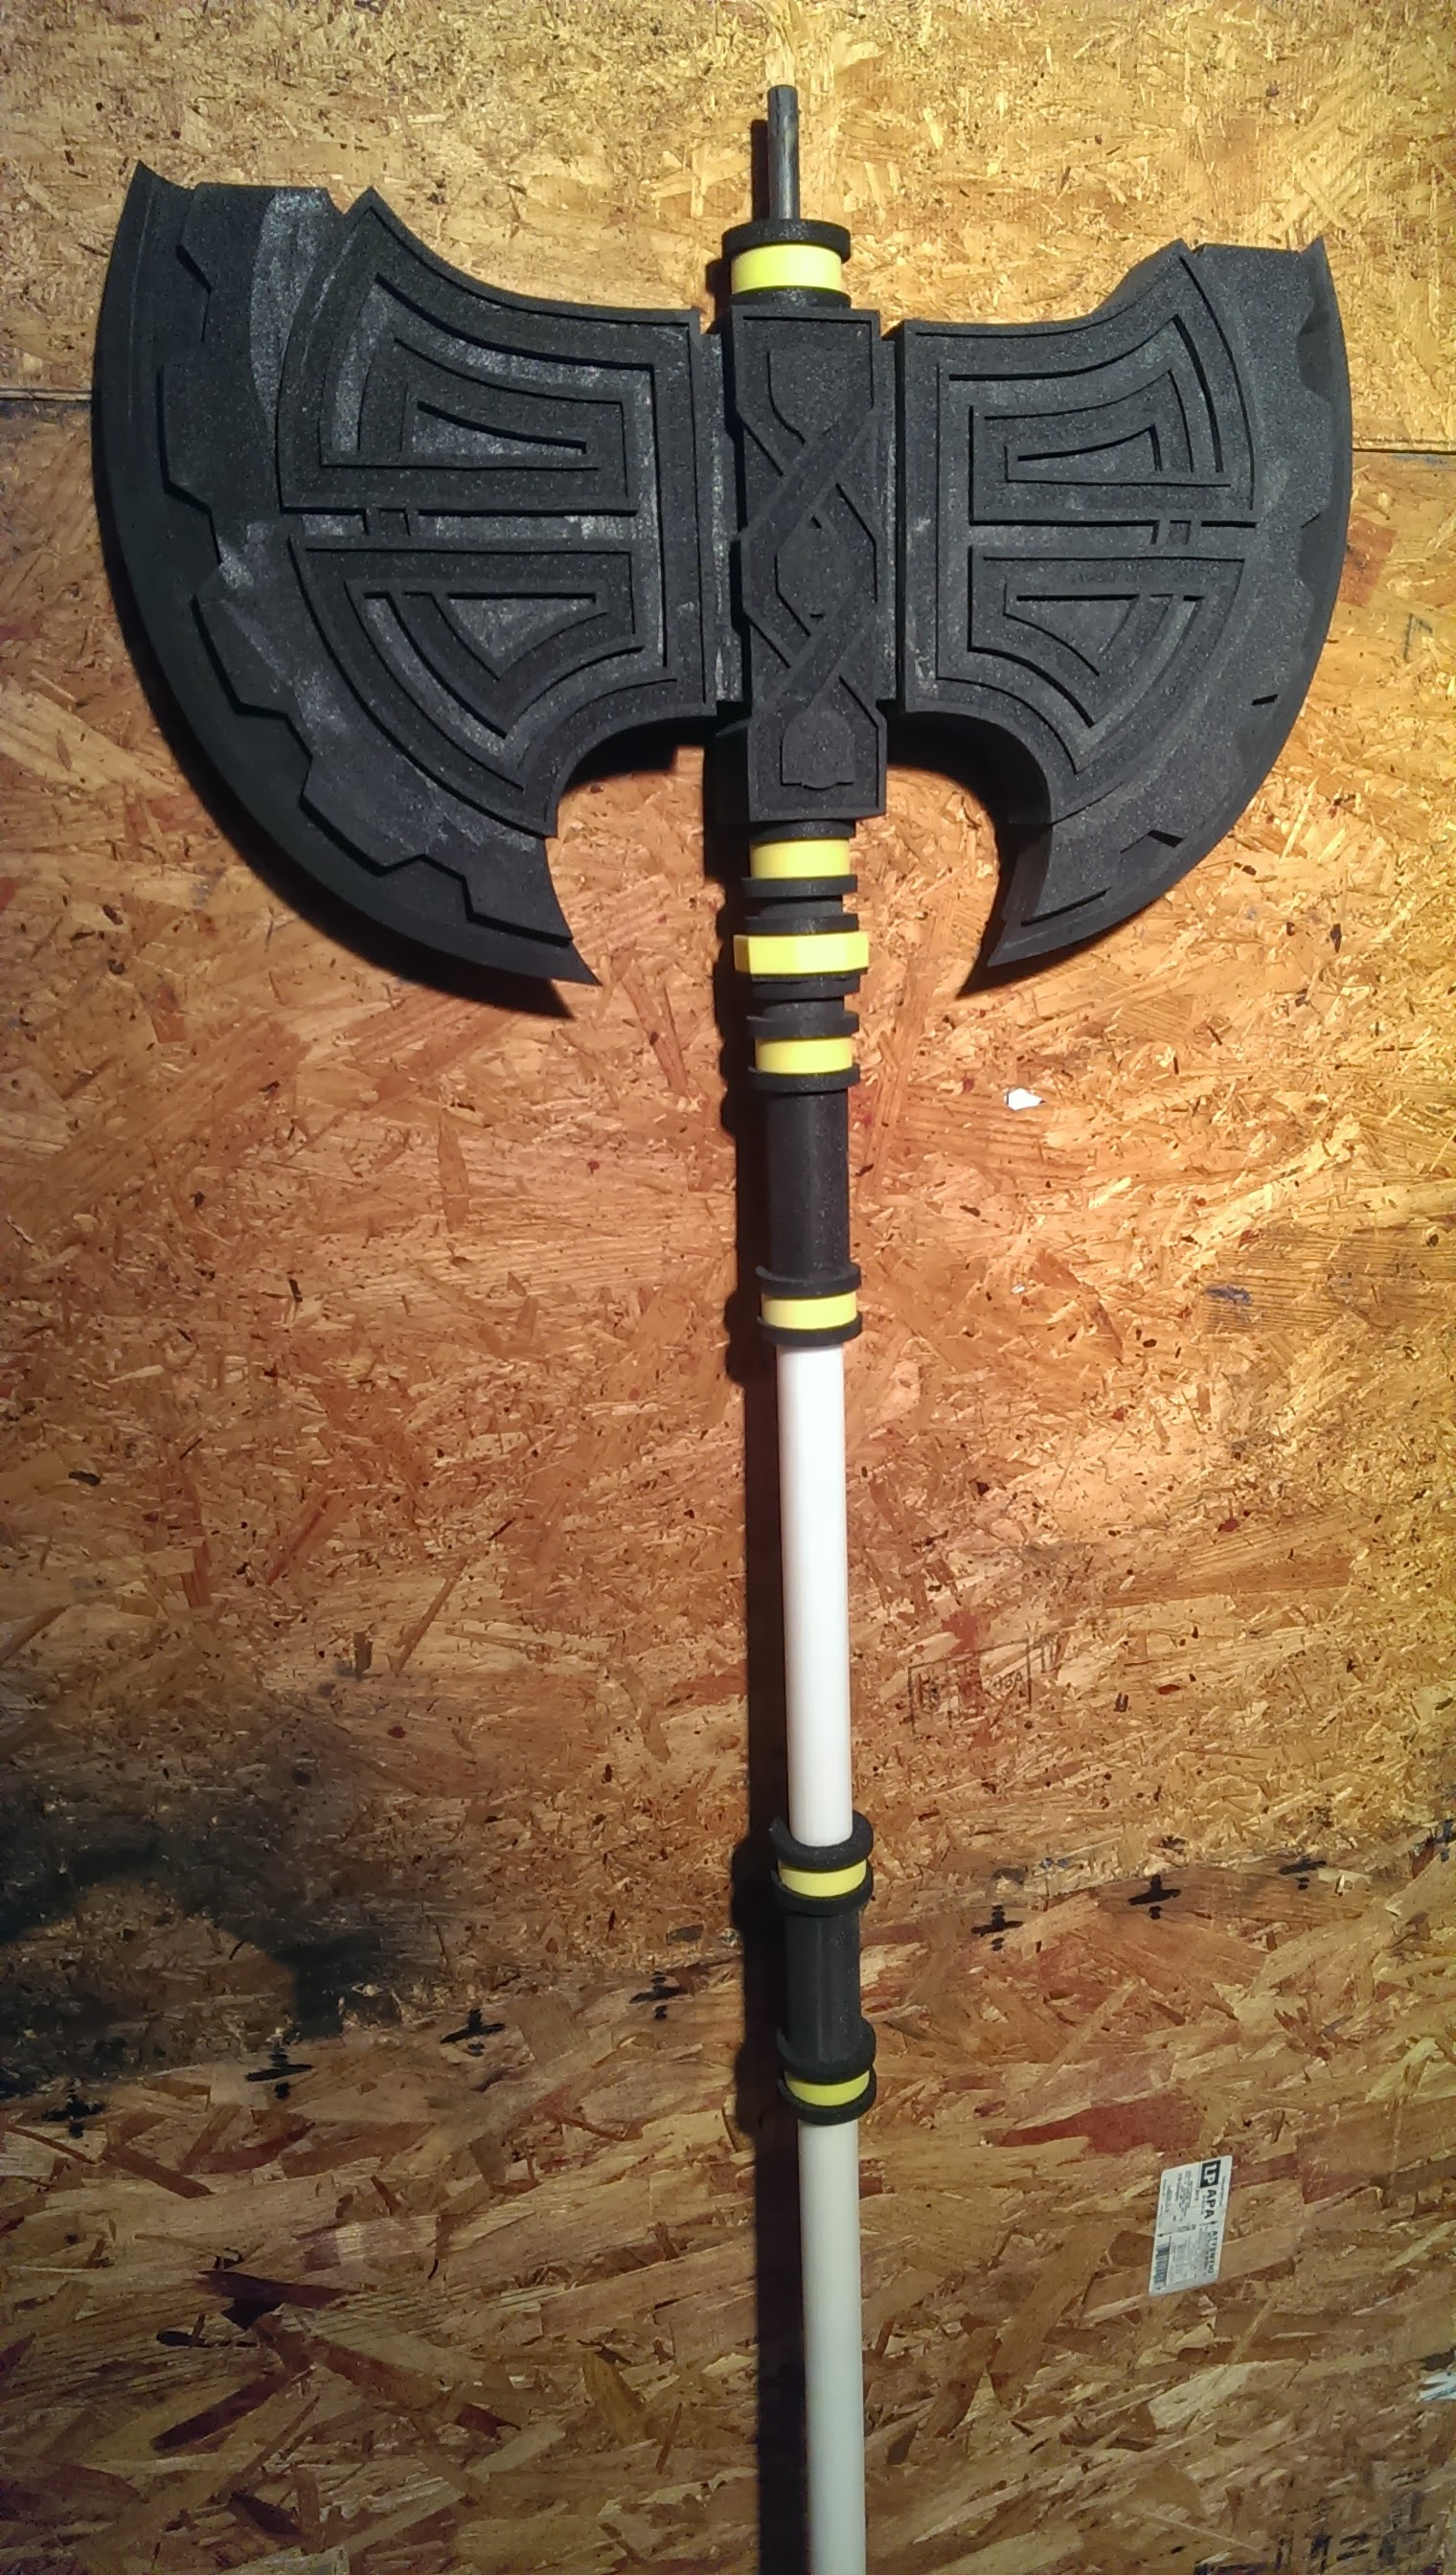
The pitting along the glue-line is likely caused by tear-out from overly harsh sanding or a great difference in the flexibility of the foam/glue.
Every ridge in the blade may well be the result of transverse movement in the cutting blade, to get a smoother finish only constant longitudinal movement.
The shaping on the hilt comes across really well - do you just latex it for the finish?
👍: 0 ⏩: 1

the pits are only on one side, and it comes from the textured surface on the bottom of my 12mm foam. It comes in sheets and is originally used as anti-fatigue floor mat in the puzzle shapes. I'll just have to get over it until I can find or order an 8mm smooth alternative. and I really would like to find one, because i have to build up the cores more than I'd really like to to get it as thick as the 12mm center foam so the cores don't come loose. the glue I'm using is all spray adhesive. 3M super 77 to be exact. it has held up incredibly well so far, and in terms of aesthetics, these daggers are more awesome looking than anything I thought I'd be able to do for a long time, with a huge thanks to you letting me in on the way you use differing thicknesses of layers. For some reason, I hadn't thought of that.
and yeah plastidip like you said... I just keep putting on thin coats until it feels strong enough to last me a while.
👍: 0 ⏩: 0