HOME | DD
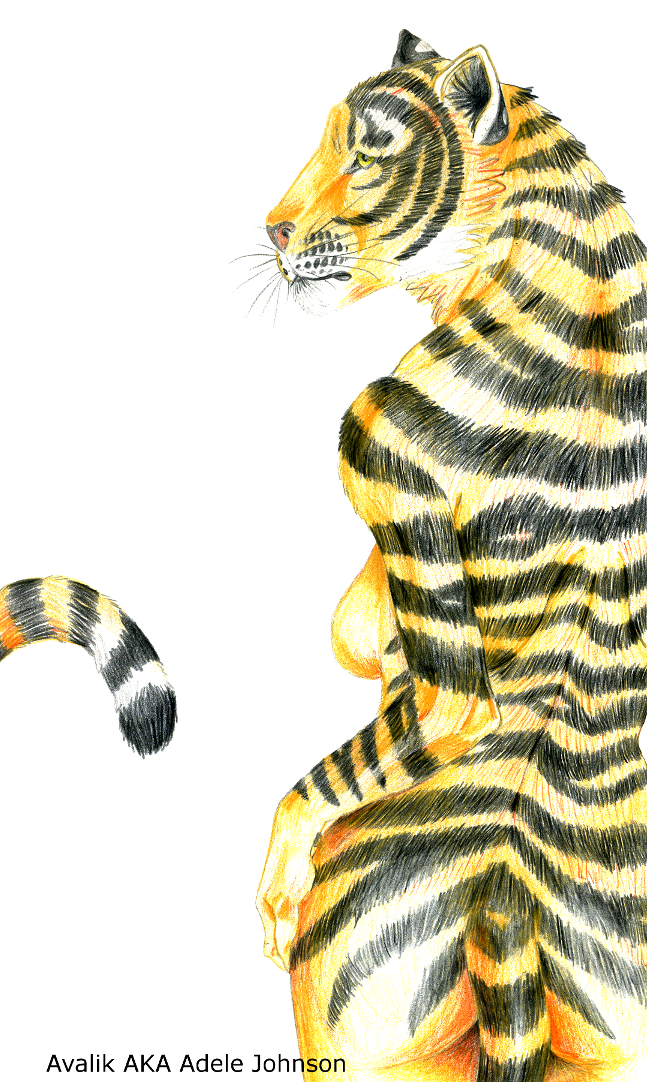
 Avalik — Process of Forest Spot

Published: 2010-09-27 13:51:27 +0000 UTC; Views: 3458; Favourites: 29; Downloads: 45
Redirect to original
Description
Final product:My WIP shots while working on this piece. Noticably the shots in Gimp are less frequent, I apologize for that, and the big gaps in some areas.
Tools: Mouse.
iScribble was the program from 1-10 where I only used the pen, area picker, eraser, and on two spots blur.
Gimp was the program for 11-16. I used the paintbrush, eraser, burn and dodge, blur and smudge for painting the lioness. Ink tool for the whiskers. I used several layers in a different mode with opaque, smudged colours above others layers for several highlights and colours.
Steps 1-10
Step 1-3: Just sketching out the pose very roughly using my reference.
Step 4: Base colours
Step 5: Some basic highlights and shadows to the dress.
Step 6: Changing the base color of the lioness, don't like it.
Step 7: Working on hand... multiple tries.
Step 8: Cropped on the left a bit. Finally finished hand. Starting to detail dress.
Step 9: More details on dress, re-doing previous creases.
Step 10: Properly outlining lioness face. More details on dress.
At this point iScribble was pissing me off with the zoom function and rogue mouse (notice that random scribble on 10?) so zoomed in, took screenshot of higher resolution and moved to Gimp.
Steps 11-16
Step 11: Several re-attempts at the head. Finally came out with this. Added lots of basic shading to head, and minor shading to arms, chest, legs. Worked on hand in more detail. Added basic shape of tail. Detailed dress more; started adding highlight colours. Put in temporary background.
Step 12: Started playing around with backgrounds with the intention to redraw it. Happens that my screenshots only feature 2; I had around 5 I was testing out as I drew. Detailed dress more, worked on chest a bit.
Step 13: Highly detailed face, changed facial anatomy minorly. Changed base colour again. Detailed chest. Detailed hands. Shaded legs a bit.
Step 14: Added my own textures to legs and cheeks. Partially finished the tail. Added the "fur" texture to face, neck, chest and right (to us) arm using a burn and dodge tool. Coloured hands, minorly edited face (eyelashes, eyes, nose bridge and ears). Shaded everywhere else.
Step 15: Moved the tail in a different position. "Fur" textured the other arm. Completed pearl necklace. Finished the edges of the dress and strap. Worked on hand. Recoloured/shaded nose.
16 Final Step (lioness): De-saturated lioness, added more light on the head. Added whiskers and muzzle spots. Moved tail down a bit. "Fur" textured legs. Shaded both arms more, and legs. Cropped more.
16 Final Step (background/foreground): At this point too tired to redraw a background. Used multiple "artistic effects", desaturated and played with colour balance and brightness on a stock piece. Redrew small bits that I didn't like, mildly edited background. Foreground spent a few hours picking apart my stock, redrawing, and forming something that looked decent.
ART USAGE TERMS for Process of Forest Spot
Process of Forest Spot is copyright to Adele "Avalik" Johnson. Please do not use Process of Forest Spot at all.
Specific terms: You may not use this in any way; my WIPs are never for use.
Related content


Comments: 5


WOW!!! ISCRIBBLE!?!?!?
Wow. This is fantastic.
👍: 0 ⏩: 0

wow that's alot of work. it came out really nice though ^^
👍: 0 ⏩: 0


Woooooooooooooooooooooooooooooooooooooooooooooooooooooooooooooooooooooow.
Thank you so much for providing this step-by-step guide to how you created such a wonderful piece.
")
👍: 0 ⏩: 0