HOME | DD
 cat-cat — Cel Shading in Open Canvas

Published: 2005-03-22 18:14:25 +0000 UTC; Views: 145535; Favourites: 1751; Downloads: 20898
Redirect to original
Description
This is my first time writing a tutorial so bear with me


 I know I'm not the best teacher around but I tried.... *dies*
Anyway, this is a mini tutorial (actually, I'm not even sure this is a proper tutorial or not... I'm just recording what I've done in order to create a piece...) to show you how I do Cel Shading in Open Canvas 3.03.
Step 1
Make a sketch!!! As my scanner is too old, my new computer doesn't support it... So I tend to do my sketches directly in Open Canvas. This is not recommended unless you have a tablet!!! (or you're extremely good at drawing with a mouse) It doesn't really matter what size brush you draw in, I usually work with the default setting.
Step 2
As I'm not very confident with my tablet drawing skills, I tend to "ink" my drawing on a seperate layer. So open up a new layer (Calucation = Standard) on top of your "sketch" layer. To make it easier to see your "ink" line, lower the opacity of your "sketch" layer first. I suggest around 20 - 30%. Start inking on the "Ink" layer (again, it's all up to personally preference as to what brush size you want to ink in... I always go with default setting, you can always make your line thicker by going over it several times). As to how to ink clean and neatly, I'm afraid you just have to be patient and practise a lot. I usually zoom in to 150% when I ink, because I found it easier to get clean lines that way


Out of habit, I like to use several layers when I ink - 1 layer for hair, 1 layer for the face + hands etc and 1 layer for clothes. I do that because it's easier to do individual adjustments when needed to. Especially concerning hair and facial features. As hair are always made up of long curves, it is likely that you would ended up with curve that's made up of lots of straight lines when you ink. This is when the seperate layer comes in handy. Inking hair on a seperate layer from the facial features allows you to clean up the hair ink lines without erasing the ink lines for the facial features, vice versa. You can always merge the layers (Layers > Merge Down) when you have finish inking. (you can also delete the "sketch" layer when you have complete the inking process)
Step 3
This is a point of deviation.... you can choose to colour in the background first or colour in your character first.... In this example, I colour in the character first (my bad


 )
)Anyway, open up a new layer (Calculation = Standard), move this layer to BELOW your "ink" layer (or layers) Start filling in the "base" colour (by "base" colour I mean just one block of colour with no variation of tone in i.e. no shadow/highlight) Again, I personally like to use several layers for this. In this example, I used 1 layer for hair, 1 layer for skin + eyes, 1 layer for the cloak and another for the clothes underneath. That way it's easier to make individual adjustments on the colours when needed to.
For those without tablet, you can use the Polygonal Lasso tool (circled in the screenshot) to map out the area you want a particular colour in, then just use the paint bucket to fill in the selected area. For those with tablet, I suggest you not to use the Watercolour/Airbrush tool when you fill in the base colours, use the Pen/Pencil tool at 100% opacity instead. You may still have to go over the area you have painted several times to get the 100% opacity.
The reason for using Pen/Pencil tool instead of Watercolour/Airbrush tool is that Pen/Pencil tool are a lot "firmer". For Watercolour tool, you have to run over the same area a lot of times before you can get to 100% opacity. Same goes for Airbrush tool and on top of that, Airbrush tool has a blurry edge to it (which is something you may not want when trying to paint in Cel Shading style)
Step 4
Open up a new layer(Calculation = Multiply) on top of the "base colour" layer (or layers) but below the "ink" layer. This new layer would be use for shadows. Define your light source then start adding in the shadow accordingly (sorry I don't know how to teach people how to do this, apart from do a lot of observation) Again, use the Pen/Pencil tool at 100% opacity not Watercolour/Airbrush tool (or Polygonal Lasso tool if you prefer).
After you've completed the "shadow" layer, add a new layer (Calculation = Addition) on top of it for highlights. Again, use the Pen/Pencil tool!
Step 5
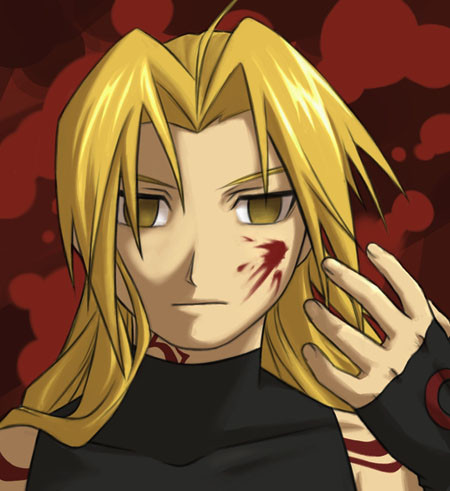
Add a layer (Calculation = Standard) below the "base colour" layer and use it for background. In this example I just filled the layer with a single colour and painted a bit of blood splattered on it.
This is basically it. In this example I added another layer on top of all the layers and painted some blood splattered on.... My way of doing this gives me a lot of flexibility because I can adjust the colour/brightness of a lot of things individually (as I'm hopeless when it comes to picking colours...) Hope this helps answering the question as to how I paint in Cel Shading style in Open Canvas


EDIT: This method also works for Photoshop and Painter too. Just that in Photoshop it doesn't have the layer option known as "Addition" (at least, I don't think it has), so for the highlight layer, you can use other layer option such as "Screen" or "Colour Dodge" instead.
Related content
Comments: 318

Thanks for your reply! I've been playing around with OC for a bit and think I'm finally getting the hang of it. I don't know why I had such trouble in the beginning, but now it's not a problem. Now just to discover all the intricacies of the program! Which will take a long time I'm sure 
👍: 0 ⏩: 0

THANK YOU! THANK YOUUUUUUUUUUUUU!!!
This thingy helped me SOOOOOOO muchhh!!!!
Wuv youuuu!
👍: 0 ⏩: 0

You have my undying love for submitting this. I've been struggle with Open Canvas and couldn't get any help! Wahhh... I love you <3
👍: 0 ⏩: 0

hey I have a quetion I have gimp and I suck but! How would you get the lines to look like on there? Or I have open canvas 1.1 how do you make the lines that kool looking? Mine ome out like all the same width. Not curvy like. Please help me SOMEBODY?!!!? ANYONE!!!!!!!
👍: 0 ⏩: 1

Emm.... Are you using a tablet with your Open Canvas? I used OC v1.1 before with my tablet, even without doing any configuration it works just fine?
👍: 0 ⏩: 2

I can't make the lines (well idk how that is lol)
👍: 0 ⏩: 0

mmm idk lol thx 4 ur help tho I realy have no idea what ur talking about 
👍: 0 ⏩: 0

wow
thnx for the help with this!lol
i just got oc and needed a guide so this will help a lot!
👍: 0 ⏩: 0

Welll..... I tried your method and failed. But its completely my fault. I have like no eye for colors when it comes to hair. >.<
But it helped me with skin tone shading so i'll learn the hair eventually. Thanks!
👍: 0 ⏩: 0

question!
how big is the resolution and the paper size is when you sketch-ink-color your art?
is it 300dpi in 11"x18"?
thankyou!
👍: 0 ⏩: 1

Sorry for the late reply...
I don't tend to have a specific paper size when I draw because everything is done on computer. As default I always go for 300dpi resolution. The canvas size just kept changing as I draw but usually it ends up at something around 2700 x 3300 pixels, so that would translate to around 9" x 11".
👍: 0 ⏩: 1

hi i like very much your work but i need to know something about layers : how i put a layer behind of the main image???
👍: 0 ⏩: 0

YOOOOOOOOOOOOOOOOOOOO
YOURE ART DESTRUCTOR AMAZING BOOM!!!!!
This tutorial was amazing
👍: 0 ⏩: 0

How much a tablet costs? That's the only thing standing on my way here, because I don't own one...
👍: 0 ⏩: 3

check out amazon.com. it's more reliable than ebay, but still with a good price.
👍: 0 ⏩: 0

[link]
best tablets out there
I have an intuos ( [link] ) and it cost about $250
👍: 0 ⏩: 0

[link]
thats mine and it cost about £25-30. its really good!
👍: 0 ⏩: 1

Okay, thanks a lot. 
👍: 0 ⏩: 2

Omg! hahahah thats what i did!
👍: 0 ⏩: 0

yay merry christmas!
👍: 0 ⏩: 0

how'd you do blood on the picture? looks cool!I'm trying to use open canvas too, but I don't have a tablet yet... suffering from trembling hand.. haha
👍: 0 ⏩: 0

sooo awesome!!! thank you so much for teh tutorial!
👍: 0 ⏩: 0

wonderfull!! thankyou so much!! hey do you know where i can find open canvas 3 .0?
👍: 0 ⏩: 0

Beautiful contours! Too bad the pen in OC is all STRAIGHT even if you use a tablet. T_T How do you do the contours so well!?
Anywho.. this is VERY helpful. Thank you, thank you, thank you. <3
-Ana~
👍: 0 ⏩: 0

I suck at using the computer T_T
Let see if i am capable enough to do even step by step instructions xD
👍: 0 ⏩: 0

DAM!i do not know how to merge it.....when i merge it will only show the first layer that i merge.help!!!!thanks
👍: 0 ⏩: 0

How do you get the lines so crisp.... when ever I do that I end up with white blotches
👍: 0 ⏩: 0

great tutorial! it was very helpful. ^^
where did you learn to shade hair? i cant ever figure out where or how to shade so that it looks good.
👍: 0 ⏩: 0

Awsome job explaining! This is verry useful
-Bookmarks-
👍: 0 ⏩: 0

interesting o.o is there another way to ink besides the tablet? i mean like vectorizing or other tools ^_^;
👍: 0 ⏩: 0

Thanks for the advice with the layers. But I don't ahve an "additional" layer option.
👍: 0 ⏩: 0

thanks for making this! I'm a noob to the whole digital art world and I recently got Open Canvas and I haven't found a helpful tutorial until I saw yours.
👍: 0 ⏩: 0

Your tutorial was like extremely helpful, but I'm still having troubles.
After step 2, going onto 3, when I use the fill tool to try and put in my base color, i get this jagged white edge between the line, and the color. What can I do to make this not happen?
👍: 0 ⏩: 0

thanks so much ^^ this really helps lots!!
👍: 0 ⏩: 0

I just don't get it...how the layers work and stuff....
👍: 0 ⏩: 1

I can help with that. ^^ First, go to 'View' at the top of your screen and make sure 'View layers' is checked. Select that box and click 'Layers' Hit 'Create standard layer' then go from there. Feel free to note me with questions :3
👍: 0 ⏩: 1
| Next =>


