HOME | DD
 Celsa — Tutorial: Comic making
by-nc-nd

Published: 2009-11-21 21:10:05 +0000 UTC; Views: 67109; Favourites: 1278; Downloads: 745
Redirect to original
Description
This is the 'mini' tutorial about how to make comic pages I mentioned before. It's become longer than I though (sorry). I hope it's clear and useful.Please, do check both text an images in combination >_<


 TUTORIAL


Here I'll explain how I do my comic pages. Note that each person may have different techniques.
Forgive any english errors I may commit. It's not my natural languaje.


 1. WRITING THE STORY
First of anything, you need to have a clear idea of the full story you are going to turn into a comic.
Then, write it down, as briefly as possible. If your story is long and it's going to be divided into chapters, write sinopsys for every chapter (or at least, for the one you're going to draw now). Make sure chapres are not too long.


 2. WRITING THE SCRIPT
Now you're going to write the script in full detail
Start planning the content of each panel and write it down. Add what type of view is going to be (bird view, from below, close-up) and what the character/s are doing (that's is, a full description of the scene, but be brief. Always be brief)
Then add the dialogue for it's character. Something like this:
1. Half-body view of Dino, trying torecover from the fall. Hibird is near him.
-Dino: Ouch... Can't believe it...
-Hibird: (small) Dino, hurts?...
Do that for all the panels (it's tough and tedious, yeah...)


 3. PANEL PLANNING
Now that the script is written, you need to plan the panels and pages layout. With the script nearby, do sketch as simply as possible how you want the panes to go on each page and the scene they'll contain (see the deviation picture for a sample)
This have to be quick, so don't detail the drawings. It just must give you a quick refence of what you're going to sketch later.
And remember to take text into consideration; if the scene's text is long, make sure there'll be enough space for it.
If you have to re-do page planning drafts, do as many times as you need. Also, you can change the script if you see fit (but remember to type down the corrections in the sript text as well)
Don't add to many panels per page. Around 6 is good. Less it'sperfectly OK if you need, but more than that can be troublesome and make the page crowded (unless they're blank panels for trasition scener or just text)


 4. PANEL / PAGE TAMPLATE
You may do the panle lines digitally ot by hand. If you do by hand, use rulers always. If digitally, just use an editing program like Photoshop, then print them and sketch on them.
Keep always a copy of it.
And make sure to set up the page on a set-up format (like A4, A3, B5, B4....)
Print the template in some color, so it can be removed easily from the sketch in the computer.
And it's good to make a border to make sure where it's off-limits.


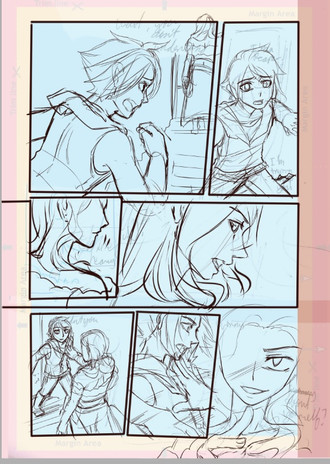
 5. SKETCHING THE COMIC
Now, with the panel planning nearby, you just start sketching the pages. You're going to have to draw a lot, and later is going to be inked/cleaned in some way, so it's best if you leave the detailing for the inking, and sketch roughly for now (not too roughly)
See the picture on the deviation for sample.


 6. INKING
For inking traditionally:
You'll have to either trace the sketch with a pencil, then inking and erasing the pencil.
Or, scan the sketches, print them in some light color (prefirably warm, since it's more different than the black of the ink by it's lightness level) in thick paper, then ink over that, and remove the color sketch in Photoshop (look for Hue/Saturation options, choose the colors, and take the lightness value to the max)
For inking digitally:
Scan the sketch and open it in a program like Photoshop, Corel Painter, etc... (I did in Corel Painter)
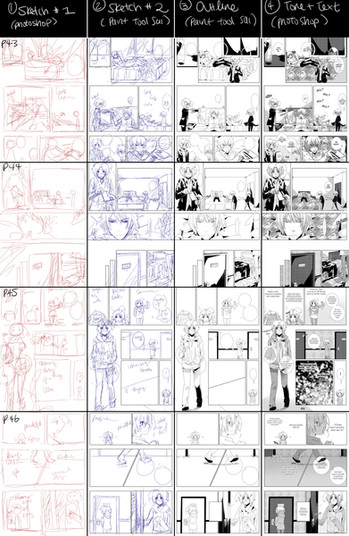
Then, it's just inking. In my case, I used different colors to tell appart the line from the filler more easily (see the deviation picture). I used dark blue for the line, lighter blue for the black filler, and other coloer for the parts where screentones should go.
You need to use different layers for each thing.


 7. FINAL EDITING
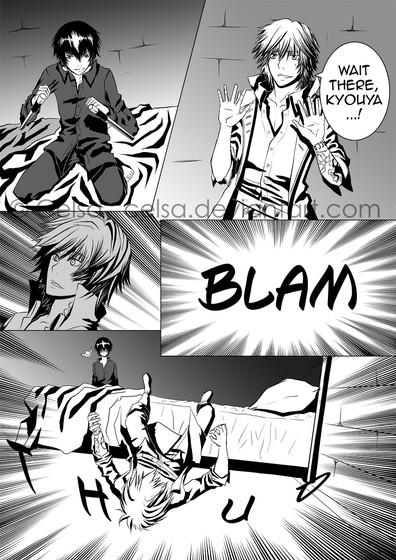
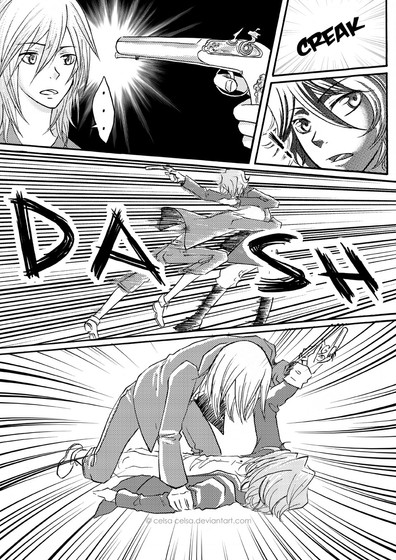
Finally, it's just some editing and adding the screentones. (see the dev picture for sample)
In Photoshop or the likes, pick up the layer for the line, and edit it so the colors turn black (in hue/saturation, make the lightness to the minimum). Same for the layer with the black filler.
For the screentoning, select the colored area, and fill with the pattern, or add a pattern manually, select the color, select inverse, and cut. Add patterns in a different layer, and blind the layers with the colored areas ('cos it sometimes can be seen trought the borders)


 8. ADDING THE TEXT
Since the edited file is going to be heavy, amke a copy with merged layers, and possibly save it a .JPG
Open it, and add the text, and the bubbles (if you didn't by hand) Then save as .PSD
I like to save a .JPG copy as well, for easier use. (see dev pic for sample)
And that's it. It should be done.
If you have questions, or I forgot anything, comment them on this deviation.
Related content
Comments: 82

I love seeing how artists work
and your style rocks!
👍: 0 ⏩: 0

Thank Thank you very much !
it's extremely awesome !!
👍: 0 ⏩: 0

Google search XD You can find some for free around the net. In other cases I used Photoshop filters and effects.
👍: 0 ⏩: 0

I've never been much for anime, but a fine tutorial all the same.
One thing I noticed though, The same shading technique is used for the subjects shirt and the majority of the bg in the first panel. This makes it a small trick for the eye to bring the subject away from the bg - It looks as though you tried to fix this by adding a light grey bit of ...plad? around the subject, but he still almost fades into the background.
just an observation I guess
👍: 0 ⏩: 0

may i know what kind os font did u use....?
btw, this is helpful! thx!
👍: 0 ⏩: 1

It's 'Anime Ace 2.0 BB' Can be found online for free (don't have the link, sorry 
👍: 0 ⏩: 0

thats really cool to see. i like it when people show their steps they take to the completed image. its interesting to see what people do and how people draw. ^^
👍: 0 ⏩: 0

Oh wow that's a different approach, using color and then going back with black ink and screen tones. Very neat. I think I'll try your way for complex scenes
👍: 0 ⏩: 1

It makes it easier for me. With all black it bacame confusing. I used it for the first time back when I had to do some ink commissions.
👍: 0 ⏩: 0

What fonts do you like to use for text generally?
👍: 0 ⏩: 1

It's called 'Anime Ace 2.0 BB' Found it on the net along with other comic-like fonts.
👍: 0 ⏩: 1

This is a great help, thank you so much for posting
👍: 0 ⏩: 1

thats cool, though the inking part confused me a bit
👍: 0 ⏩: 1

How? Maybe I can explain better if you tell me.
👍: 0 ⏩: 2

hey how did u make your manga online ?
👍: 0 ⏩: 1

I`m sorry I don`t remember what I said to you lol can u tell me ?
👍: 0 ⏩: 0

just with the colors...the weird colors..when you say inking did you mean lineart or coloring?
👍: 0 ⏩: 1

I mean inking in black and white. I first do it using colors to tell appart the line from the black filler more easily while working on it. Then I turn it black in Photoshop. Just a trick to make it easier.
I also fill with colors the parts where the screentones go, so later it's just select and out the screentone (since I usually test out a few, so it's easier for me this way).
Hope this helped.
👍: 0 ⏩: 1

huh its an interesting technique and ya it helped thanks ^^
👍: 0 ⏩: 1

Glad to hear so. You're welcome
👍: 0 ⏩: 0
<= Prev |


