HOME | DD
 chioky — Swordmaking Guide: Part 3

Published: 2007-07-29 21:04:25 +0000 UTC; Views: 37879; Favourites: 176; Downloads: 377
Redirect to original
Description
Swordmaking Guide: Part 3 (Sanding and Painting)Part 1 (Tools and Equipment): [link]
Part 2 (Planning and Cutting): [link]
Part 4 (Fixing and Handle Wrapping): [link]
I would use these updated swordmaking tutorials instead:
 The Swordmaking Tutorial: Part 1 (Tools and Equipment) [link] The Swordmaking Tutorial: Part 2 (Planning and Drawing) [link] The Swordmaking Tutorial: Part 3 (Cutting out the Sword) [link] The Swordmaking Tutorial: Part 4 (Cutting out the Tsuba) [link] The Swordmaking Tutorial: Part 5 (Sharpening the Sword) [link] The Swordmaking Tutorial: Part 6 (Sculpting the Details) [link] The Swordmaking Tutorial: Part 7 (Painting and Glossing) [link] The Swordmaking Tutorial: Part 8 (Constructing the Sword) [link]
 Onto the third guide only the 4th one to go before its complete! Now the first guide was about tools and machinery in the second guide was about planning and cutting. In this guide you will learn how to sand down the edge of a blade and paint cleanly. So I will write about what goes on in each picture above as a step by step scheme, here goes:
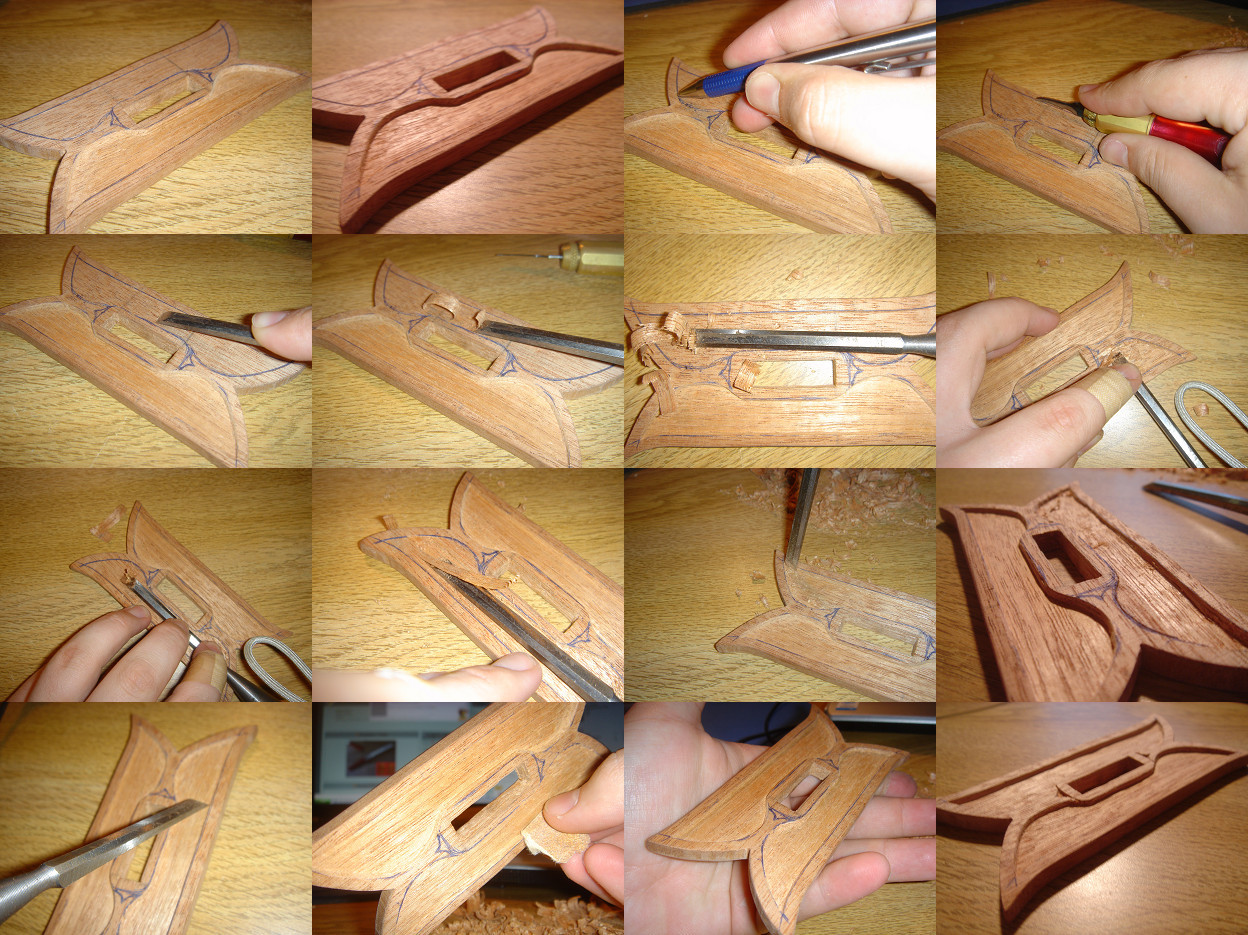
Item 1: Right I said i would cover cutting the hole in the guard in the last guide so i will. With a drill, drill 2 holes in each end of the rectangle drawn out on the guard
Item 2: Now you must widen one of the holes with a needle file or a larger drill bit so that it allows enough room for a coping saw blade in. When its wide enough put in a copign saw blade and secure it to the saw.
Item 3: With the coping saw inplace saw down all the way to the other hole on each side carefully. Once cut out remove the coping saw blade
Item 4: Now with files sand away the inside so it makes a nice rectangle shape. Of course sand the sides away enough so the sword blade can actually fit through in there.
Item 5: Now onto the blade with sandpaper sand rigoursly the front of the blade to get rid of all the uneasy bumps when you were cutting it out. The less bumps the better.
Item 6: Now dont just sand away from the guard point leave space for the thing just above the guard which shouldnt be sharp. So start and indent with a flat file which will be the start.
Item 7: Now start filing away at the blade but keep the file at a 20 degree angle. This is so you get a nice slope for the sharp blade it should be about 1cm in depth.
Item 8. Now with the depth of the sloping blade set go at the blade and sand away at a 45 degree angle. Of course once thats done do the other side of the blade.
Item 9: with a flat file sand away rough file marks on the blade that you might have done and to make a sharp edge. Then lastly with sandpaper make it nice and smooth the blade of course.
Item 10: Now i do all the sanding processes for about 5 inches of the sword then move up the blade and continue. I wouldnt recommend doing all the processes right along the blade in one go.
Item 11: At the blade tip switch to a flat smooth file and rest the blade tip on the worksurface not suspended. Now sand away very carefully becuase if your too fast and hard you will snap off the tip of the blade which ruins the blade.
Item 12: If you have done all the above processes do the exact same on the other side. Also make sure the blade edge is really sharp but not too shrap that it splinters. With files it could take a normal sword 4 hours.
Item 13: Now cut 2 pieces of balsa wood out to act as the thing above the guard. Balsa wood breaks extremely easily so take care.
Item 14: Stick them to the blade with woodglue and use woodfiller on the side gaps. Then sand down the woodfiller so its nice and smooth. This will stop the guard falling off the sword.
Item 15: If you think your sanding is not working well it might becuase your not at a right angle or your file is filled with wood dust. Rub the wood dust off the file with a bursh to keep it clean.
Item 16: Now for the handles do the same processes as item 7 and 8 and sand down the edge of the handles but not too much hald of the width of the handle will do.
Item 17: However leave space at the bottom which you dont sand as much becuase this is the hilt of the sword that doesnt have any handle wrapping on it.
Item 18: After your done sanding with the handles go over it with sandpaper to make it nice and smooth and remember to leave the bottom alone only sand it gently.
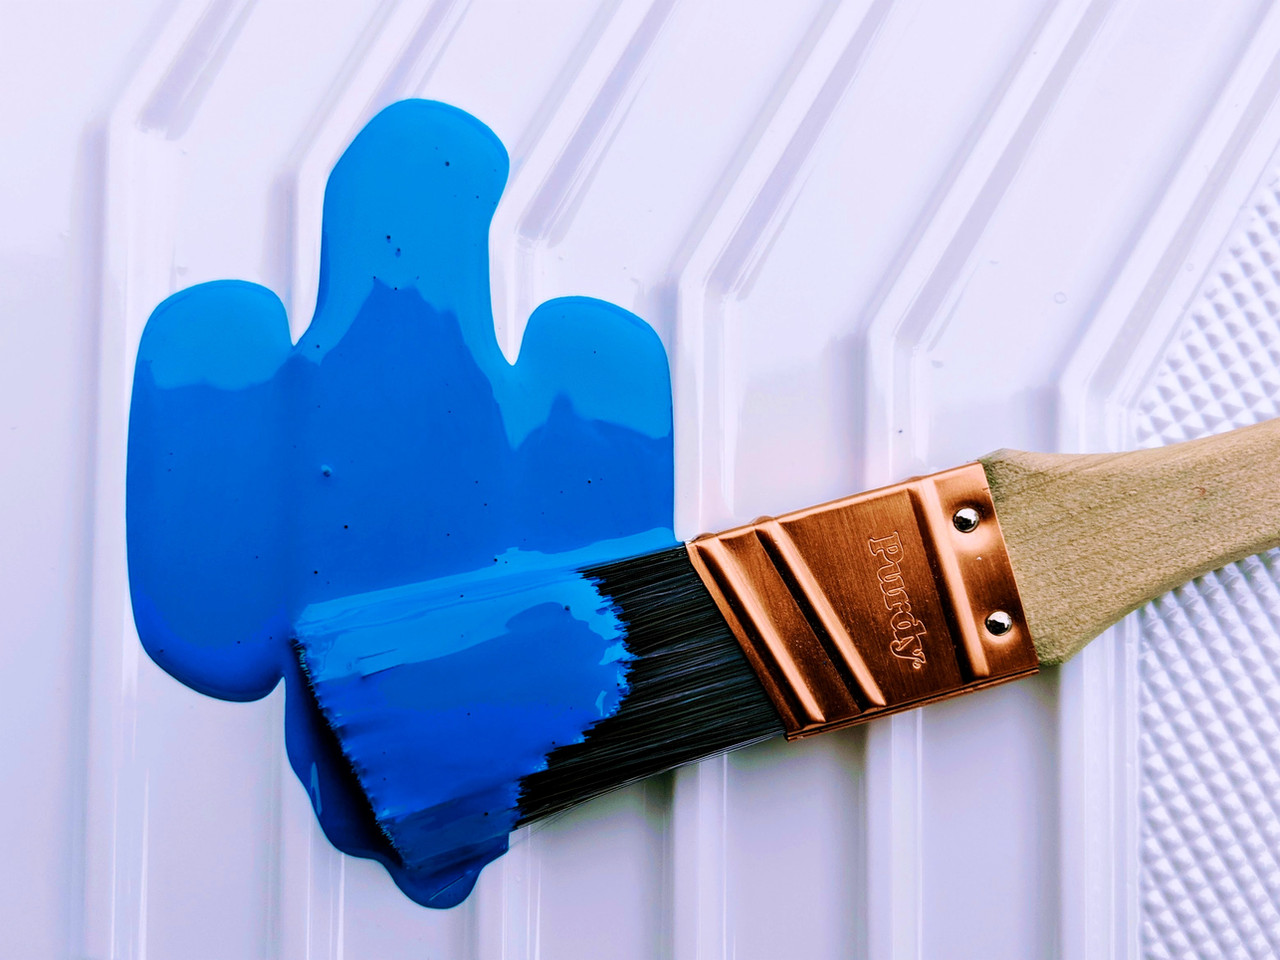
Item 19: Now i paint using spraypaint becuase it gets the job done. PLEASE SPRAYPAINT SAFELY in a ventilated area of wear a gas mask, muffle your mouth with your arm or hold your breath. Now with white primer coat the faces of the handles. the guard and the blade of the sword.
Item 20: After the white primer has dried spraypaint the appropriate colours and add several coats. The white primer will make the colour show up more meaning a better shine.
Item 21: The blade with white primer has been spray painted once and it shines well and the colour stands out great. The piece of wood next to it has been spray painted once but doesnt shine and the colour looks crap. The point is white primer WORKS.
Item 22: Now for the tricky places to paint in the sword grab a brush and spray paint the colour into the cap. With this you can hand paint with a steady hand the places the can can't reach.
Item 24: Tricky places are like the thing above the guard. Painting with the brush dries alot quicker and is safer but remember to put the brush in white spirit to clean the brush.
Item 24: Now we are at the end everything has been sanded and painted. Whats last is to put it all together and wrap the handle to complete the sword.
Related content


Comments: 29

would you make me a sword if i pay you for all the matireals needed ?
👍: 0 ⏩: 1
crap all i really need was a blade and guard but oh well ill just buy a whole sword and tear it down
👍: 0 ⏩: 0


I like your creativity  (Smile)")
👍: 0 ⏩: 1

things getting expensive always ruins the fun in making
👍: 0 ⏩: 1
")

I can´t tell how much I like this tutorial.
Just one thing, by the artists comments you wrote 24 twice...it´s 23 for the first time.
But man, the photos are amazing!
👍: 0 ⏩: 1
again please ignore these swordmaking guides they are terribly outdated XD
👍: 0 ⏩: 1
They are the first one I see, so I´ll comment them all!
XD
👍: 0 ⏩: 0

knowing how lucky I am I'll probably end up cutting myself or killing myself with that.....(im not lucky what so ever ..... Im serious)
👍: 0 ⏩: 1
you couldnt go as far as killing yourself with the tools unless you were cursed, and cuts can be healed with bandages XD
👍: 0 ⏩: 1

Good work there.
I just want to comment step 23: to paint those tricky places, you can use masking tape to cover the areas you don't want to paint over.
For example, in this case, cover the blade (already silver painted) with the masking tape, and then paint the habaki with the golden spray paint.
Spray paint usually leaves a better finishing than just a paintbrush.
(or first paint the habaki, cover it with masking tape and then paint the blade)
👍: 0 ⏩: 1
I have no luck with masking tape somehow it always leaks onto the areas I dont wanne paint XD
👍: 0 ⏩: 0

Uhh I got so many questions for certain parts of this =/ but I was wondering, how long did it take you to finish your first one? cuz im totally lost
👍: 0 ⏩: 1
ah be more spacific with your questions please XD
My first handmade sword took 1 month
My first bleach sword took 1 month
It took 30 minutes to write this guide
👍: 0 ⏩: 0

Just one question, it's the only thing I'm not clear on:
How do you attatch the guard?
👍: 0 ⏩: 1
If you pay close attention to the golden painted part which is directly below the sharpened silver blade it is actually a layer of balsa wood. The thinkness of balsa wood is about 1 milemetre. So thats 1 milemetre of thickness added on all 4 corners of the blade. When you thread the bottom of the sword into the guard it will stop at that point where the golden painted thing is. Since there is more thickness the guard cannot move anymore. You then add the handles so that it cannot go backwards. Thus shutting itself in and it becomes a clean attachment.
👍: 0 ⏩: 1
OHRIGHT
I knew about the balsa wood part, but I didn't realise the handle kept it in place. Does it not shift around the tiniest bit when touched? Or is it held firmly in place?
👍: 0 ⏩: 1
It will only move a bit if you force it if it moves alot you havent screwed in the handles firmly or the balsa wood parts arent level.
👍: 0 ⏩: 1

i can see a lot of hard work tat u have to put into it... amazing tat u only used simple tools!
👍: 0 ⏩: 1
Well its amazing that you just use cardboard and paper to make weapons XD
👍: 0 ⏩: 1
haha.. we are both equally amazed at each other!
")
👍: 0 ⏩: 0

oooh lala!
awesomeness, I shall definitely try to make a sword (:
👍: 0 ⏩: 1
You shall make a sword and post it XD
👍: 0 ⏩: 1
I shall!!! (once the School Certificate is over (: )
👍: 0 ⏩: 0