HOME | DD
 dark-spider — HyP - Step by Step

Published: 2007-11-17 19:56:51 +0000 UTC; Views: 42855; Favourites: 568; Downloads: 3434
Redirect to original
Description
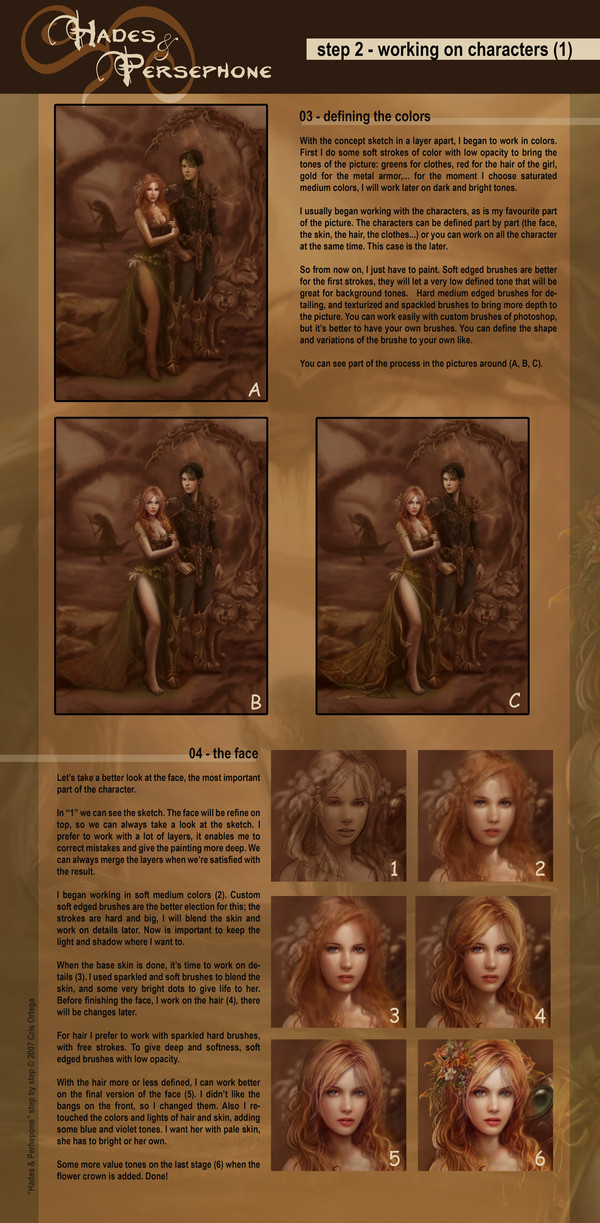
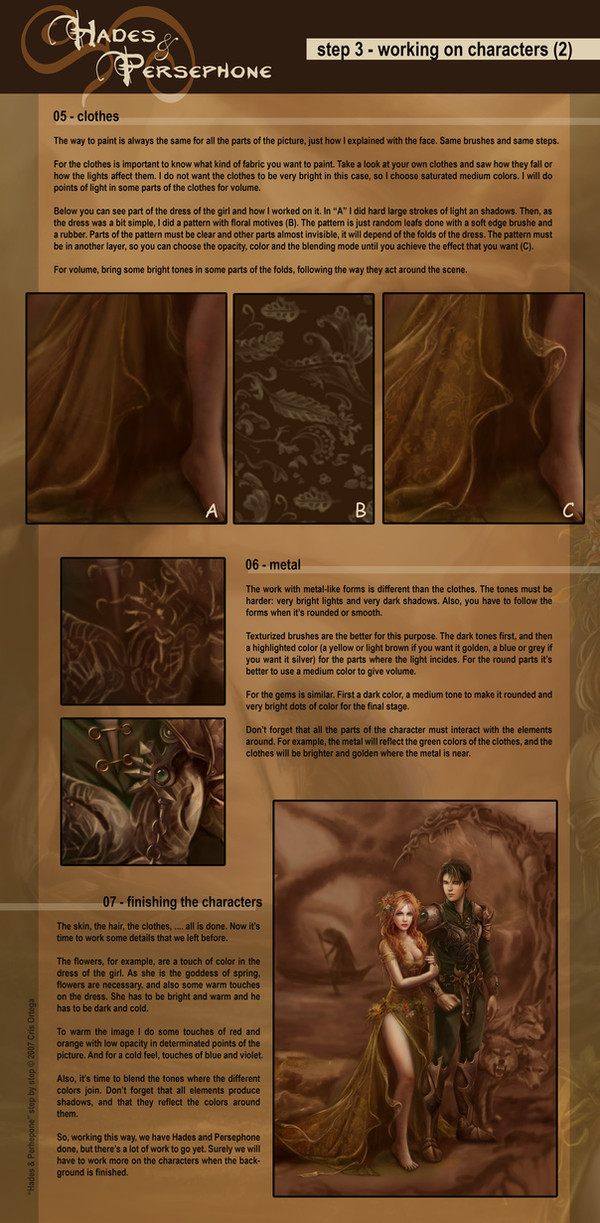
Step by Step of one of my works. This is the first step, you can see the other ones following the links:Next step: [link]
Tools: Photoshop CS 2, Wacom Intuos 3 tablet, and tons of patience
 (Wink)") .
.Download it for a better view.
Related content


Comments: 67

Wow you have great talent, absolutely stunning.
👍: 0 ⏩: 0


")

oh thank you for this.
Just a question though about when you say you use a soft edged brush and spackled brush to blend.
I can't exactly picture how you do that. I know how to blend with a soft edge brush or blend with a spackled brush, but together?
Do you mean you put the base colours with a soft edge brush and blend them with a spackled one?
If you could and have time, I'd really appreciate if you went a bit more in-depth into how you blend (I have so many issue with blending T_T)
👍: 0 ⏩: 1

Well, for the basement I work with a hard edge brush, for the principal colors. Then, I blend the result. I can do this in two ways: with a combined brush with spackles and soft edges (you can mix them up in the “brushes preset” section in photoshop) or with some touches with a soft brush and some touches with a spackled one.
I don’t have a lot of time for tutorials, this one took me a lot of hours ^^. But perhaps in the future if I can get enough time I will do some more concrete tutorials of these kind of parts.
👍: 0 ⏩: 1
oh ok. I forgot about that dual brush thing in photoshop.
but thank you, I think that cleared it up for me. I'm just gonna have to practice (sigh) that.
👍: 0 ⏩: 0

wow thanks this is very helpful!! I am glad you put this up.
👍: 0 ⏩: 0

Great! One day I hope you be as good as you

👍: 0 ⏩: 0

interesting turorial .
I dont understand one thing .in this case u grab an pencil sketch and then scan but then how u do to make the outline or u just start to paint on it ?
👍: 0 ⏩: 1
In this case I did the sketch directly in photoshop, with a hard edge brushe. Sometimes I scan a pencil sketch. But in any cases, the sketch must be in a transparent layer so you can see what you are painting under it.
👍: 0 ⏩: 2

the color is very amazing and the pic is awesome (Smile)")
👍: 0 ⏩: 0
wow directly but Im supossing u have a tablet right?
ok transparent layer I will try it next time .
👍: 0 ⏩: 0

Wow! I've always started blocking the base colors before doing the volumes... This technique looks interesting! *waiting to see next steps*
👍: 0 ⏩: 0

Oh wow nice tutorial. I love it.
👍: 0 ⏩: 0

yay!! Thanks so much!! This is great help, and very interesting to read.
👍: 0 ⏩: 0

Thanks!! Beautiful drawing, and it really helps to have a peek behind the scenes at how it came to be one
👍: 0 ⏩: 0