HOME | DD
 davidyardin — Ms Marvel Step 7

Published: 2009-05-18 23:56:41 +0000 UTC; Views: 7623; Favourites: 87; Downloads: 327
Redirect to original
Description
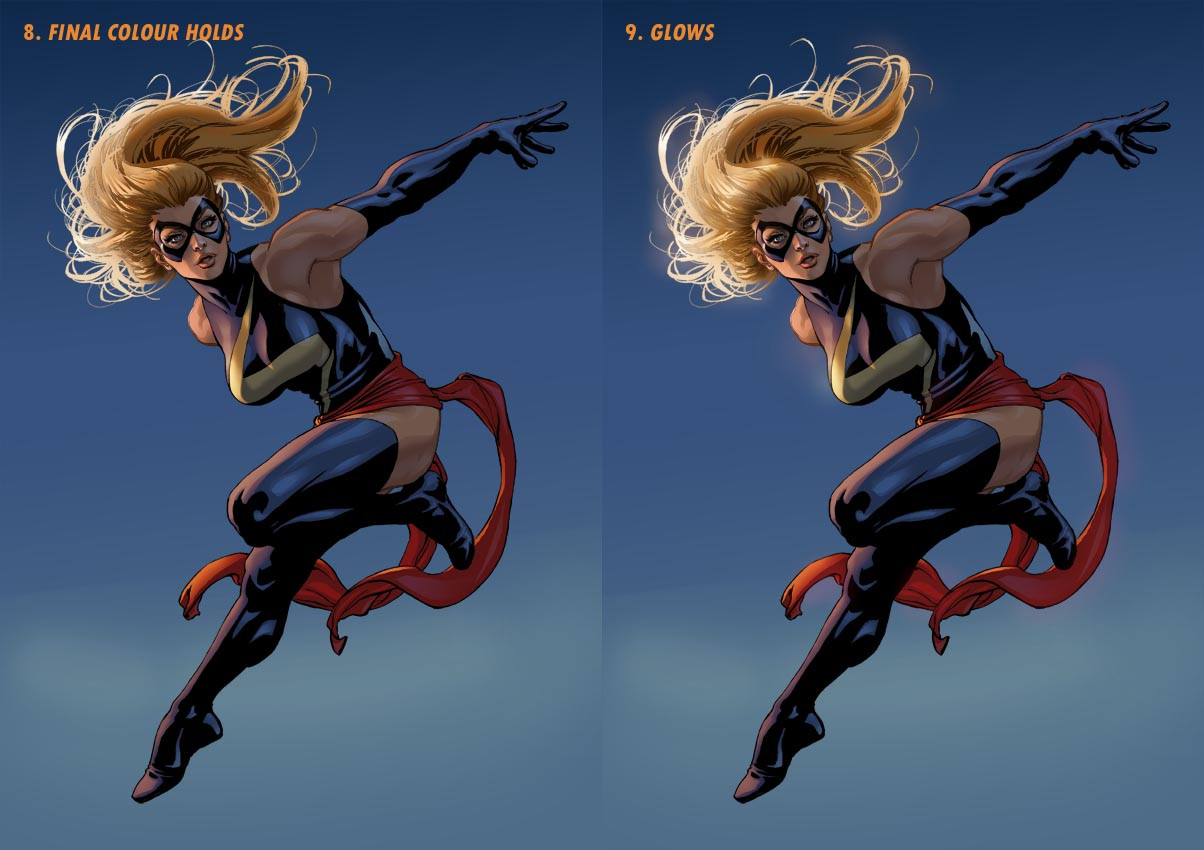
Step 7. Hair DetailI put the Hair colour holds on a seperate layer, so I could work on them by themselves without having to keep reselecting all the lines in the hair. I could have alternatively saved the selection of the hair and left it on the same layer as the other holds, but I preferred having it on a seperate layer. You can see how much the holds on the hair change the piece. It really started coming together for me once the holds were visible, since that is what had been sitting in my head since the pencil stage, and I had to keep telling myself along the way that this is what the final result would looke like.
Related content


Comments: 7

I agree with ~ThE-ViRuS-oF-LiFe , this was a really informative step!!
My only question - how did you go about coloring the hair highlights? You didn't just make that whole area lighter, because I see gradients that seem to pointing in different directions. How did you do that?
👍: 0 ⏩: 1

once the color hold is done in a new layer, he can use the selection took to then apply new gradiants and use different brushes on top of that..... I ASSUME thats what he did, I hope i am right:-D
👍: 0 ⏩: 1

Yeah pretty much.
With hair (or anything really) you are looking at how the light hits the larger area as a whole, and also the smaller individual parts.
So with the hair I will apply lighter and darker areas to the whole mass first, then select smaller sections for clumps of hair and render those, then add smaller individual strands if needed etc.
If you look at the image before I did the colour holds, you can see the cuts (selections) where I have rendered the hair. Brian Haberlin covers this process in one of his digital art tutorials [link] , and this image explains what I've done [link] .
Now after I'm done rendering the flat colour selections, I then select all the black lineart of the hair and apply colour to that with different colours and tones again, so I'm getting more gradation on top of the other rendering.
Hope that makes sense.
👍: 0 ⏩: 1
yea i got you here.... I am going to go check the link for the inks right now.....
👍: 0 ⏩: 0

This has been the most informative step for me at least. I would never think to actually ink out the lines in the hair and use them as you did for this step. I normally try to do ALL the color work for hair in program, having only knocked out a rough shape of the hair in the pencil stage. This looks much easier and more efficient.
👍: 0 ⏩: 1
I don't have a tablet, so drawing a rim light around the hair in photoshop with a mouse would have been a pain.
👍: 0 ⏩: 1
I'm still constantly amazed at how adept people are at using a mouse within Photoshop. I'd die a slow, painful, artsy death without one.
👍: 0 ⏩: 0