HOME | DD
 GriswaldTerrastone — Perspective Tutorial: 2VP 1

Published: 2010-10-29 21:37:15 +0000 UTC; Views: 16277; Favourites: 91; Downloads: 278
Redirect to original
Description
This is the first page of the second part of this tutorial...now, we enter the world of the TWO vanishing points!Yae!
First, what is the difference here, aside from the obvious? What exactly is a two-vanishing point perspective? What does it do?
With a one-vanishing point perspective, all things center around that one point. Since there is only one such point but lines in a three-dimensional space involve three things- up/down, left/right, and towards you/away from you- then it seems a bit much for one point to handle it all, and in fact it cannot. It can only handle towards you/away from you (basic "depth"), so anything else must go "on automatic;" in other words, any line that does not involve depth usually are either vertical or horizontal.
This was very clear in several of the images from before, like One Vanishing Point Street. Likewise others, like the checkered floor and walls.
When looking at a block right at the corner, the single vanishing point cannot handle it ("problem") because the block does not have sides leading to one vanishing point. In fact, the problem is that at least two sides are involved at once, and unlike the one vanishing point images, they cannot BOTH recede into a single vanishing point- because they shrink in opposite directions.
So, at least two vanishing points are needed.
Since TWO points are now involved here, something you didn't have to consider with a single vanishing point comes into play here: how will you place them relative to each other? Left-right, up-down, diagonal? How far apart?
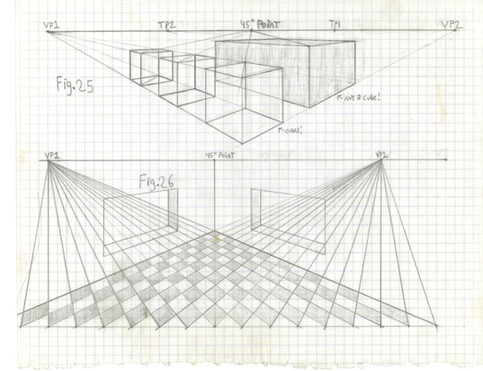
One of the most important things you must keep in mind is this: The closer the two vanishing points are to each other, the more extreme the angles will be. For this tutorial I usually keep both vanishing points on the page so you can see what is happening and how, but for actual artwork, I almost always put the paper on a large piece of smooth cardboard and draw the vanishing points on that, off of the page...because in real life, you don't often see such extreme angles.
Remember how, with a single vanishing point, any line that doesn't involve it is usually automatically vertical or horizontal? With two vanishing points, you'll soon notice that any line not involved with them is usually only automatically vertical.
For a quick start, first we'll deal with that problem that the single vanishing point was unable to handle- a basic corner view of a block.
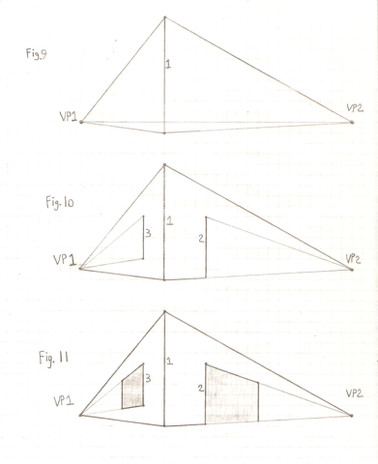
First, draw a horizontal line. Draw a dot right in the middle of it. Then, draw two more dots, one on each side of it- but for now, make sure that they are the same distance from the center dot. What you have should be something like Fig. 1.
The line used here and in the future is what I'll call the "Horizon." To the left is the single vanishing point, but single no longer- now it's Vanishing Point 1. And it is here that it's time to introduce...the SECOND VANISHING POINT! That's it, over there on the right; complete with top hat. Well, why not?
Now, draw a vertical line through the horizon, right through the Center point. For now, make sure that it's centered, so the part under the horizon is as long as the part over the horizon, as in Fig. 2.
Next, from each vanishing point, draw a line to the tip of that vertical line, top and bottom. You'll draw four such lines, and now you have a sort of squat diamond shape, as in Figure 3.
Here in Fig. 4 is where two vanishing points do what one alone couldn't- from where the center point was, draw a dot to the left, and then from the right. Just make sure that they're pretty much the same distance from the vertical line. From each of those two new points, draw a line straight up and straight down, stopping when you reach the diagonal lines- the ones coming from the vanishing points. If you like, you can shade in the resulting shape, which is a block seen at its corner.
For a solid block, that's it- of course, you can erase those excess lines if you like.
But, if you want a transparent block, then you would draw two new pairs of lines from the vanishing points, this time to the top and bottom tips of those new vertical lines (3 and 4). They will intersect right on that first vertical line (line 1). Merely darken the lines going from the tips of lines 3 and 4 to line 1, as shown in Figure 5.
And that's it- you have a simple, but effective, block, either solid or transparent. This is the basic concept of the use of two vanishing points.
Since the horizon goes through the center of the block, it is as if you are looking right at the middle. This is why the top half is the same as the bottom half, all nice and even. And this image also lines up the back corner perfectly with the front corner.
But what if it isn't? On to the next page!
