HOME | DD
 GriswaldTerrastone — Perspective Tutorial: 2VP 7

Published: 2010-10-29 22:12:04 +0000 UTC; Views: 3974; Favourites: 40; Downloads: 144
Redirect to original
Description
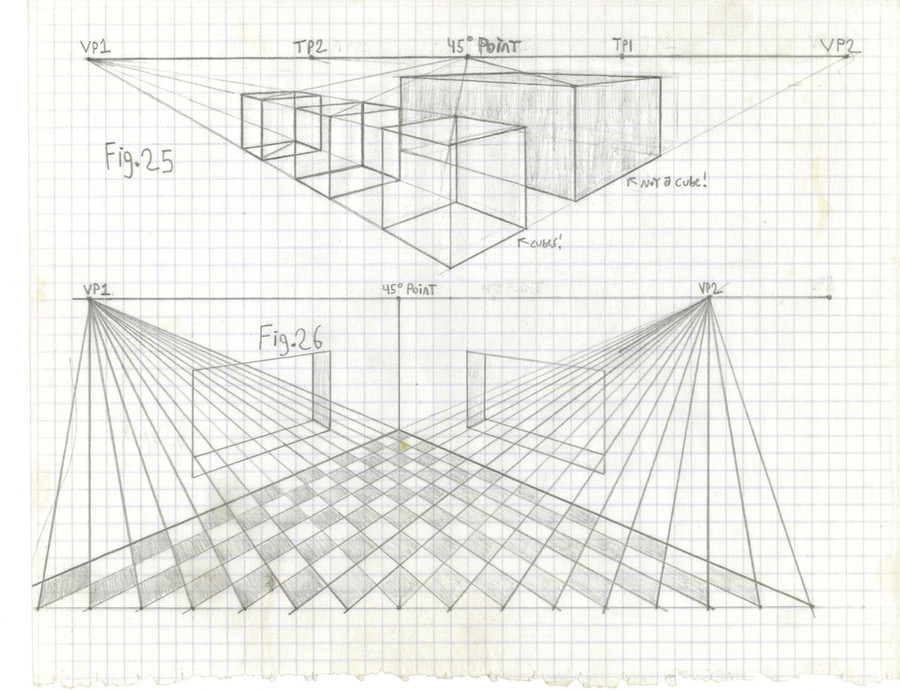
We’re close to finishing this cube here!So far, you have a square with a line going down from the front corner. The TP1 and TP2 points were the third part of drawing a cube, and now it’s all about to come together. To avoid a careless mistake, you might want to erase TP1 and TP2, you no longer need them for this cube.
What you do now is pretty much what you did earlier on with the blocks: first, draw lines from the two vanishing points to the tip of that hanging line. Once this is done, simply drop vertical lines from the side corners- points 1 and 2 here- to those two lines you just drew. Those will be points 3 and 4. Darken the lines as shown from points 3 and 4 to the tip of that hanging line.
And so, if you want a solid cube, that’s it! You have it!
If you want a clear cube, as in Fig. 21, then just do what you did earlier, and draw lines from the vanishing points to points 3 and 4. Where those two new lines intersect should be under the back corner of your square; drop a vertical line from that square’s back corner to that intersection.
Darken as shown- as you know how such a thing would look.
You’re DONE!
")
Now, if you wanted to draw a box, then, after drawing the solid-colored cube, you would just have drawn a short vertical line down from the square’s back corner to whatever line it first hits. And that’s all there is to it!
Fig. 22 merely shows what would have happened if we had swung (or drawn) that front edge UP instead of down. You would have done the rest the same way.
Just to check it out, draw a line from the 45 point through the corners of the second square you ended up with. If you can do it, as shown, then that square was done properly.
Here three things should be mentioned:
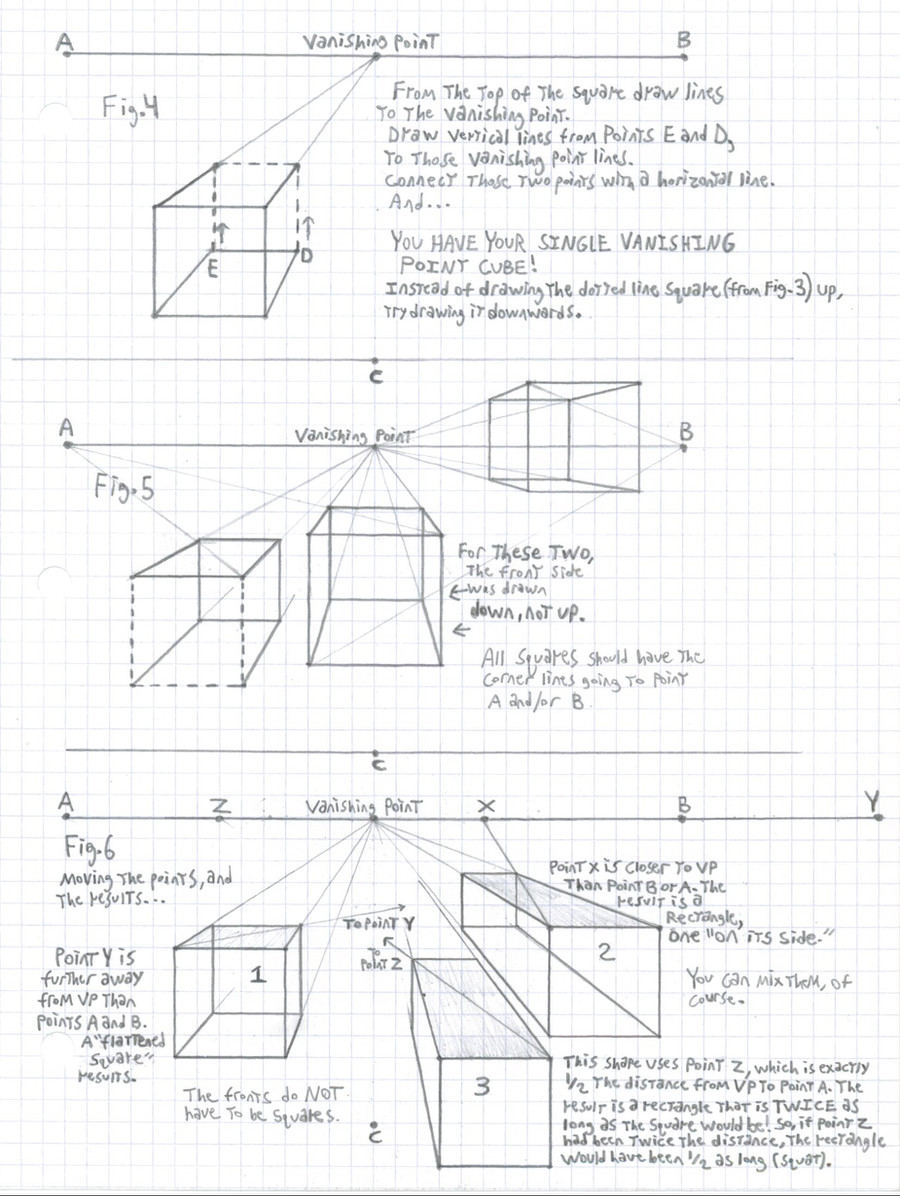
1) You would only use the TP1 and TP2 method if and only if you wanted a cube. If you had drawn that front edge line shorter, but did the rest as explained, you would have ended up with a squatter shape. If you had made that line LONGER, then you would have ended up with a longer shape. But they would have been properly drawn, just not as cubes.
2) The strange look of the bottom part of the cube in Fig. 21 is because the two vanishing points are pretty close together. The closer they are, all else the same, the more exaggerated the angles will be. Try it again, as before, but try to make the vanishing points further apart. See what happens. Further apart means more shallow angles.
3) In Fig. 19, we drew the second point above the first one- that is, between the first point and the horizon. This is why the first point was the “front corner point.” If you have already guessed that you could extend the line from the 45 point below that first point and put the second point THERE, BELOW the first point, thus making IT the front corner point, then you really do understand this! If you put the second point between the first point and the horizon, then it will be the back corner point- to see this, flip Fig. 18 and 19 upside down, so it looks like you started above the horizon.
And that’s that. Now you can draw a cube, or any “proper” shape with a square top and bottom…or you can turn the page sideways, and…square sides!
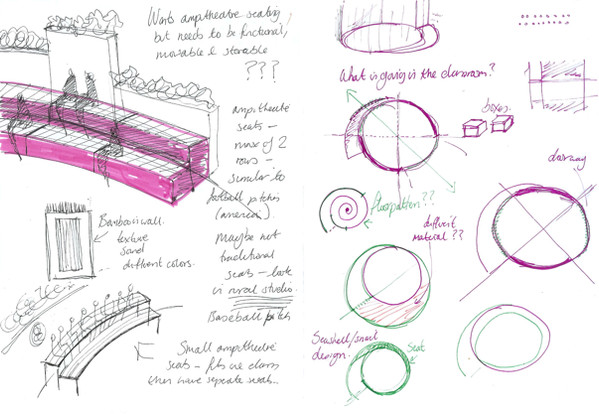
NOTE! It occurred to me a few days ago that there is also something else: If you remove the lower square in both examples, you would get a simple stool, seen from above and from a lower point of view. Since the legs do connect to the squares, they would be the proper length.
They touch the floor- the plane below the horizon.
And all would be at the proper angles.
If you use the same horizon, then you can draw multiple objects, and they would all be at the proper angles and the legs would be the proper lengths (if they can be seen). You can draw in rectangles for benches and tables or the like, this might help:
[link]
****In other words: if that square you draw is the base of something, then you know where it sets on the picture plane. How long you make the lines going up determines how tall it will be.
If the square is the TOP of something, then you know tall it is, and how long you draw the lines going DOWN will determine where the base is- as a rule, the longer the lines, the "closer" the base will be to you. Try this with first short lines, then longer, and see for yourself!
Good luck!
Previous page:
[link]
Next page:
[link]