HOME | DD
 GriswaldTerrastone — Perspective Tutorial: 2VP 4

Published: 2010-10-29 21:55:56 +0000 UTC; Views: 32946; Favourites: 160; Downloads: 446
Redirect to original
Description
To continue from the previous page…In Fig. 12, all you have to do is draw a line from the upper right corner of the opening on the right side to vanishing point 1, darkening the part “in” the opening itself. It’s just one line. It looks like a corridor or tunnel extending back out of sight.
For the window, you do the same from its upper left corner to vanishing point 2, but this time you only draw a short segment form that corner- as shown. From tip of that short line, drop a vertical line down to the window edge; but then, from the same tip, draw a DIAGONAL line. How? Line up the line’s tip with vanishing point 1, and from the tip draw to the edge of the window. Study this for a moment. See why. This is the next step in drawing such things, because that one small part of the window uses BOTH vanishing points. Think of a real window seen from that angle- it does the same thing. Notice the diagonal line from the lower left corner of the window leading to vanishing point 2, by the way- since we are viewing the window from below, we cannot see the lower ledge of it inside the building, so we would not draw that line at all in a serious picture. Again, just think of a real window- you know the inside ledge is there, but you cannot actually see it.
For Fig. 13, we erased a small part of the structure on the extreme left and right sides, and added small vertical lines. Now it looks something like a simple building with a window and an entrance.
Where the lines meet at the upper corner of the building you have an angle, in my case, it was 100 degrees (If yours is different, no problem). Measure yours, and then bisect it- cut it in half- and extend that line back through the corner, so it looks like your building has a rod sticking out at the corner. If you have nothing to measure with, just for now more or less do this as closely as you can. A better, accurate method for doing this is coming up, but for now, this will do nicely.
From both vanishing points draw lines to the tip of that new line. From where they all meet, draw a tiny vertical line, and then from both vanishing points draw a line to the tip of that tiny line. Now, a short way beyond the back corners of the building erase the lines going to the vanishing points, draw tiny-little vertical lines connecting the lines at those corners, and then connect the bottom of those tiny-little lines with a short segment from the vanishing points, as shown. You do not have to be too exact at this point. You should have something like in Fig 13., a simple structure with an overhanging ledge!
The main thing here is that the ledge is ABOVE the structure, while all else was below it. But that ledge, like everything else, comes from those two vanishing points.
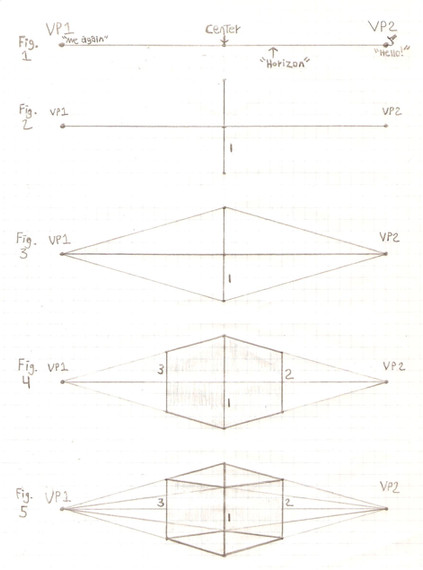
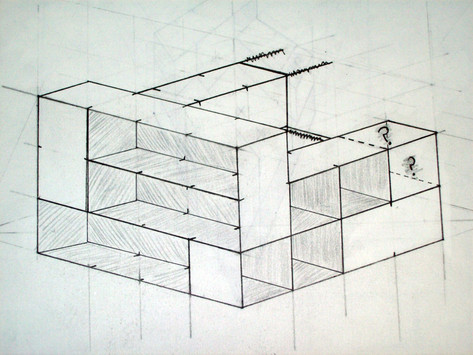
Hey- what’s THIS? This, Fig. 14, is just a random assortment of shapes I drew using vertical lines and lines from the vanishing points, in a way that shows some structures behind others. With the single exception of those two tiny diagonal lines on that overhang to the left of line 1, all things here follow that rule. This is a fancier version of that block we drew back in Figures 1 through 4. Everything here uses what we did so far, including that thin slab those structures are on and that block proudly displaying the 2VP banner. Examine each structure, and see how they were drawn, especially the strangely-shaped ones. Notice how the higher up something is, the more extreme the angle is. It all stems from those two vanishing points and the rules mentioned earlier.
Also look the front structure- the one with line 1- and the one to the left. There is a space between them. If you wanted to draw a corridor with a gap between two blocks, that is how you would do it with a two vanishing point perspective.
So far, you’ve seen how use of the single vanishing point and the two vanishing points makes quite a bit possible. Yet, it all stems from one or two points. That’s it, really!
Related content
Comments: 10

Thank you.
I like the quote in your reply.
👍: 0 ⏩: 1

Thank you!
👍: 0 ⏩: 0

Your welcome- best of luck to you!
👍: 0 ⏩: 0

Oh, wait, did you mean did I get it from somewhere else? No, I did this myself, as well as the text. Most of it is on graph paper, since my old ruler is so beat up.
👍: 0 ⏩: 0

Yes, from a scanner I picked up for 10 dollars...on a coffeehouse computer.
The tutorials are free to all. I am typing in some text right now to supplement the images!
👍: 0 ⏩: 0
