HOME | DD
 Luunan — KICKstarter Step-by-Step

Published: 2014-01-29 17:29:48 +0000 UTC; Views: 838; Favourites: 31; Downloads: 2
Redirect to original
Description
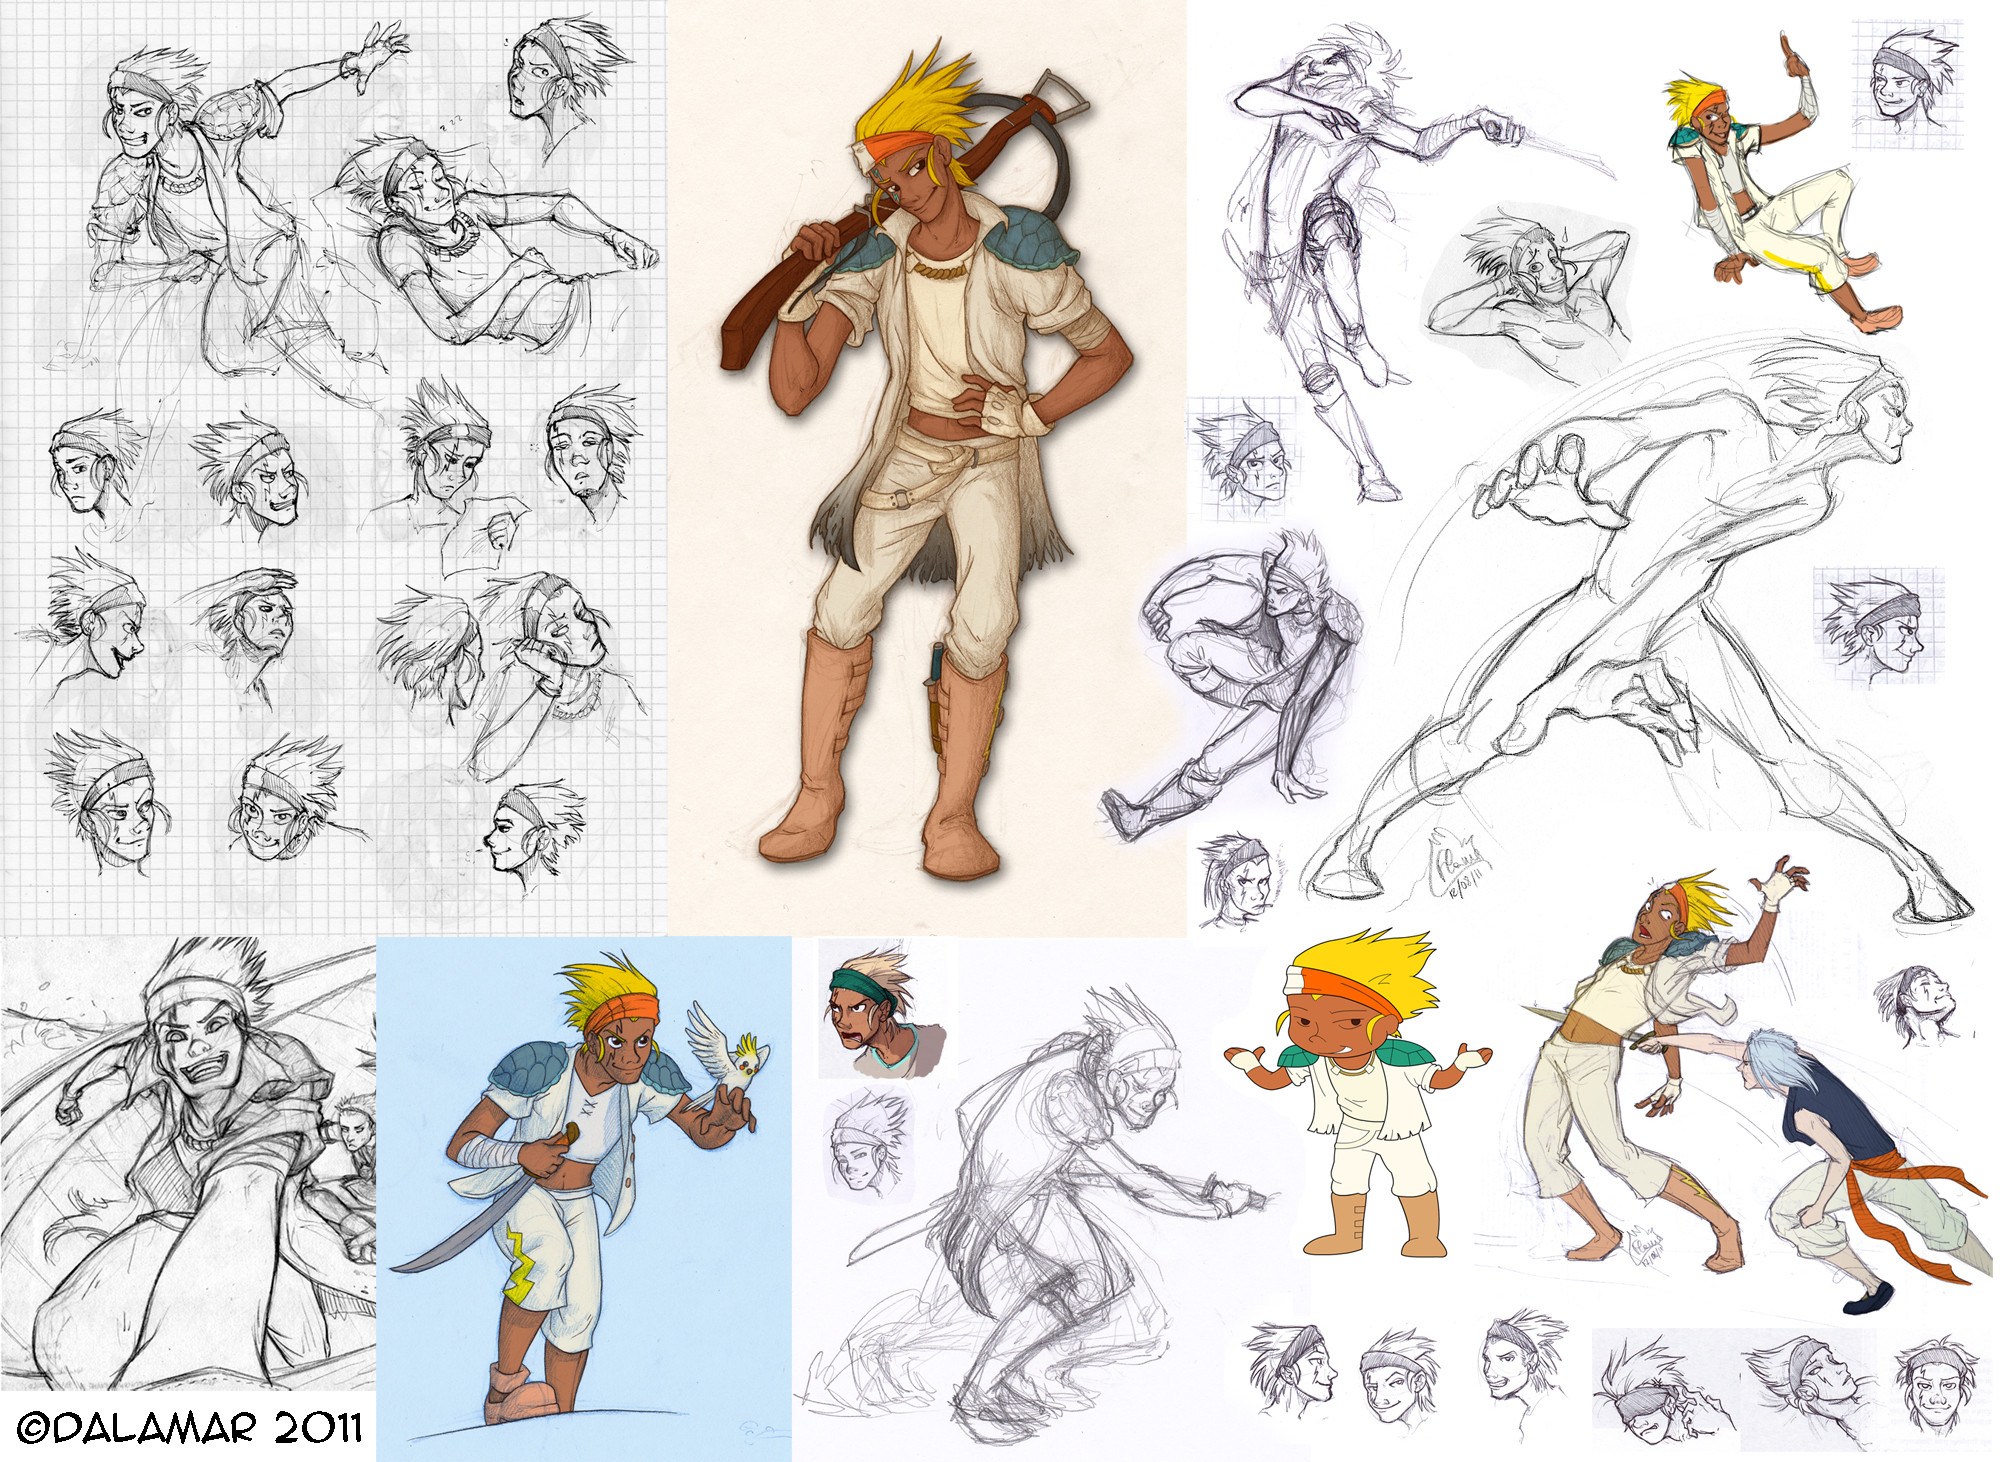
Usually I work on small canvas but this picture was huge for my standarts so I had to crop it down a bit, I hope it isn´t too pixelated owo"
For those who wished for it and those who don´t care, a Step-by-Step how I worked on the Wakfu fanart with our all favourite barbarian, Goultard <3
You can ignore the text if you want, I just wanted to briefly sum up what I did in each step. It isn´t that interesting, however uwu
Goultard © Ankama
Related content


Comments: 11


So jetzt kann ich das endlich mal kommentieren o3o
Ich bin noch nie auf die Idee gekommen irgendwas so komplett grob zu skizzieren das muss ich auch mal probieren, anstatt gleich alles richtig haben zu wollen xD
Oh die Kette war ein Pinsel :'D Ich hab mich schon gefragt wie du die SO gleichmäßig hinbekommen hast
Ich finde es total interessant zu sehen wie andere zeichnen, einige Sachen mach ich ähnlich andere komplett anders xD

👍: 0 ⏩: 1

ich mach das nicht immer, bei einfachen und kleinen bildern mach ich nur einen sketch und arbeite mit dem dann während ich beim outlinen fehler ausbessere, bei etwas so großem und detailiertem wie dem hier zeichne ich aber lieber einen groben sketch vor, einfach damit ich direkt vor augen hab was ich zeichnen möchte, ansonsten könnte es beim clean sketch dann etwas komisch aussehn und bevor ich stundenlang an dem herumfeile mach ich mir etwas das ich als anhaltspunkt verwenden kann
ich hab mir mal ein paar brush sets runtergeladen aber die meisten wieder gelöscht und nur ein paar gelassen wo ich davon ausgegangen bin dass ich die früher oder später mal brauchen kann, gut dass ich die kette nicht gelöscht hab xD
jaa ich mag das auch, man kann dabei so viel lernen und oft versteht man dann auch vieles besser 8D
👍: 0 ⏩: 0

this. is. the. best. tutorial. ever.
you explain every tiny detail so professionally. tho I couldn't understand step 6.
Love the way you shaded the hair
but a thing I don't understand as well. why did you add the blow light effect? since you didn't add a background!!
I don't seem to get the idea of it!!
and BTW, you're so awesome. do more stuff like this. (if you want to and have time XP)
👍: 0 ⏩: 1
ya welcome xD
step 6 is kinda hard to explain, it´s something i personally prefer to do but many might not even know what i´m talking about if i´d explain it to them
i try to keep it short, i use a layer with a layer effect (like multiply, overlay etc) and color them or add gradients, i like to play around with different effects to see what fits best. hope you understood it better now ^^
just because there is no bg doesn´t mean there can´t be bounce light ")
thanks, i already made some sketches and hopefully get some more of these done soon c:
👍: 0 ⏩: 1
now that makes since. I do that often as well. it gives the drawing some special, nice and simple effect ^^
to me, I rarely use bounce lights. it's hard to do them with the mouse ;A;
I can't wait 'til you do more
👍: 0 ⏩: 1
it isn´t necessary, i just add it for aesthetic reasons
also back when i was drawing with mouse i didn´t even know what bounce light was so i understand you

i will hurry >8D
👍: 0 ⏩: 0

awesome! the glowing and colour blending is really nice
👍: 0 ⏩: 1
thanks
👍: 0 ⏩: 1