HOME | DD
 MythrilAngel — Simple Beaded Star Tutorial
by-nc-nd
MythrilAngel — Simple Beaded Star Tutorial
by-nc-nd

Published: 2009-01-12 03:46:05 +0000 UTC; Views: 39299; Favourites: 516; Downloads: 766
Redirect to original
Description
As requested, I made a beaded star tutorial (Smile)")
Always remember to tie your work and weave in the ends. Cutting too close to a knot can lead to the knot eventually coming undone. If you like, put a tiny dab of glue on the knot to further secure it a bit better.
Tips:
1) Use thread the same color as your beads, or the same color as the vast majority of them.
2) Use size 10 or smaller seed beads, I used size E for the purpose of clarity in this tutorial.
3) Depending on the size of seed bead you choose, adjust the number of re-enforcement rounds you add - the hole of the bead is only so big, a smaller bead means less enforcement rounds.
4) Despite looking uniform, a single packet of seed beads can have many different shapes and variations of the same bead (a tiny bit taller, wider, bigger hole, smaller height) Choose beads of a similar shape to ensure a good outcome.
5) Just have fun~!!!
And as mentioned on the bottom, do not redistribute this tutorial for money in any way shape or form, if used on your site you must give proper credit and a link back to the original tutorial. Items made with the use of this tutorial are free to sell.
Thank you to all of you who have added this tutorial to your Favourites and/or just taken the time to have a look
Other Tutorials
~Simple Beaded Shapes Tutorial~
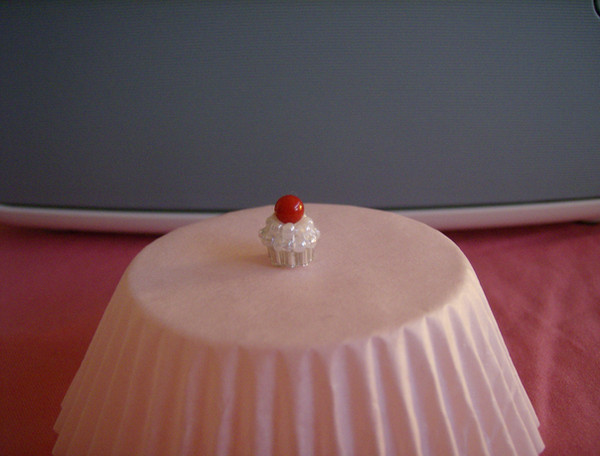
~Miniature Beaded Cupcake~
Page One
Page Two
Page Three
Page Four
Page Five
Related content


Comments: 114


 (Wink)")


I'm going to try this one! Thank you so much for sharing!
👍: 0 ⏩: 1

You're welcome and have fun~!!!
👍: 0 ⏩: 0

Thank you very much for this great tutorial, I'm going to try it
👍: 0 ⏩: 1
You're welcome. There are extra tips in the comment section that should help too
👍: 0 ⏩: 0

This helped a lot in my making of graduation gifts for my friends ;w;~ Thank you so much!!
👍: 0 ⏩: 1


I can't say how awesome this little pattern is!
This was the first beading thing I did, just a couple simple ones with thread. I just recently picked up beading again (Never really been to good at it! XD) So I just picked up some thin wire, and spent about 2 hours making a little necklace charm thing! 


👍: 0 ⏩: 1
I'm always finding new ways to use the little star myself. It's easy to do so as not to discourage new beaders, and teaches a little bit of the basics as well. If my camera wasn't dead, I'd remake it with clearer pictures and more tips and options
I'm glad you're having fun with it~!!! You may want to try the beaded cupcake tutorial too. Whenever I'm bored I usually mess around and make different cupcakes, even made a tinier one with all size 15 seed beads -- calling it the micro cupcake : P
👍: 0 ⏩: 1
Alrighty!
Nice! ")
Microoooooooooo cupcake C:
👍: 0 ⏩: 1

I've featured this tutorial in my article on beaded stars [link]
👍: 0 ⏩: 1
Thank you for all of your features~!!! I feel honored that you feature me so much, and slightly spoiled lol
👍: 0 ⏩: 1
Good, good
👍: 0 ⏩: 1

Just made one a little bit bigger than the tutorial (added another row of beads), and it's GORGEOUS! A perfect teeny tiny ornament for our first Christmas tree! <3 Thank you!
👍: 0 ⏩: 1


Waaaaah~~~ this is SO helpful. Thanks! I'll upload my works when I get the hang of it
👍: 0 ⏩: 1
I look forward to seeing them~!!!
👍: 0 ⏩: 1

Thanks for the tuto, i used it here [link] (sorry for the very late feedback D
👍: 0 ⏩: 1
You're welcome, and your stars look great
👍: 0 ⏩: 1

I am faving all your tutorials like there is no tomorrow! Thank you for sharing.
👍: 0 ⏩: 1

:3 This is great! I was just looking for something like this to make a Christmas gift for a friend of mine.
^_^ Thanks for sharing this!
👍: 0 ⏩: 1
You're welcome, I'm glad it helped
👍: 0 ⏩: 0

I learned this many years ago and I still make some when I feel for it. But I make them bigger by adding another round at least, also, instead of three beads in step four I use two and then do another round to add the third afterwards, it reinforce the round already made and I find that it keeps the shape much better that way. But that's how I do it.
When I do the next round to make the stars bigger I add four beads before taking it though the next point and then in the end I come out in the middle of these four and I add three to make the point more pronounced.
Just some tips from me in case you want to make them bigger with the same size of beads as the others
👍: 0 ⏩: 1
I'm sure many will find your tips helpful
I used to make these many years ago for fun myself too 
👍: 0 ⏩: 1
Probably will, I had another version of these stars as well with six points instead of five somewhere, just can't remember it properly, I need to fined the star I did back then as I think it is hidden somewhere back home with my mother.
I have been thinking of making a tutorial for the stars myself the way I do them, but it is pretty much the same except for the extra rounds and some other small changes, when I make them I usually have no plans for them as they fit well for most decoration purposes, be it jewellry or something else.
👍: 0 ⏩: 0

You're welcome~!!! : D
👍: 0 ⏩: 0

It look so easy to make, I will give it a try making this cute stars with your tutorial when I find some time <3.
Thanks for making this tutorial and sharing it.
👍: 0 ⏩: 1
They are easy to make 
One tip: After adding the "in between" beads in step three, work the needle around to where the tail is, and tie the two together to close the round so that the thread won't slip/come out, then continue beading without cutting either ends.
Later, weave in the first tail, trim it. The second tail, tie it off, then weave it in
I sort of use the first tail as something to hold onto until the end because the work is so small XDDD
You're welcome

👍: 0 ⏩: 1
| Next =>