HOME | DD
 ProjectToothless — Toothless Pattern Release: Part 4
by-nc-nd

Published: 2011-12-19 14:16:08 +0000 UTC; Views: 37690; Favourites: 214; Downloads: 1266
Redirect to original
Description
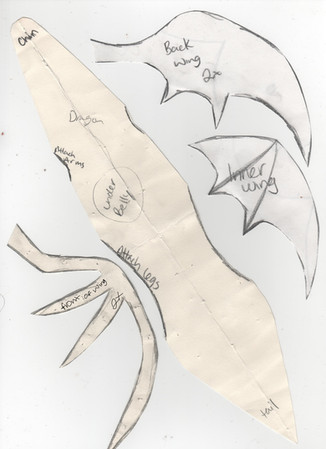
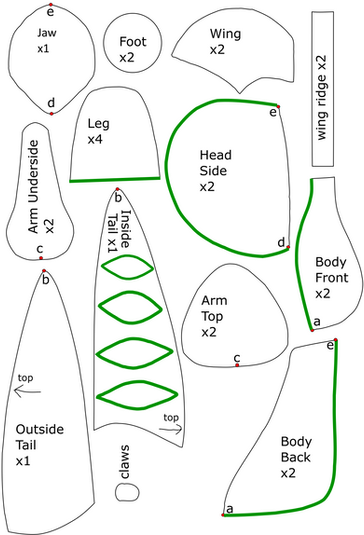
This is the last part (4 out of 4) of the finished pattern, I am releasing.The pattern is for a highly detailed Toothless-inspired plush dragon.
NOTICE: There will be an upload with an alternate tail-fin for those who want it to be completely true to the movie.
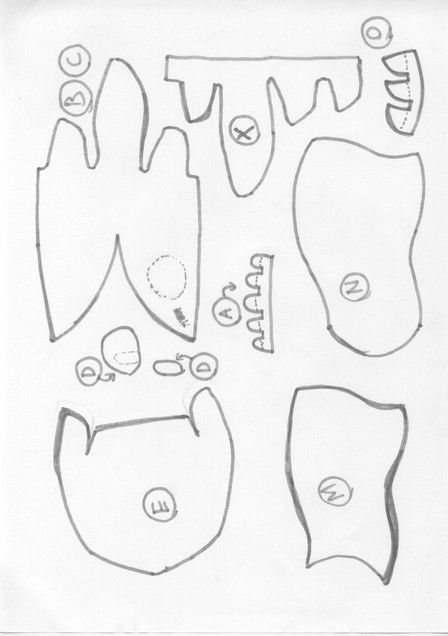
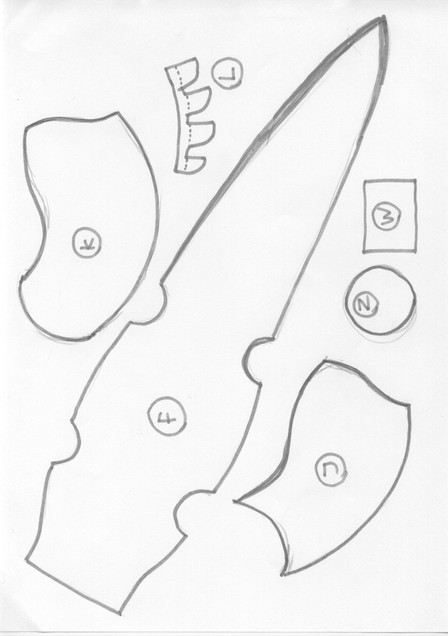
Note, this image is of exactly A4 size and made for printing:
Do not let your printer resize the image - instead, have it crop the edges, that fall outside of the printable area.'
Remember that all pieces that are not spikes or claws will NEED a ½cm seam margin. Don't forget to add this.
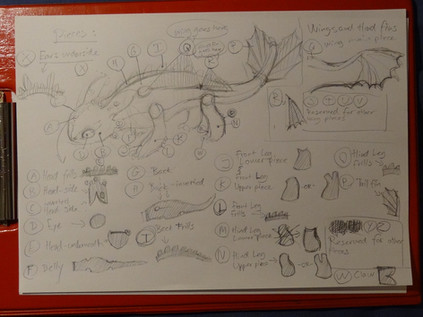
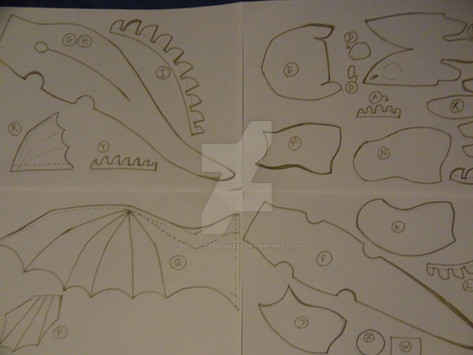
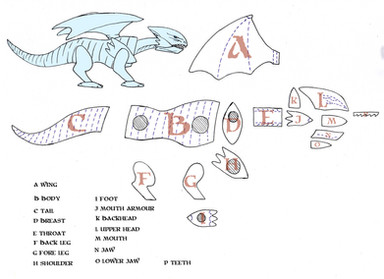
For a reference on the pieces, please see the Piece Overview here:
[link]
More info will probably be found here in the near future.
_____
Previous: [link]
Next: none - this is the last piece.
_____
Also... I better get to making a sewing tutorial.
In the mean time, Spirit-of-america has a tutorial, that can be used... most of the way:
[link]
_____
TUTORIAL HERE:
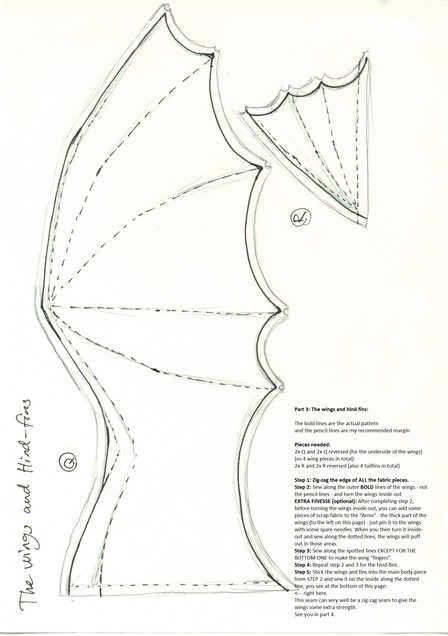
How to make the wings:
Read the enire tutorial and pick the method, you like the best.
Pieces needed:
4xQ
Some scrap fabric (Optional)
Method 1:
a) Cut out the wing pieces and stack them 2 and 2 (making one of the wings mirrored).
b) (OPTIONAL) Place a thin strip of scrap fabric along the edge of the wing (edit: to the left in the image) (Where you'd expect it to be thicker) - when you turn it inside out, it'll already be stuffed.
c) Sew along the LEFT (in the picture) side of the wing pieces (if using scrap fabric, it should be underneath your seam), so the "fingers" are still open.
d) Turn the wing inside out (Make sure, the "fingers" align properly - pin them together) and make a straight seam where the dotted line defines the limb (Top to bottom). This should "encase" the scrap fabric that fills up the thick part.
e) Make straight seams along the finger lines.
f) OPTIONAL: Make a straight seam close(!) to the edge of the RIIGHT (in the picture) side of the wing, closing it from the finger side. This will help the wings keep their shape.
g) Make a fine zig-zag seam along the right side of the wing (the fingers)
h) The wing should still be open in the top (Where it connects to the body.
i) You may add some extra stuffing (as far as possible) to the "arm" through the hole in the top (in the picture)
j) Done! Ready to attach.
Method 2:
a) Cut out the wing pieces and stack them 2 and 2 (making one of the wings mirrored).
b) (OPTIONAL) Place a thin strip of scrap fabric along the edge of the wing (Where you'd expect it to be thicker) - when you turn it inside out, it'll already be stuffed.
c) Sew along the entire outline of the wing (EXCEPT FOR THE TOP, where it's attached to the body - this is the hole, you'll use to turn it inside-out).
d) Turn the wing inside out. It may be easier if you cut away excess fabric around the "fingertips" before attemtpting. Then make a straight seam where the dotted line defines the limb (Top to bottom). This should "encase" the scrap fabric that fills up the thick part.
e) Make straight seams along the "finger" lines.
f) The wing should still be open in the top (Where it connects to the body.
i) You may add some extra stuffing (as far as possible) to the "arm" through the hole in the top (in the picture)
j) Done! Ready to attach.
Method 1 is easier and will give a more precisely defined wing, but the fingertips will feel slightly more rough.
Method 2 is a bit harder but will give you a wing, that's soft and cuddly all over - but you risk that the fingertips will look less defined.
How to make the hind fins:
This tutorial can be found in part 1.
It's basically the same as the wings.
How to make the tail fins:
Again: The same as the wings:
Sew all around the outer edge of the pieces (2 stacked on top of each other), cut off excess fabric, turn inside out and with straight seams make the lines.
Related content
Comments: 10

I used your pattern as a starting point and scaled it up 3 times to make my son Toothless wings for Comic-Con next weekend. He is in heaven! Thank you for the help because the first set of wings I tried creating my own pattern were a complete failure. Part of that was the pleather with the cuddle not working well together. This time I ironed on fusible webbing to the fabrics and that helped them to play much nicer together. Back of wings
👍: 0 ⏩: 0

Hi, I'm making a hoodie with detachable wings and I'm using a slightly altered version of your pattern. (I basically added three inches in the middle and made both wings all one piece.) Once I'm finished, I want to make a tutorial for it. Is it alright if I include your pattern with its alterations? (Giving credit and a link to here of course.)
👍: 0 ⏩: 0

These look amazing! I bought some cool fabric to make another dragon, and this is the pattern I'll use! Great work!
👍: 0 ⏩: 0

Sounds good. It'squite small, so you won't need much fleece.
👍: 0 ⏩: 1

I just found out, I bought way too much ($8 worth of fleece).
50cm x 150cm is more than enough.
On the other hand, now, I have for another one.
👍: 0 ⏩: 1

I'm gonna give it a try! Will let you know how it goes.
👍: 0 ⏩: 1

Thank you very much.
For updates on the project, please see my journal.
I'll update it every time something happens.
👍: 0 ⏩: 0

