HOME | DD
 S-Hirsack — Tie Dye tutorial Pt. II
Published: 2010-11-29 14:13:55 +0000 UTC; Views: 8535; Favourites: 29; Downloads: 167
Redirect to original
Description
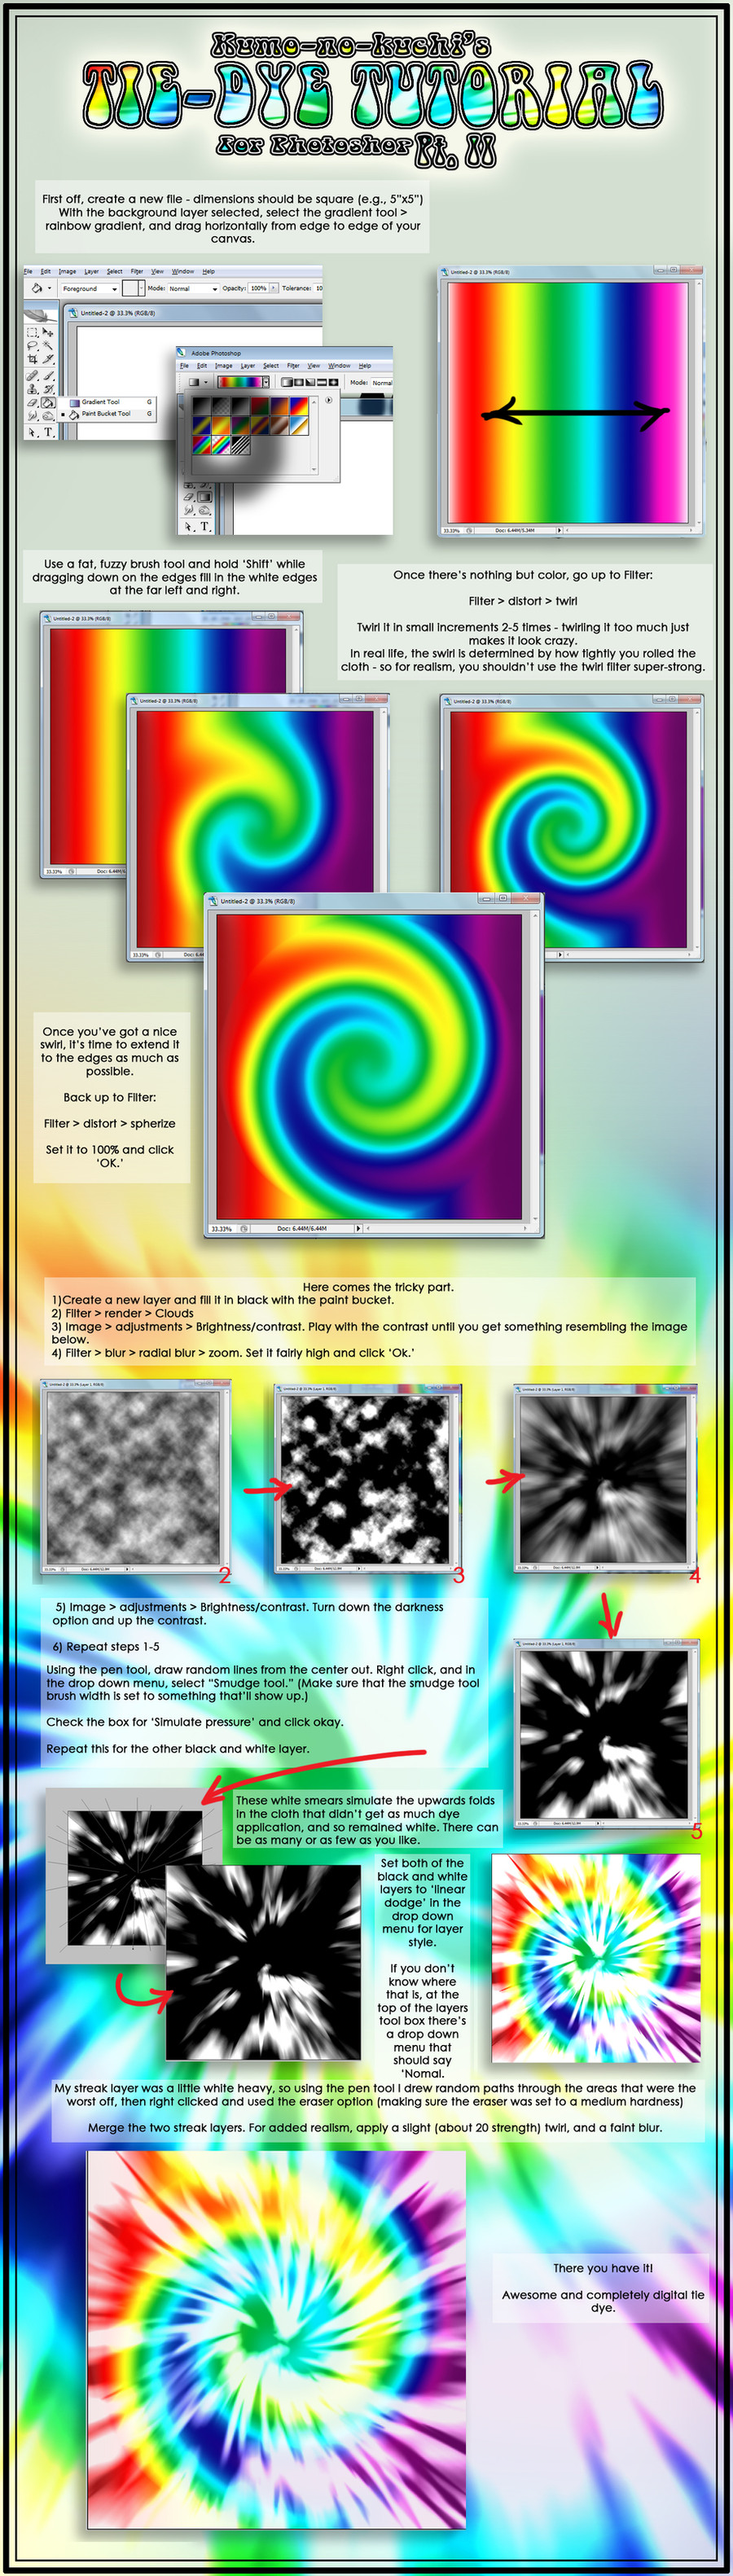
This is a sort of improvement/expansion of THIS [link] tutorial I did a few years back.Cleaner, better looking results.
Related content


Comments: 11

👍: 0 ⏩: 0

When you did the brightness/contrast part, what were the numbers you entered in? I'm having a hard time getting my "clouds" to look similar.
👍: 0 ⏩: 1

I couldn't say, a lot of this kind of thing (for me at least) is eyeballing it and playing with sliders until I get the look I like.
👍: 0 ⏩: 0

OK when I right click after drawing the lines, smudge tool does not show up. I'm using photoshop CS5 and smudge tool is in a completely seperate box under tools and there's no place to check "Simulate pressure".
👍: 0 ⏩: 1
You can probably achieve a similar effect by carefully going in and using the blur tool if smudge is giving you issues.
👍: 0 ⏩: 0

help!!! can you make me one for custom colors???? what would you charge??
👍: 0 ⏩: 0

I'm using Photoshop Elements 9.0 and trying your tutorial. However I don't have a drawing tablet like you used here. Can I still do this tutorial in that program, and what kind of brushes do you recommend I use? Any help would greatly be appreciated!
Thanks!
👍: 0 ⏩: 1
Of course you can still do it without a tablet!
The method I recommend if you don't have a tablet is to use the pen tool and a standard 'round' brush with a size the maximum desired width of you 'brush stroke.' Make sure you have your brush set to the opacity you want, then select the pen tool and make sure that you have it set to 'paths.' Then:
1) Use the pen tool to place (by clicking) the start and end of where you want a 'stroke' to go. Clicking and dragging on the second point will allow you to curve/bend the path you create, and hitting esc after you're done placing a point will end one pen path so you can start another.
2) Right click (PC) or ctrl+click (Mac) and select "stroke path" or "stroke subpath" depending on whether you want to do several paths at once, or just one at a time, respectively.
3) On the tool roll down menu select 'brush' and tick the box besides "simulate pressure"
This will result in white strokes tapered at both ends that you can easily control or alter before rendering. Play around with it a bit, it's a fantastic element.
👍: 0 ⏩: 0

Wouldn't it look a little better with some colour dodge?
 (Smile)")
👍: 0 ⏩: 0
Wouldnt it look better with a bit of colour dodge?
👍: 0 ⏩: 0
