HOME | DD
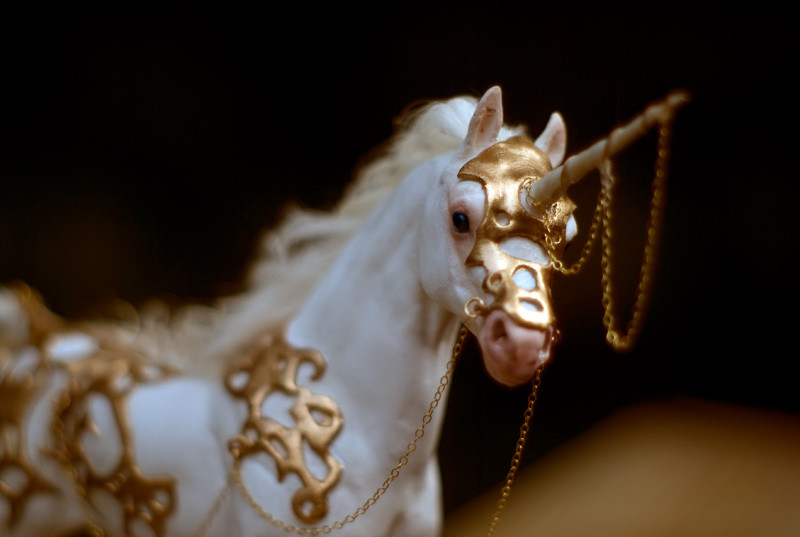
 SovaeArt — Unicorn Sculpture Tutorial

Published: 2008-01-11 13:32:04 +0000 UTC; Views: 44586; Favourites: 1203; Downloads: 4221
Redirect to original
Description
I can't believe I actually finished a tutorial! I always start them but quit part way through, so this is quite a feat. It's huge- about 100 pictures. It is the entire sculpture from wire armature all the way down to hair. Just click "download" on the left hand side. Enjoy.For those who can't use PDFs, the tutorial is also online here: [link]
Let me know if anything is confusing or makes no sense. I've been on a lot of hydrocodone lately *bronchitis*
Related content


Comments: 273

I'm afraid not. You can certainly use the finishing techniques, sculpting muscles and details and such, but the sort of armature I use wouldn't hold up in a kiln I don't believe, and from all my experience with real clay, managing to fire something with spindly legs like this would be near impossible, unless it had a base and other supports.
Polymer clay is hard when it's cold, and soft when it's warm. It's a pain in the ass I know but you just have to kneed it till you've warmed it through. I use a mix of super sculper and sculpey firm, and it usually takes about an hour to fully mix two 1lb packs. You can use mineral oil to soften the clay itself, and if you only want to soften a small area, you can use mineral spirits/turpenoid. It's certainly possible though, and a lot easier than firing.
👍: 0 ⏩: 1

Alright, I'll give my super sculpey packs one more shot.
One more question then: Do you have to use floral tape, or is masking tape just as good?
👍: 0 ⏩: 0

How did you make the clay so smooth instead of finger marks,etc ? I LOVE IT!
👍: 0 ⏩: 1
It's all in the tutorial
👍: 0 ⏩: 0

so adding more layers of acrylic paint smooths it out? i thought the more layers you put the more nasty it looked.. clumpy or whatnot. so i covered everything in glaze but it turns out shiny when i dont want it to be =T
👍: 0 ⏩: 1
You must allow the layers to dry fully before applying another. I know acrylic "dries" in a few minutes, but in reality its hours before it is truly dry. You need to use quality acrylic paint, not the supercheap stuff which has very little actual pigment in it and is mostly cheap filler. You also need to use a very soft brush, like a synthetic watercolour brush. If extra layers are looking thick, water the acrylic down. Work in a different direction each time you apply a layer, and they must be applied with great care, not just plopped on  (Smile)")
👍: 0 ⏩: 0

This was the most amazing tutorial I've ever witnessed. Right after I found it I made my own unicorn [link]
This is seriously top notch and your talent is just...wow.
Thank you for this!
<333

👍: 0 ⏩: 1
I checked out the sculpture, and it's fantastic! I'm glad the tutorial is cohesive enough to be able to follow! hehe
👍: 0 ⏩: 0

wow very cool and helpful! love it!
is it very heavy? because i have a project for school (end of semester project... brrr) and i`m looking for a way to make a big rocking unicorn ")
👍: 0 ⏩: 1
Well these sculptures are very small, less than 12". You will not be able to use clay of this kind to make a large rocking unicorn. On a large scale, polymer clay is very brittle and delicate. It would be an enormously difficult (and HEAVY) feat even with /regular/ clay. All the pieces would need to be fired separately and then put together. I just don't believe it would work, and even then you would need to move it, and it would indeed weigh about 8 tonnes
Your best bet is good old sturdy wood.
👍: 0 ⏩: 1
ok thanks  (Wink)")
👍: 0 ⏩: 0

wow i love this tutorial A LOT. its been really helpful for when i tried making figurines myself.
however i do have a couple questions. I am getting ready to seal my sculpture and i was just wondering about what kind of sealer i should be looking for exactly. I could not find the particular brand you were using so im not sure exactly what i should get and what would not turn the sculpture tacky.
so i guess what im asking, to sum it all up in case that was a bit confusing, is could you tell me a little more about what sealer you use before the painting, and about how you use it
")
👍: 0 ⏩: 1
I'm afraid Atelier is the only brand I use. I know others are available but I have never tried them, and so cannot attest to their effectiveness.
You can buy it online here:- [link]
I simply finish the sculpture (sand it, fill cracks, etc) wash it, allow it to fully dry and then use a liberal amount of binder medium. Sometimes I'll just go ahead and trickle the medium directly onto the sculpture and then swoosh it around and spread it out with a soft clean paintbrush until the whole thing is covered in an even layer. Also be sure there are no big drippy areas. You can remove excess medium with a dry paintbrush.
There's really nothing much to it
👍: 0 ⏩: 0

Thanks for sharing! The way I do sculptures is vastly different from your methods, but I did find a number of things that would be useful to me. :3
👍: 0 ⏩: 0

Thank you very much for this tutorial-I'm looking forward to trying out some of the techniques
👍: 0 ⏩: 0

With the Polymer clay, What type is it?. I'm going out soon to get the supplies, so i can start this vary cool tutorial. ^^
👍: 0 ⏩: 1
I use a mix of super sculpey and sculpey firm
👍: 0 ⏩: 1
Dose it air dry, or do you have to cook it.
👍: 0 ⏩: 1
You must cook it at around 270f, and the time depends on the thickness. I do these sorts of sculpts for around 50 minutes.
👍: 0 ⏩: 0

This is the best sculpture tutorial I hve ever seen; thank you for the effort you put into explaining everything

👍: 0 ⏩: 1
Thanks! It was a pleasure.
👍: 0 ⏩: 0

Nabbed!
I was wondering how you went about applying the hair and doing horn's, as I have a few custom ponies in mind that I wouldn't mind trying that technique on, if you don't mind. ^_^
Thanks for sharing this! It's VERY helpful!
~~Bee
👍: 0 ⏩: 1
For the horn I applied a wad of clay, carved it down, made it smooth, and then worked the design into it.
The hair is applied just as it shows in the tutorial, in little clumps starting at the end, and working against the direction of the hair
👍: 0 ⏩: 1
*bows over and over* You are awesome ^_^.
Man, now to just find some time to work on the custom ponies I need to have finished before June for the My Little Pony Fair in Rhode Island! STRESSSSSSSSSSSS!!!! XP If I can, I want to try your techniques on one very special unicorn custom I've had in the planning stages for over a year now. Your hairing technique is the only way I can see this custom done with, as it's probably going to be the least cartoony, least cute custom pony I've ever worked on ( going for semi-realism, if it's at all possible with ponies ^^: ).
~~Bee
👍: 0 ⏩: 0

WoW! That's an excellent tutorial...makes me wanna go make something now...
👍: 0 ⏩: 0

This is incredibly helpful. I'm definitely going to be using some of your tips and advice. I've been wanting to refine my sculpting for so long I've kind of just stopped because I got so fed up with it 
👍: 0 ⏩: 0

Oh wow, you are so precious to share this knowledge! I have been looking for such a thing for quite some time. Thank you so much for taking all the time to go step by step, that surely makes the project take 3 times as long.
I need to stop, really, your ass is not kosher, I just am that greatful. ^_^ Thank you ever again so very much.
👍: 0 ⏩: 1
LOL XD
It didn't take too long, I just took a picture every time I did something to the sculpture. I think I actually took about 250 photos, but I managed to distill them into some sort of order
Glad you find it helpful!
👍: 0 ⏩: 0

Ooh, this tutorial is wonderful! It's so interesting to see how these wonderful sculptures of yours are made... I might even try it myself one day. It will probably be terrible compared to yours, but hey, it's a fun idea...
Oh, and I have to give it a

👍: 0 ⏩: 1
Thanks! I think sculpting is great fun, it's one of those artistic activities that's really basic and almost primal. I think everyone should have a go at it
👍: 0 ⏩: 0

(smiles) My hands itch to try my hand at this method, only on cats. Thank you so much for being so detailed! I'm sure to look it over often. Thank you very, very much!
👍: 0 ⏩: 0

Wow, this is so neat! I'm looking forward to perusing the whole thing and learning lots!
👍: 0 ⏩: 0

Wow! This was great, so helpful!
👍: 0 ⏩: 0

mindblowing!!!
thanx alot for sharing the WIP pdf!!!
lots of thing i got to learn!!
👍: 0 ⏩: 0
Cool! Next time you should show 2 parts of the amarture. Like how it looks when you start making the armature, and then after you add clay partially.
👍: 0 ⏩: 0


amazing tutorial. Major kudos to you!
👍: 0 ⏩: 0

This is amazingly helpful! I'd actually been wanting to ask you about your process, but this answers just about all my questions. Awesome! I'm definitely hoping to try sculpting when I have the time and place.
👍: 0 ⏩: 0

ohhh I loved reading that! I've never actually had a sculpture crack, but I suspect I don't bake them long enough. I generally bake them for 20 minutes on 200 degrees, since they start to burn after that
I also never bake mine in one go... I bake them more than once. is that bad? I don't use tape either since I figured it would melt or something if there was no clay over top.
I never thought to use an exacto knife to carve.
you've definately given me some good ideas! this was really well done!
👍: 0 ⏩: 1
Naw, the tape doesn't burn at all. On things I've broken open the tape has been just the same. I wouldn't bake things at that low a temperature for that short a time, but if you're doing it multiple times it wouldn't be a problem. I've baked certain sculptures up to about 8 times, so I know that's no problem xD
👍: 0 ⏩: 1
indeed. my oven is a gas oven so I think it heats things differently maybe? but yeah, usually I bake each sculpture at least 4 times and the last one for a bit longer
that's good to hear about the tape. I should start using it.
👍: 0 ⏩: 0

Do you find that using the sealer before painting helps with even coats of paint ? i have the worst time getting even coats when i paint my sculpts, and they usually end up looking awul, unless i prime with white...and even then it doesnt always turn out right :/
Thank you for the tutorial, i've never seen it done with tinfoil and floral tape, but thats an excellent idea
👍: 0 ⏩: 1
I don't think it makes any difference to how good the paint looks. All I can say is put several coats on, getting gradually more watered down. You may want to try using enamels.
👍: 0 ⏩: 0

Wow, GREAT tutorial. The clear pictures and accompanying text make it very easy to follow.
You make it look so easy though XD
👍: 0 ⏩: 0

wow thats a brilliant tutorial, thank so much for posting it! It was really easy to follow.
I think i might have to try hy hand at sculpting again.
Same questions as CosimicDreamer, where do you get the viscose from? and can i use masking tape instead of floral tape?
👍: 0 ⏩: 1
Opps, forgot to answer his/her question about the masking tape, but I did answer the viscose question there
👍: 0 ⏩: 1
ok thanks, i'll go find some floral tape tomorrow, can't to try sculpting again now^_^
👍: 0 ⏩: 0

Your tutorial is the most detailed, informative, and extensive, one I have read! 
I have never yet used the hard gray Sculpy polymer clay before, and this tutorial will be very helpful when I inevitably do. Since I use mainly Premo, my methods are a little bit different. I usually solder my armatures. ( I like instant gratification 
I would have never even thought of using mineral oil to smooth out the clay, and the same would go for the acetone, for the fear of destroying the composition of the polymer, but seeing that you do it all the time, I just might give it a try! 
I have two questions... Where do you get the Viscose, and can the masking tape be subsituted for floral tape? I just use the masking tape, but occasionally the clay doesn't stick. (I use a light coat of Liquid Sculpy)
The best part, that I learned from you tutorial, is that you use a silicone plate under your pieces. I'll bet a "Sil-Pat" mat would work the same way. 

I don't have a convection oven, but does that really make a difference? 
Excellent, informative, Job! You should post this as an Artisan Craft News article!
Thank you tremendously!

👍: 0 ⏩: 1
Thanks! I'm glad you found my tutorial useful
We all have our own methods and quirks, and the tutorial is just the way I work and it suits me. Your work habits sound great
I don't recall where I got my current batch of viscose, somewhere online. You can get it as hanks for use in spinning, and you can get other fibres in the same hair-like form too. I'd recommend getting it in large amounts of white and dying it yourself, as the places online that sell pre-dyed "doll hair" do so at an all but extortionate price.
And I believe a convection does make a difference, as it heats the sculpture evenly and is not subject to areas of high and low heat like many gas and electric ovens.
Thanks!
👍: 0 ⏩: 1
Double 'Doh! 
")


You are very welcome!

👍: 0 ⏩: 0
<= Prev | | Next =>