HOME | DD
 TheMonoTM — Metro UI v2.0 Beta
by-nd
TheMonoTM — Metro UI v2.0 Beta
by-nd
Published: 2012-09-11 05:00:47 +0000 UTC; Views: 19955; Favourites: 37; Downloads: 2862
Redirect to original
Description
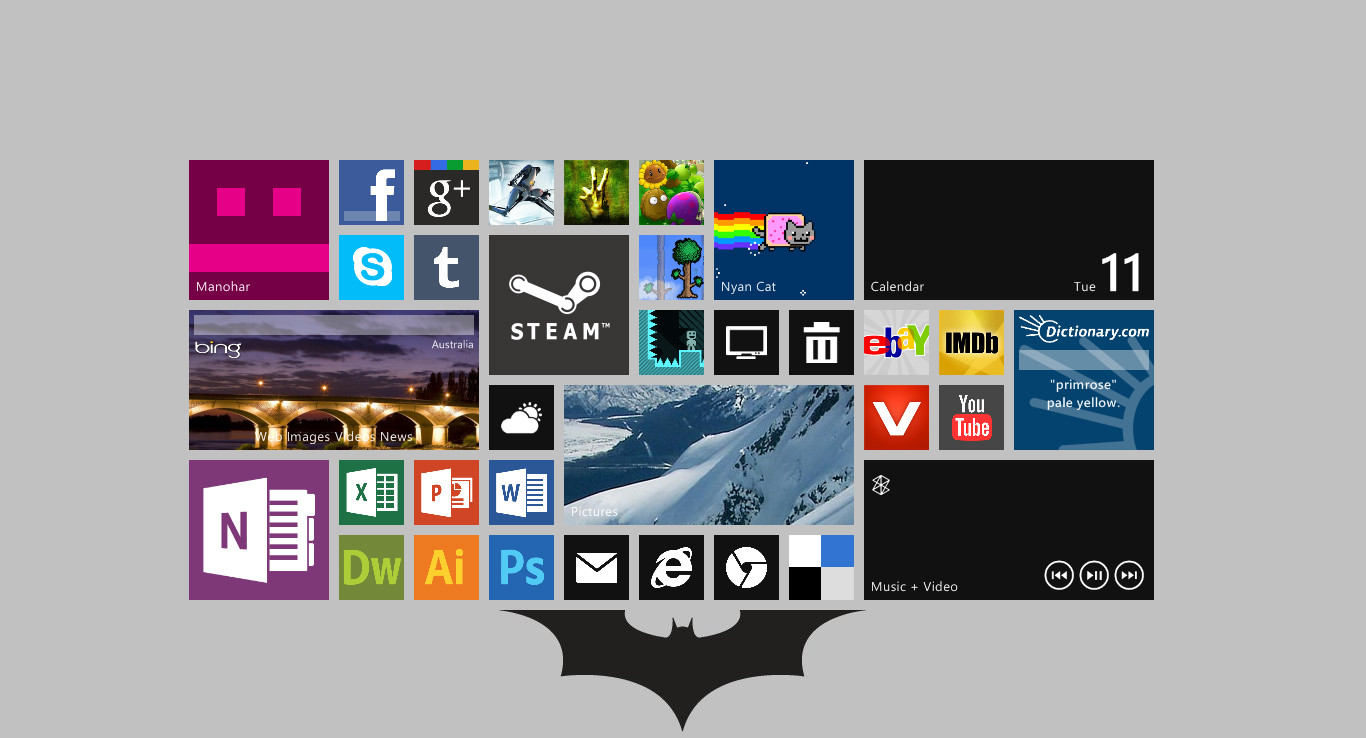
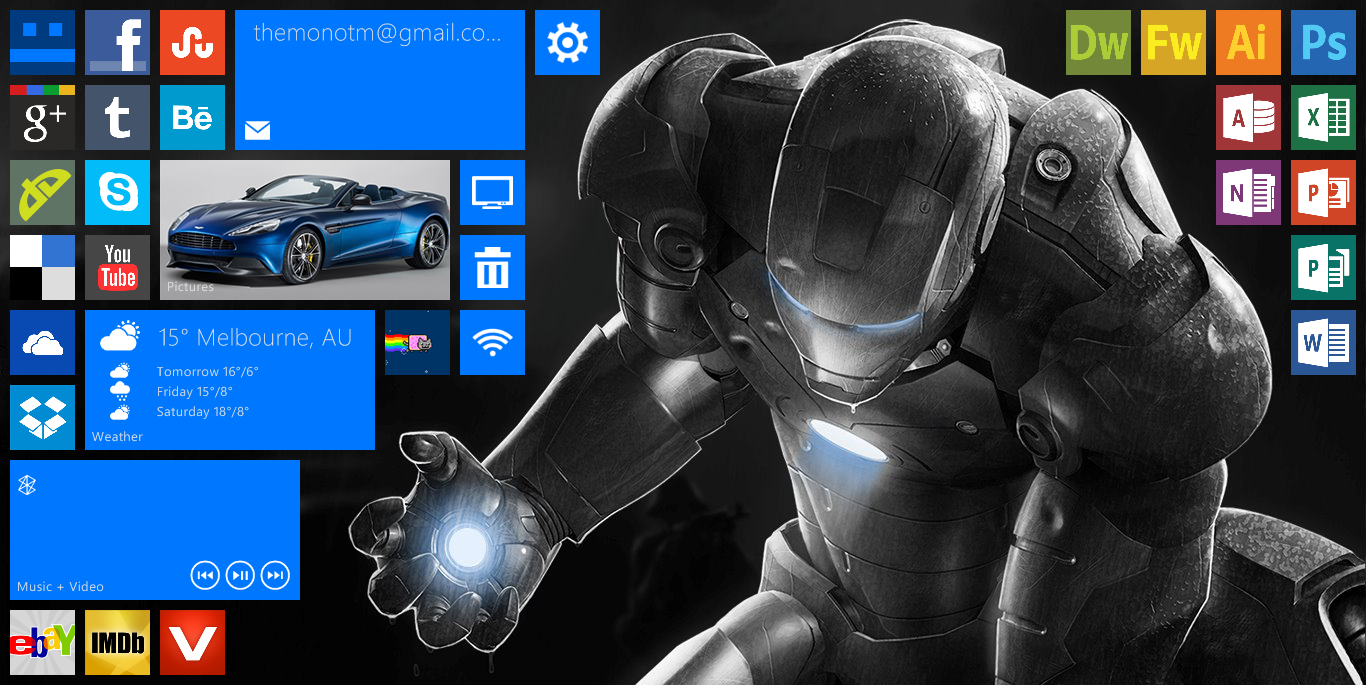
The beta version of my latest update to Metro UI. It includes many new features including small tiles like Windows Phone 8. It also has a USB notification inspired by this . This is only the beta version and v2.0.1 will fix many of the bugs that have risen. Please help me eliminate these bugs by reporting them in the comments and also feel free to suggest new features. Enjoy!Related content


Comments: 7


how do you change the icons and get setup links for the customized icons, im new to rainmeter
👍: 0 ⏩: 1

Right now the only way to do so is to make or download your own image.
For Normal Size:
1. Create a new folder in 'Metro UI/Meters' and call it whatever you want.
2. Save the icon as 'icon.png' inside this new folder
3. Create a new '.ini' file with a suitable name
4. The contents of the 'example.ini' file should be
[Rainmeter]
[Background]
Meter=IMAGE
MeterStyle=BackgroundStyle
LeftMouseUpAction=!Execute ["{the path for the application or website}"]
[MeterTitle]
Meter=STRING
MeterStyle=StringStyle
Text=Example
x=15
y=127
[MeterIcon]
Meter=IMAGE
MeterStyle=IconStyle
For Large Size:
1. Create a new folder in 'Metro UI/Meters' and call it whatever you want.
2. Save the icon as 'icon.png' inside this new folder
3. Create a new '.ini' file with a suitable name
4. The contents of the 'example large.ini' file should be
[Rainmeter]
[Background]
Meter=IMAGE
MeterStyle=BackgroundStyle
w=290
LeftMouseUpAction=!Execute ["{the path for the application or website}"]
[MeterTitle]
Meter=STRING
MeterStyle=Win8StringStyle
Text=Example
x=195
[MeterIcon]
Meter=IMAGE
MeterStyle=IconStyle
For Large Size:
1. Create a new folder in 'Metro UI/Meters' and call it whatever you want.
2. Save the icon as 'icon.png' inside this new folder
3. Create a new '.ini' file with a suitable name
4. The contents of the 'example large.ini' file should be
[Rainmeter]
[Background]
Meter=IMAGE
MeterStyle=BackgroundStyle
w=65
h=65
LeftMouseUpAction=!Execute ["{the path for the application or website}"]
[MeterIcon]
Meter=IMAGE
MeterStyle=SmallIconStyle
Hopefully this makes sense to you. If not, I'll try to make a template for the final release version.
👍: 0 ⏩: 0

I reside in IL. and the weather app was still on Australia and the picture for the User Account didn't show up. I tried the weather code for the weather app but it didn't really work and I didn't know where to get the code.
👍: 0 ⏩: 1
For both of these you will need to use either the normal size or the large tiles
For the User Account picture, it doesn't work on all computers so you can define a custom picture. Here are the steps:
1. Hover over the tile
2. Click on the white stripes in the bottom right corner
3. Click 'Custom Image' and select your desired image
As for the weather:
1. Visit [link]
2. Find your weather location
3. The URL will look somewhat like [link]
4. The code at the end is the weather code so in the above example the weather code is 'ASXX0075'
5. Hover over the tile
6. Click on the white stripes in the bottom right corner
7. Click the Weather Code text box
8. Enter the Weather Code for your location, hit 'Enter' and Save
Hopefully these steps work for you. If not report it again and I will try to identify the problem.
👍: 0 ⏩: 0
Some of the pictures don't appear and also the apps are stuck on Australia. x_x
👍: 0 ⏩: 1
Please explain what you mean so I can try to fix it. What pictures don't work and what panels are stuck because I also reside in Australia.
👍: 0 ⏩: 0