HOME | DD
 xaotherion — Hair shader explanation (Blender + Cycles)
by-nc-nd
xaotherion — Hair shader explanation (Blender + Cycles)
by-nc-nd

#blender #cycles #hair #nodes #realistic #setup #shader
Published: 2015-05-16 22:19:30 +0000 UTC; Views: 35427; Favourites: 206; Downloads: 614
Redirect to original
Description
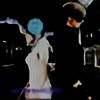
Just to show how I do it. A node setup for (photo)realistic hair. Note that it can get computationally heavy, so for large amount of fur, simpler setup is recommended:fav.me/d8tm6q8
Upper branch of nodes is rather simple and deals with "main" hair color. Bright/Contrast node serves for adjustments, as the texture applied to the setup may give too dark or too light effects when rendered.
Lower branch deals with hair specular highlights. Natural hair generates 2 highlights along its length: one whiter and 'cleaner' closer to the tips, and another, more deeply colored and fuzzy closer to the roots.
Colors of the two leftmost nodes should be adjusted, appropriately to the overall hair color (here's for the peach/reddish blonde that my Wanda has). They deal with the fuzzy highlight.
The light gray Hair Reflection node with offset of 6° deals with the clean highlight. Could get whiter/darker depending on your need, but generally doesn't need adjustments.
Related content


Comments: 8

If you want the colors of the reflection nodes to be assigned to points along the length of the hair you need to use the intercept output of the hair input node and connect it to a color ramp. With this setup you are merely blending all the colors into an offwhite and assigning it to the full strand of hair. The reason the reflection is preset to white is because it reflects the color of light it receives. Those 'root' areas don't emit a new color of light. They only reflect the light it receives. That light is 'pre-colored' by passing through the hair around it. In other words, you only need white reflection. Those other colors are useless since the colors you are after are actually created through use of the transmission nodes.
👍: 0 ⏩: 0

What texture did you use in the image texture node?
👍: 0 ⏩: 1

Nothing special, just the intended main hair color with extremely slight color variations here and there, to keep it from being completely uniform. Could also go with plain color for simplicity.
👍: 0 ⏩: 1
I see. I used a wood texture and that seemed to work pretty well ")
👍: 0 ⏩: 1
This hair look is a result of applying various roughness settings. Found under Particles buttons, Children tab, then activate Interpolated (or Simple if you prefer). This section of interface is really complex, and I hardly have any quick tips about that. Experiment a lot and see what happens. For hair, see especially the "Kink" settings.
For the longest time, I wanted to make some kind of tutorial/manual on it, but I find it to be more of an alchemy than science - if you know what I mean.
👍: 0 ⏩: 0

Nice. I tried it and works just like you said. Thank you for sharing. Ive been struggling with PR hair for a while. I could get close but just never close enough.
👍: 0 ⏩: 1
Good to hear that you found it useful. Cheers!
👍: 0 ⏩: 0
This nodes don't work for my model, when I go to the rendered mode its like the textures aren't even there
👍: 0 ⏩: 0