HOME | DD
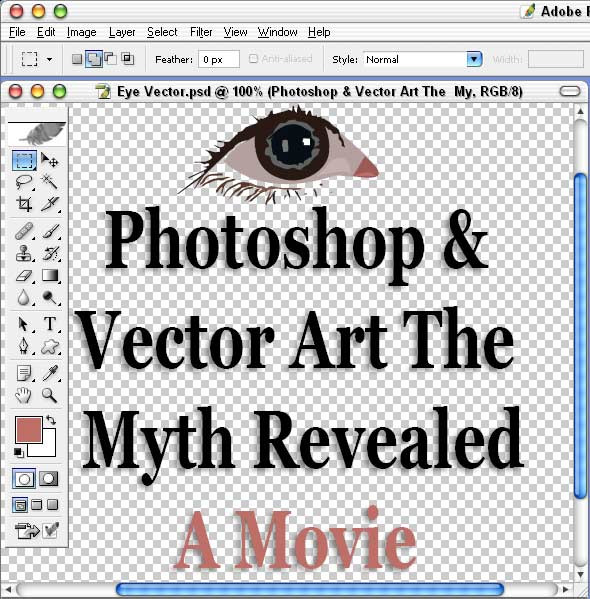
 BarryKiddPhotography — Blending Modes Tutorial Video

Published: 2004-01-24 09:44:34 +0000 UTC; Views: 3804; Favourites: 19; Downloads: 1979
Redirect to original
Description
This is another little video for beginners on the most basic usage of blending modes in Photoshop. I am a tad more goofy than most of the time. Perhaps I was tired or just a little more relaxed this time. I don’t really know.I have been trying to make some on more advanced subjects but the file sizes are out of this world. I will begin submitting them when and if I can get them below 8MB
I can say that I have at last gotten my audio problem out of the way so it sounds much better.
I would like to thank ~signalstock for the use of his image in the example.
Thank you all and have a great day
 (Smile)")
Barry
Related content


Comments: 26

I need help bad! When I save a JPEG on Photoshop it makes the pic 2-3 shades darker than it actually is, anyway to correct this? THANKS!
👍: 0 ⏩: 1

Try converting it to sgrb before saving it. If that doesn't do the trick get back with me. OK?
👍: 0 ⏩: 1
I figured it out! Lol, go to Images>Mode>Convert to profile and choose your monitor (If you know the name of it) and it'll convert it to t hat definition.
👍: 0 ⏩: 0

This is a great tip! I have a question: How do you fill the color into the second layer?
👍: 0 ⏩: 1
Thank you for the comment. I am glad that you, or at least hope that you, got something out of it
Anyway I filled the layer with the foreground color using atl + del on my keyboard. Alt + Del or Alt + Backspace will always fill the active layer or selected regain with the foreground color and crt + del or crtl + backspace will always fill it with what ever is set as you back ground color.
Make since? If not just let me know. OK?
Please have a great day,
Barry
👍: 0 ⏩: 1

I found this useful. Thanks for sharing your knowledge.
👍: 0 ⏩: 0

I really liked this. Really kewl. I'll have to keep this in mind.
👍: 0 ⏩: 1
I am a little disappointed in this one. The Idea was to get people that have never worked with blending modes interested in them so that they will want o try them out and explore their many possibilities but there are so many holes an gaps in it that I have considered taking it down. Oh well these thing happen.
As always thank you for the comment,
Barry
👍: 0 ⏩: 0
Yes. I will be flying out for the annual conference (Photoshop World) in March. This year it will be held in San Francisco, CA. That is one of the highlights of my year each year
👍: 0 ⏩: 0

it's a neat tutorial an' all, but the thing i noticed about it was the glaring lack of any information on what the different types of layers do or how they work. that would be really useful to beginners and even those of us who've been using certain blending modes for a while but are kinda clueless about the other ones (such as myself — what the heck is the difference between linear burn and colour burn, anyway?).
👍: 0 ⏩: 1
As far as telling what each specific mode does, well, that is a bit long for a video tutorial. Something like that would take a while to go through. Each step would affect the image differently depending on how it was used.
Let us say that we place a colored layer under our image just like we did in the tutorial. Then we switch the blending mode of the top layer, the copy of the background, to luminosity. Basically what will happen is that all black will remain black, all white will remain white but all lighter colors will reflect varying degrees of the chosen color underneath. It will be the same weather the image is color or black & white. It will act like a black and white image but say green or blue or dark red or what ever the color you chose to use under it.
Now instead let us say that we chose to place the color layer on top and the copy of the back ground right under it. If we choose luminosity we get nothing (blackness). But if instead we choose the blending mode called color we get the same thing as if we had chosen luminosity in the paragraph above. Even so it doesn’t end there. Cut the opacity of the color layer back we can get some very beautiful effects.
The problem is that it goes on and on in, literally, endless combinations.
I do see your point but something like that is better written than seen in a movie unless of course the movie is on a disk to accommodate the massive file size and where you can start and stop it at will and work with the information covered.
It is something that I, at least, would need to research before even making a written tutorial. No big thing there since I would learn a lot in doing so. I know what the modes do and how they cat do but I would prefer to give solid facts instead of simply the burn section burn darkens and dodge section lightens
The movie above was more or less intended to “spark” an interest in those that have never tried working with modes or perhaps didn’t even realize that they were there. Then they would want to give them a try and see what sorts of things they can create.
Thank you so much for your comments I will try to do better in the feature as long as it is within the 8MB upload limit that I am permitted here at deviantART
If you would like a written tutorial I can make one but it will take a few days to research get it together. Or perhaps I can find and point you to the right source.
Please have a wonderful day,
Barry
P.S. Sorry for the small book

👍: 0 ⏩: 1
good point — that is better dealt with in text.
The movie above was more or less intended to “spark” an interest in those that have never tried working with modes or perhaps didn’t even realize that they were there.
ahhh, alrighty.
Or perhaps I can find and point you to the right source.
if i can remember where i found it, i think i already know where there's a page that gives a list of at least of few of them.... if you'd like to make another tutorial, go for it, but there's no pressure for me.
no worries about the length. have yourself a good one, too!


👍: 0 ⏩: 1
No it would be no trouble for me. I could just drop a line to NAPP and they would send the info right to me. That’s what I pay them for and if they don’t have the answer no one will. It often seems that NAPP has better information than Adobe when it comes to stuff like that. Then all I would need to do is take the info they send and make it more interesting
Take care
Barry
👍: 0 ⏩: 1
urr? what's napp?
👍: 0 ⏩: 1
The National Association of Photoshop Professionals.
👍: 0 ⏩: 1
damn. didn't know there was such a thing. thanks.
👍: 0 ⏩: 0

great tip something i was already aware of...need more advanced stuff...goo djob on this
👍: 0 ⏩: 1
OK I can try. I will need to submit it as .pdf (simple not like the one with all the bells and whistles) or HTML. I can't do alit more with video. To many switches and colors drive up he file size.
We will see.
Thank you as always for the comments,
Barry
👍: 0 ⏩: 1
please..i have cable modem i download at a rate of 20megs/a minute on a slow day..im connected at 3 megs/sec...please...cant u submit as a pdf and video if it isnt to much work?..your tutorials are so easy because of that fact that they explain everything detailed with audio and video..please?..lol
👍: 0 ⏩: 1
Making the tutorials and even the ideas is easy. In fact some of the more complex videos I have on my hard drive where I have gone show are much better than the short ones that I have submitted so far. The problem is that the largest file that I can submit is to deviantART is "I believe" 8MB. I am working on better compression though. I have tried cutting the dimensions of the movie in half but then it smaller than actual screen size like so many that you see. I'll keep trying to getting better compression though. OK?
Have a great day,
Barry
👍: 0 ⏩: 1
ok..i know..try winziping it so people can download...i have some webspace i can upload some stuff to i can host some stuff for u
👍: 0 ⏩: 1
Bummer. Tried that too LOL. I get my best compression when saved as .swf but it also allows no room to compress farther. If I were to zip this move with an html doc to be downloaded, saved and played on or off line the file size then it would be the same as the movie uploaded for continuous feed. I loose either way
This movie was compressed from 22.9 MB all the way down to 2.62 MB It will not go much more.
This one isn’t the problem but the BIG DADDY movies are LOL. Some of my more advance topics are compressed down to --- hell I don’t know right off hand but I’d say 120 or so MB down to as small as 30 or 40 MB
I am looking into getting my own space soon. That would be great if I can do that. Mostly since it would really help out for work!! If my clients could upload their Images there it would be great. Yes I need my own server space
")
👍: 0 ⏩: 0

Cool - very interesting and surely an into that would get some people interested in the modes. (I've long been a convert already. ")
In any case, the only thing I noticed was the mention to play with the Fill setting, which probably wouldn't be smart for a beginner. It doesn't add any functionality over Opacity in this kind of blending, so it might be more likely to confuse people.
Very nice presentation - what software did you use to make it and get those red highlighter circles?
👍: 0 ⏩: 2
The video was made with Camtasia Studio though I am still using last years model. It serves my needs. All of the curser highlights and the conversion to .swf are part of the program. You can also use it to port your video to QuickTime or Real. I have found that I tend to get better compression and good quality with .swf. The original .avi for the blending modes video was 25MB. Not bad considering that it was compressed to 2.62MB. The largest movie I have uploaded here was on setting up grids. The file was much larger something like 7MB but it is also 10 min long.
If you are interested this is the best program I have found so far. I am sure a better on will com out tomarrow though. Sadly it is only Windows compatible. It doesn’t work wit OSX
👍: 0 ⏩: 0
You are right about the fill. Sorry about that I was just rambling. Defiantly something to watch when trying to pass some sort of info along,
Thank so much you for both the comment and the input,
Barry
👍: 0 ⏩: 0