HOME | DD
 CGCookie — Tutorial: Coloring Over Your Lineart

Published: 2014-07-31 21:47:13 +0000 UTC; Views: 207560; Favourites: 7338; Downloads: 2787
Redirect to original
Description
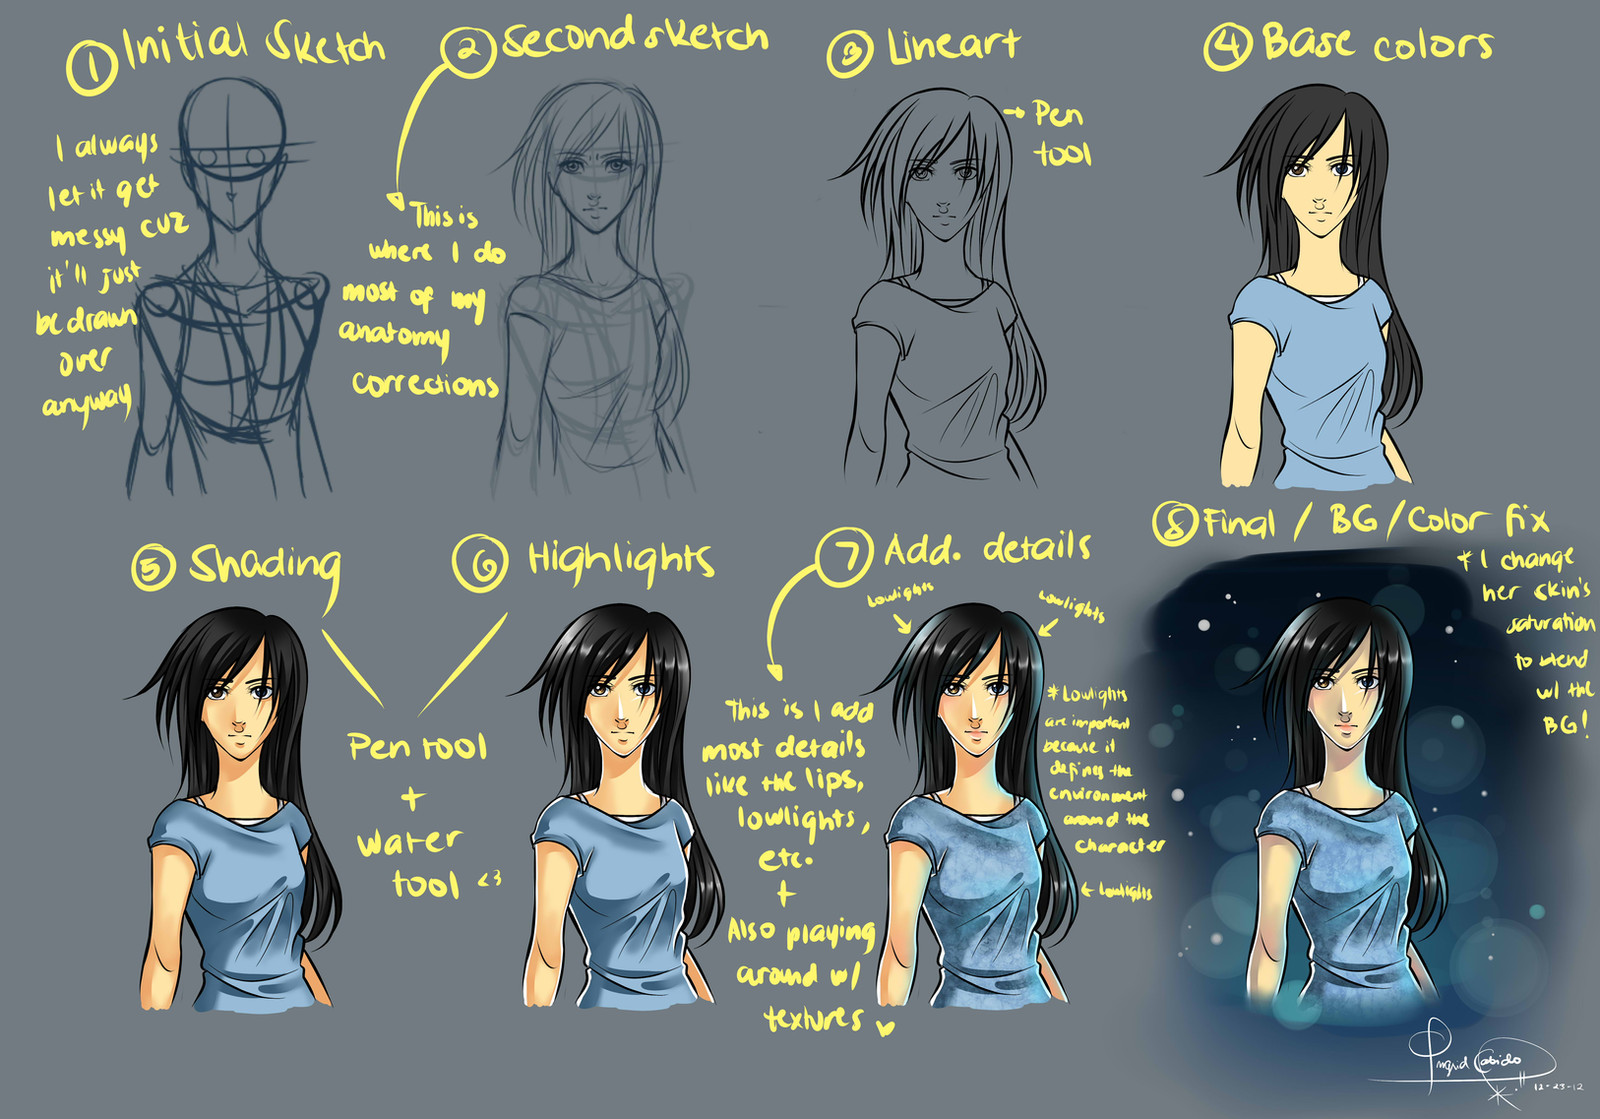
Watch the Full Free Video Tutorial HEREIn this quick tip tutorial, Tim Von Rueden goes over coloring over your lineart. This has been requested multiple times and I would like to show you one way of going about coloring over your lineart. This can be very intimidating for some, especially those who feel very confident with their line art but feel when they add color, it ruins the concept altogether. So below is a quick step by step that goes along with the video tutorial.
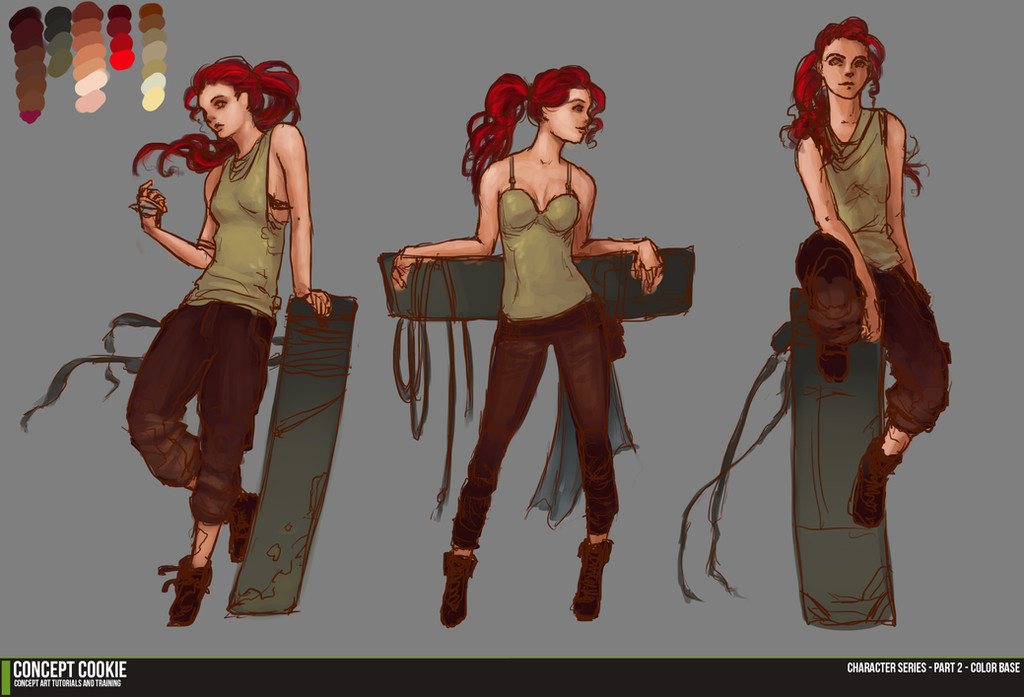
My BIGGEST advice is to be confident. You may have strong lineart so compliment that with even stronger shading techniques. The more comfortable you become with this process, the more versatile artist you will become! Just remember to keep the lineart separate on it’s own layer so that you can lay the base colors UNDER the lineart layer and then create layers ABOVE the lineart layer for coloring!
Citizen members can download the HD video along with the .PSD file from the tutorial!
Related content


Comments: 140


Thank you. This will come in handy when I'm back to creating art.
👍: 0 ⏩: 0


But... why? The third one is unfinished. The last one is better in every way, because it's fully rendered and polished. I just don't understand comments like this
👍: 0 ⏩: 2

Being unfinished isn't an excuse to dislike it. Haven't you ever had a drawing that you thought "hey this is looking good! I can't wait to finish it!" and then when you finished it you got an "eh, that's alright" kind of reaction?
Also, a drawing can *usually* be much more expressive during the sketch/unfinished part, since you have those free, spontaneous lines and colours happening... which, sometimes, happens to be toned down when you're polishing it and thinking carefully about every single millimeter of the piece. But hey, it's a matter of opinion, personally I like them both.
👍: 0 ⏩: 0

Hey it's an opinion okay? People like different styles. And how do you not understand that kind of comment? It is just probably that he or she liked the girl without glasses or whtevers...
👍: 0 ⏩: 1
But it's not really a different style? It's just the unfinished version of the piece.
👍: 0 ⏩: 2
Well the third one is more watery and soft. Kinda. Like water color a little i guess? Easier on the eyes, well for me anyways.
👍: 0 ⏩: 0

It's a different emotion. The third is more... friendly and nature. And the finish one isn't nature at all, she is quite... stressful? I'm about a character now.
👍: 0 ⏩: 0


It gives a cleaner effect so you know for sure you have the whole of the inside of the lines coloured and you can use clipping layers with less hassle c:
👍: 0 ⏩: 1

That logic of yours is so flawless that... but whatever if you want it to take longer then go for it.
👍: 0 ⏩: 1
If it's flawless that means it's fine, so I'm a little confused by what you mean, but it's just a preferred way of doing it.
👍: 0 ⏩: 0


This has been extremely helpful. I have been stupifyed!
👍: 0 ⏩: 0

I agree with you. Without glasses she was more beatiful.
👍: 0 ⏩: 0


Yeah, the glasses make her look better!
👍: 0 ⏩: 0


")

Great tutorial man. I'll be giving it a try for sure!
👍: 0 ⏩: 0

This free tutorial is a true revelation. Thank you so much!
👍: 0 ⏩: 0

I've seen so many videos, tutorials, and step-by-step instructions for something like this, but I can't tell you how much this helps bring everything together. Thank you very much for posting this!
👍: 0 ⏩: 0

That was fantastic! I learned something lol. Kinda wish it was also a tutorial on a different painting style, but this was still kick ass.
👍: 0 ⏩: 0

I found this really helpful. I've been wanting to start coloring without having black lineart but I didn't know how to go about it.
👍: 0 ⏩: 0


Step 1. Draw a circle.
Step 2. Draw the rest of the fucking person.
👍: 0 ⏩: 0


This is funny because I'd probably stop at step 2 and say "well, this is pretty good".
👍: 0 ⏩: 0

Nice and simple and to the point! :3 Thank you!
👍: 0 ⏩: 0

This is beautiful! I'll be sure to try this out---thank you ^.^
👍: 0 ⏩: 0


This actually really helps.....and that's saying something when tutorials never helped me before!
👍: 0 ⏩: 0

Wow very helpful! Thank you for taking time to share this!
👍: 0 ⏩: 0


thank you SOOOOO much you have no idea what a big help this has been to have this explained !
👍: 0 ⏩: 0
| Next =>