HOME | DD
 darthhell — Workflow Tutorial

Published: 2011-04-07 19:55:46 +0000 UTC; Views: 18177; Favourites: 104; Downloads: 690
Redirect to original
Description
People are always asking me if I know Tyler Durden. Oh wait, I mean people are always asking me what my procedure is and workflow and all that. I try to explain it the best I can but I'm not very good at explaining what I do or how I do it, or why I do it. But recently I've been asked this alot, so I decided to try to map out what I do. After all, this is how I learned everything before I started inventing my own procedures. So for all those who wanted to know, here it is. And if I've left anything unclear or you just have any questions let me know. I tried to keep it simple yet informative.One thing to note here, under the render settings. For Darth Talon I do these things twice, one for her red tone and one for her tattood tone, the setups are the same I just use different colors, and I use my tattoo map as a transparency map between the blended materials.
Other than that I hope this all makes sense.
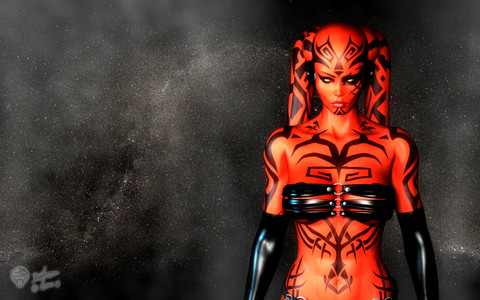
Here's the final product
Related content
Comments: 59

yeah its really useful!!! sometimes these materials are the best tutorial, simple and complete. in shortly is useful.
👍: 0 ⏩: 1

Excellent. I had many people asking for this from me, but I'm not usually good at this kind of thing.
👍: 0 ⏩: 0

Hehe, I love when people show their steps !
Very good !
👍: 0 ⏩: 1

Wow, really great job on the post work. Rendered in Max?
👍: 0 ⏩: 1

Thank you. Yep, Max 9 with vray.
👍: 0 ⏩: 0

hoo hoo! so we get to see your sexy magic at work...
👍: 0 ⏩: 1

Yes, sometimes I let people peak behind the curtain 
👍: 0 ⏩: 0

Thanks for taking us all behind the curtain on this, it's definitely enlightening. I tend to use the burn tool for shading, although your method is much better.
👍: 0 ⏩: 1

I go back and forth actually on the burn tool or this method, over the years I notice I tend to use this way mostly for body areas and the burn tool I still use predominantly for hair shading. But with this way its easy to get right into the cracks so to speak. Then if you need a more intense shadow you can always duplicate that layer and blur one of them some more.
👍: 0 ⏩: 0

I like how you are using gradient maps and self-illum instead of flat colors and regular shading... I'ma have to try that.
👍: 0 ⏩: 1

Yeah once I figured that out everything about my images changed. Now I can mainly put a single light source and control everything else in the texture and it makes it alot easier.
👍: 0 ⏩: 1

Nice! I was always curious as to how you did that. Thanks for sharing.
👍: 0 ⏩: 1

so that's how u pull off this AMAZING artwork that u do!!!!!! 
👍: 0 ⏩: 1

That's part of it anyway
👍: 0 ⏩: 0

I need to try your strategy for the shadows.. What I'd normally been doing was render normally, and then render a shadows-only render with a good lighting setup that does some good AO, and then pop it on top of the other layer in Photoshop with the Multiply blending mode, and start futzing with the opacity. Your approach seems much easier.
👍: 0 ⏩: 1

Yeah it actually works really well, I did it once out of laziness just wanting to fix a render really quick and it turned out so well I worked it into my regular routine.
👍: 0 ⏩: 1

I always like finding new techniques anyhow.. 
👍: 0 ⏩: 1

Yeah I converted over to Max a few years ago when I discovered you could buy older versions at an insanely discounted price. But alot of this stuff I think can be done in Poser, the indirect illumination adds a little something but when I was test rendering without it it still looked good. It's always a matter of preference I suppose because alot of times I don't even turn it on because the look I'm going for doesn't require it.
👍: 0 ⏩: 0

Nice darlin. I think i'm gonna try some of these tips. Awesome!
👍: 0 ⏩: 1

Sweet, if you have any questions or need any help let me know.
👍: 0 ⏩: 0

Interesting. 
I noticed a lot of postwork around the shoulder area. Out of curiosity, do you use the "Simple Details" shoulder morph from Renderosity? It might help and cut down on postwork.
👍: 0 ⏩: 1

Great minds think alike
I've never heard of the simple details morphs. I just did a search for them and couldn't find it. Do they have it for V3? After all these years I've never upgraded to V4.
👍: 0 ⏩: 2

Yep, there's a version for the Gen3 models as well as the Gen4.
The crappy search on Rendo never finds it because the merchant put those products in the store with a one-word title "SimpleDetails". I can never find it either, which is why I wrote down the vendor's name to make it easy.
Here's a link to his (corvas) store: [link]
Best 5 bucks I ever spent for a figure.
👍: 0 ⏩: 1

Yeah that is definitely an awsome morph, I'm getting that for sure, thanks
👍: 0 ⏩: 0

[link]
That is the link for Corvas's V3 arm fix
👍: 0 ⏩: 1

Oh that is going to make things so much easier, thanks a ton, I'm definitely getting it.
👍: 0 ⏩: 1

Yeah, it helps. I use it on my V4 models.
👍: 0 ⏩: 0

Wonderful walkthrough! I knew I wondered how you did it, and it being mostly postwork is a surprise to me, especially how you apply the after-effects. Your procedure has opened my eyes to a new way of doing things. Thank you very much
👍: 0 ⏩: 1

No problem and thank you, I hope it's pretty easy to understand, or at least will give people some more ideas of how they can do things.
👍: 0 ⏩: 1

That it was. Very insightful
👍: 0 ⏩: 0

i thought you render Darth Talon. but you do all of this in Photoshop?????????? O_O
👍: 0 ⏩: 1

Oh I do render her, but to make her look good I have to do tons of postwork. The top half of the tut are my render settings for 3dsMax, the rest is the postwork.
👍: 0 ⏩: 1

so it has the layers palette like Photoshop?
👍: 0 ⏩: 1

No, the top part with the 4 different versions is just showing the differences between render settings, to explain how I set up a character. Most people use the settings that would produce the first image in line but the way I set up the materials I render it to come out like the last one in line. All the layering and stuff is done in photoshop after the render is done.
👍: 0 ⏩: 1

ahh okay now i understand. 
👍: 0 ⏩: 1
| Next =>
