HOME | DD
 GriswaldTerrastone — Perspective Tutorial: ES 2

Published: 2011-05-10 18:48:20 +0000 UTC; Views: 4159; Favourites: 45; Downloads: 129
Redirect to original
Description
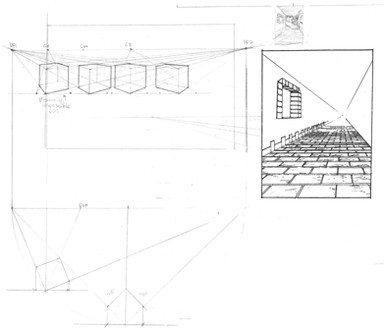
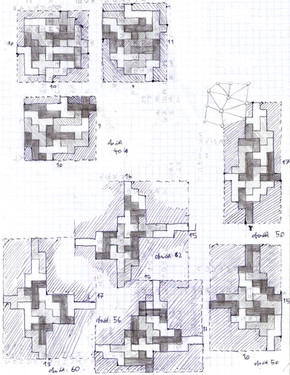
...look above at Fig. 4!It may seem a bit intimidating at first, but that's just because of the numbers and extra dots.
In the previous examples, as well as the floor on page 2VP 9, everything was equally spaced apart, because everything was equal in size. But if you want to draw, say, a city- real-world or even fantasy- it is unlikely that a block of buildings will be equal in size to streets and alleys. What do you do?
The first thing you must do is decide on a "key" object. This is sort of a reference point for everything else, since everything usually exists in relation to everything else.
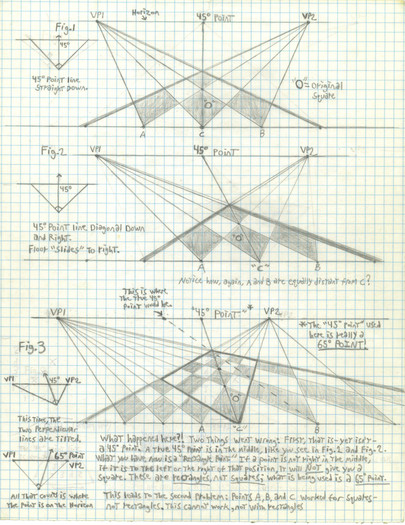
In this case, I started this the same way as before- I drew that square on the 45 degree line, right on the bottom line, just as before.
That is my reference.
Once again I have points A and B. Once again I measured their distance from point C, which I'm calling "Center" here. No reason, really- guess it was pretty late...
Now, if I had continued as before, I would have had something similar to Fig. 2- everything the same distance away, and the same size.
But THIS time, I wanted the "streets" between the dark squares to be 1/2 as wide as they would normally be.
So- between A and Center, right in the middle if them, I drew in a new point, point "1."
Between B and Center I did the same with point "2."
I then connected point 1 to vanishing point 1, and point 2 to vanishing point 2.
Already you can see a more narrow strip than before.
Helpful Hint: When doing this, in this way, at NO TIME should any line from either vanishing EVER go through any of the dark squares.
Now, here you have to imagine what you want: something similar to the previous examples, but with more narrow strips between the squares- but on all sides of any square there will be squares. Just like before.
By now you have narrow strips right next to the first square, left and right.
You want it to be a full strip, so- draw in points on the bottom line, each that 1/2 of A-to-Center (or 1/2 B-to-Center), and connect the next dots to the appropriate vanishing points- in this case, the point to the left of A to VP 2, and the point to the right of B to VP 1.
Now you have one dark square, and two narrow strips.
Now connect those same points to the other vanishing points- that is why they are numbered "1,2."
Slowly, connecting each point to the vanishing points indicated, leaving out the ones in parenthesis for now, observe how the picture develops: as the lines criss-cross, more squares among the narrow strips. Your best bet is to move outward from the center, one at a time, left, then right.
Since I wanted a white border, I also left out the ones with an "*" under them.
Darken in the squares and you have it.
The whole key here is deciding how much more narrow- or wider!- you wnat those "streets." It could have been 1/4 as wide, or 2 1/2 times as wide- and you base the measurements on Center, A, and B.
Since, as earlier in this tutorial, the square is the basis for cubes, pyramids, and more, what would happen if we expand on this some more?
Bring in...Fig. 5!
This is just what we have in Fig. 4, only I built up blocks (I didn't bother to make perfect cubes, just "buildings") in the usual way, with vertical lines. Leaving some squares alone, making a small pit with one, and varying the sizes a bit, keeping in mind which blocks out what (as with any such picture), look at the streets and alleys between the buildings.
Oh- I just sort of threw in the wall opposite the border. It gives that sliding block a nice view of things, no?
If you had wanted those squares to be the TOPS of the buildings, instead of the bases, you could have drawn vertical lines DOWNWARD, again keeping in mind which would block out what. You could even have used a third vanishing point, too (to have used it for Fig. 5, either you'd have to shrink the original squares, or expand the new ones on top of the buildings).
I did this one a just a couple of days ago- and it was the first time I was actually able to do it without guessing.
Have fun!

