HOME | DD
 kohu-scribbles — Quick scribbly rock tutorial for SAI

Published: 2013-10-06 21:46:07 +0000 UTC; Views: 49442; Favourites: 1934; Downloads: 540
Redirect to original
Description
Quick rock tutorial to explain something to someone who asked. Again, I'll do a better one when I improve.


Tools:
Pencil Tool - A hard-edged brush.
Watercolor Tool - A soft-edged blending brush. You can play around with the settings on this (blending, dilution, persistence) and see what works best for you. Play around with this a lot before using it so you can get a feel for what it does and how it works!
--------------------------------
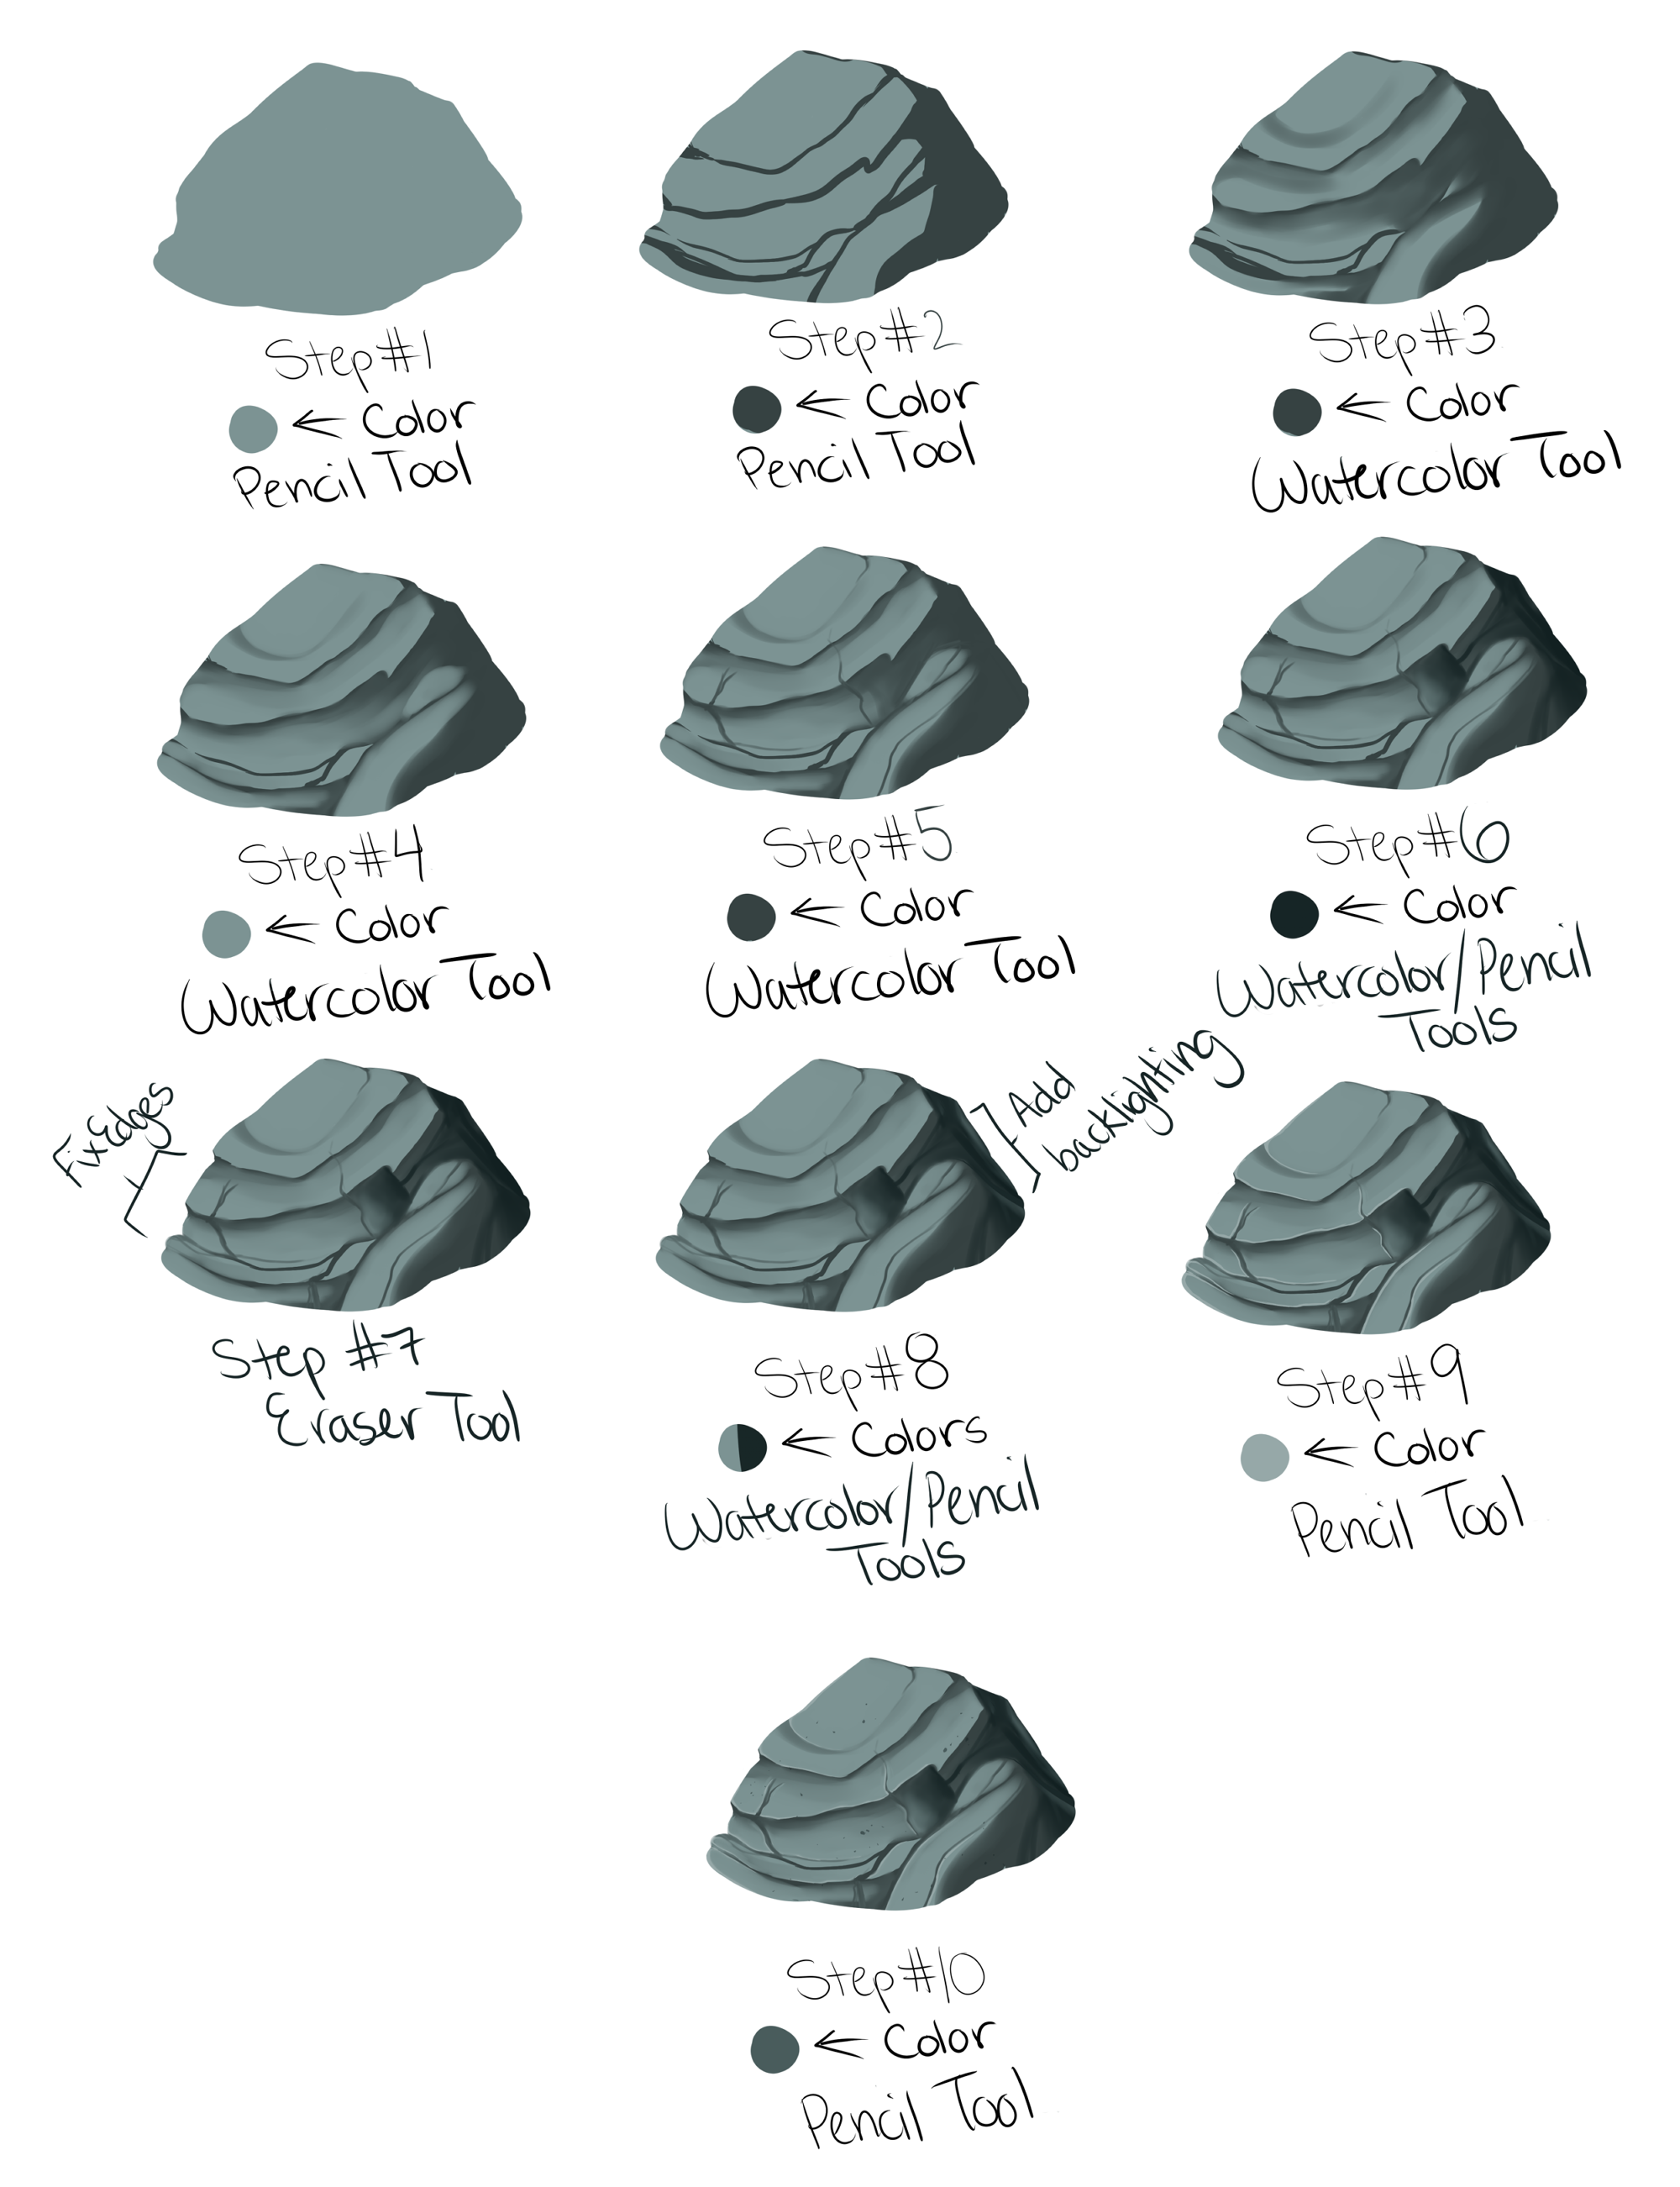
Step #1 - I make the basic shape of the rock with the Base Color using the pencil tool.
Step #2 - Click the little box that says 'Preserve Opacity' above the layers. Then, using a Darker Color, make the general shape of the rock's shadows using the pencil tool.
Step #3 - Switch over to the watercolor tool. Using the same Darker Color, lightly blend the rock's shadows. It helps if you start in the Darker Color and brush outwards (like a real watercolor brush, it should blend nicely into the new color). You can use a larger watercolor brush for this, just get the basics down.
Step #4 - Still using the watercolor tool, switch back to the Base Color and tidy up your blending a little.
Step #5 - Now, decrease the size of your watercolor brush, and make several smaller lines in the rock to add more detail.
Step #6 - Using the same techniques from Steps #2 and #3, make darker shadows at the back of the rock using an Even Darker Color.
Step #7 - I made sloppy edges, so I needed to go back and erase some of the edges to better define the rock. Be sure to unclick the 'Preserve Opacity' box before you start to erase!
Step #8 - Again, using the same techniques from Steps #2 and #3, take the Base Color and add some backlighting to the back of the rock.
Step #9 - Taking a Lighter Color, use the pencil tool (small size) to draw some highlights to give the rock a bit more definition. This is an optional step.
Step #10 - Take the watercolor tool and blend the highlights in a bit more, then use the pencil tool to add some speckles to the rock.
You are done! This is how you get a quick lazy rock.


Related content
Comments: 17

Thanks so much for the rock tutorial! It really helped me on this piece ^^
www.deviantart.com/lilstraywol…
👍: 0 ⏩: 0

👍: 0 ⏩: 0

Aaaa, thank you so much for this! I generally don't like drawing environment - but this really made it much enjoyable!
👍: 0 ⏩: 0

Very helpful tutorial, I don't have SAI, but I think this will work with other painting apps as well.
👍: 0 ⏩: 0

Hm! Can I ask what "preserve opacity" does? I never get why people use it, nor do I ever see a difference when they/I use it...
Or perhaps you know of a tutorial that explains this ; v ;''?
👍: 0 ⏩: 1

It means that you'll only be coloring over the pixels you've already colored. So if you have, say, the color for one character on a single layer, you can click preserve opacity, and if you want to change the color or color over just that color (rather than the white background), you can, without going outside of those lines. :>
👍: 0 ⏩: 1

O: Oooh so its the same as clipping group!
Interesting o: Confusing but interesting! Thank you so much C:
👍: 0 ⏩: 0

ok...this is a great first page..now please publish a book 

👍: 0 ⏩: 0

I always add a film grain to mine. I think I'm gonna stop doing that though.. it just doesn't fit with the rest of how I draw. Great tutorial! I'm going to give this method a try!
👍: 0 ⏩: 0

Yessssssss..
this pleases the blue doberman.
she will make good use of this. XD
I've been struggling with doing rocks in SAI lately, so this is a life saver!
also, I was too much of a dunce to understand the first one you did, so maybe I'll have better luck with this one, hopefully!
👍: 0 ⏩: 0

thank you for this! I always have a difficult time drawing rocks
👍: 0 ⏩: 0


